Making an entire gun of one's own design, from scratch isn't the easiest thing to do, but redesigning an existing gun can be far more difficult since one has to "work around" certain design elements that simply can't realistically be altered. That said, I can truthfully state that this project is the most challenging, from a creative standpoint, that I've yet undertaken. That's not only because of the side pedal but also the "island" safety, but I get ahead of myself, allow me to fill in some back story. A few years back, Beretta unveiled a double that they dubbed (double? dubbed? Ha, I kill me!) the "Serpentina". This gun was quite a departure from anything that had been seen prior, as it was completely smooth, sidelever operated, had the aforementioned "island" safety and highly polished barrels left in the white. Now, none of these things individually are without precedent but the way in which Beretta combined them resulted in a gun that was unlike anything anyone had ever seen before. To say that the gun was polarizing may be a bit of an understatement. The "traditional gun guys" didn't get it while some others saw it as the bold artistic statement that it was meant to be. The owner of this Fox was quite taken with the Serpentina and contacted me about making something that pulled inspiration from that gun without being an outright copy, something that was just as slick and smooth but which looks more like a gun than a used bar of soap. The sidelever and island safety were must-haves, as was the completely bald, smooth look but he wasn't particularly keen on the actual shapes of the Beretta. For the "raw material", I had suggested a Fox, so a Philly-made 16 gauge Sterlingworth was found that had mint bores and also ejectors (another must-have for the client), then the design, or more accurately, the redesign work began. Shortly thereafter, Beretta raised the bar by presenting the "Serpentina Black" which was again, completely smooth but this time all of the metalwork was finished in deep black and the gun was stocked in highly polished Gabon Ebony resulting in a gun that was blacker than a Spinal Tap album cover. Personally, I thought it looked great. I've long had an idea in the back of my mind for what I call the "Duesenberg" gun, that would be a gun with all of the metalwork left in the white and perfectly polished, with the "wood" finished in a deep gloss black lacquer, along with a few other car-inspired touches. I guess it could be called the "black and white" gun as well but it was a Duesenberg coupe that gave me the idea, hence the name. Obviously, the lacquer stock finish would preclude the gun's being used in any remotely realistic way, which is one reason the project had never progressed beyond the idea stage. I'd never actually considered stocking a gun in ebony until I saw the Serpentina Black, mainly because I'd always assumed that pieces of ebony that big were unobtainable. Realizing that that was an actual option and having secured a suitable billet of ebony (you think English walnut is pricey?), I contacted the client and suggested that we go with the "black and white" motif. He enthusiastically agreed. The gun will be completely devoid of engraving, checkering and even screw heads, in other words, completely smooth. Achieving this look necessarily also means that the relief cut in the frame that accommodates the forend iron must be dealt with. I've done that in the past with a spring-loaded, articulated cover but those were extractor guns. The ejector mechanism in this forend doesn't leave much room for the cover mechanism but, where there's a will, there's a way. Obviously, this is no cakewalk and will require major redesign and surgery but the end result will be like nothing else. Here goes.
First off, here are a couple of photos of the gun as received.


Here are some of the parts that will not be used. The topstrap, rib extension and forend lug will join this group as well.

After complete disassembly, the frame and triggerplate were annealed and the topstrap was removed in preparation for the new leverless piece. The dropped areas on the new topstrap are what will create the island safety. Converting the gun from a captured stock to a drawbolt stock killed two birds with one stone. It accommodated the island safety while hiding the breech screw in the most effective possible way, by getting rid of it. That bar of 1020 with the blue arrows pointing to it is the material from which the new topstrap was made.


Once the design of the sidelever and bolting mechanism was proven using wood mockups (old-school rapid prototyping), the actual parts were made in the steels appropriate for their role. Before I actually made the new bolt, and before the topstrap was welded in place, I took the opportunity to true up the bolt bore in the frame since they are neither round nor cylindrical as they came from the factory. They're also about as rough as a corncob internally as well. The form of the sidelever was taken almost directly from the Serpentina, per the client's request as that is his favorite single part of the gun. Aesthetically, it will work well in this application. Below are some photos of the roughed out sidelever and its inspiration, all prior to welding.


The topstrap/frame junction, after welding and rough shaping of the contours at the wood/metal interface. The lever is roughly shaped and the bolt and link are made. At this point, the only external frame shaping that's been done is that which is incidental to the structural modifications. Once all of the internal mechanisms are made, I'll get to the external shaping. The next items on the agenda are the return spring mechanism for the bolt and the safety mechanism, which will be unlike anything seen on a double, not a slide, roller or a lever. In case you're wondering, no, the sidelever does not pivot on the sear pin axis.


When I filed up the new topstrap, I left the safety island high because the top line of the hand portion of the stock would define the height of the island. Normally I don't start on the stock pattern until later in the process but much like when making a bar-in-wood design, the stock in this case determines the shape of certain elements, namely, the safety island. So I had to mock up at least the hand portion of the stock. The parts of the safety mechanism could not be made until the height and contour of the exposed surface was defined.


Here is the blank. Even at this exposure, it's apparent how black this piece of ebony is.

The bolt operating and auto-safety mechanism. Everything is still in the rough state and will be finished to the usual standards.


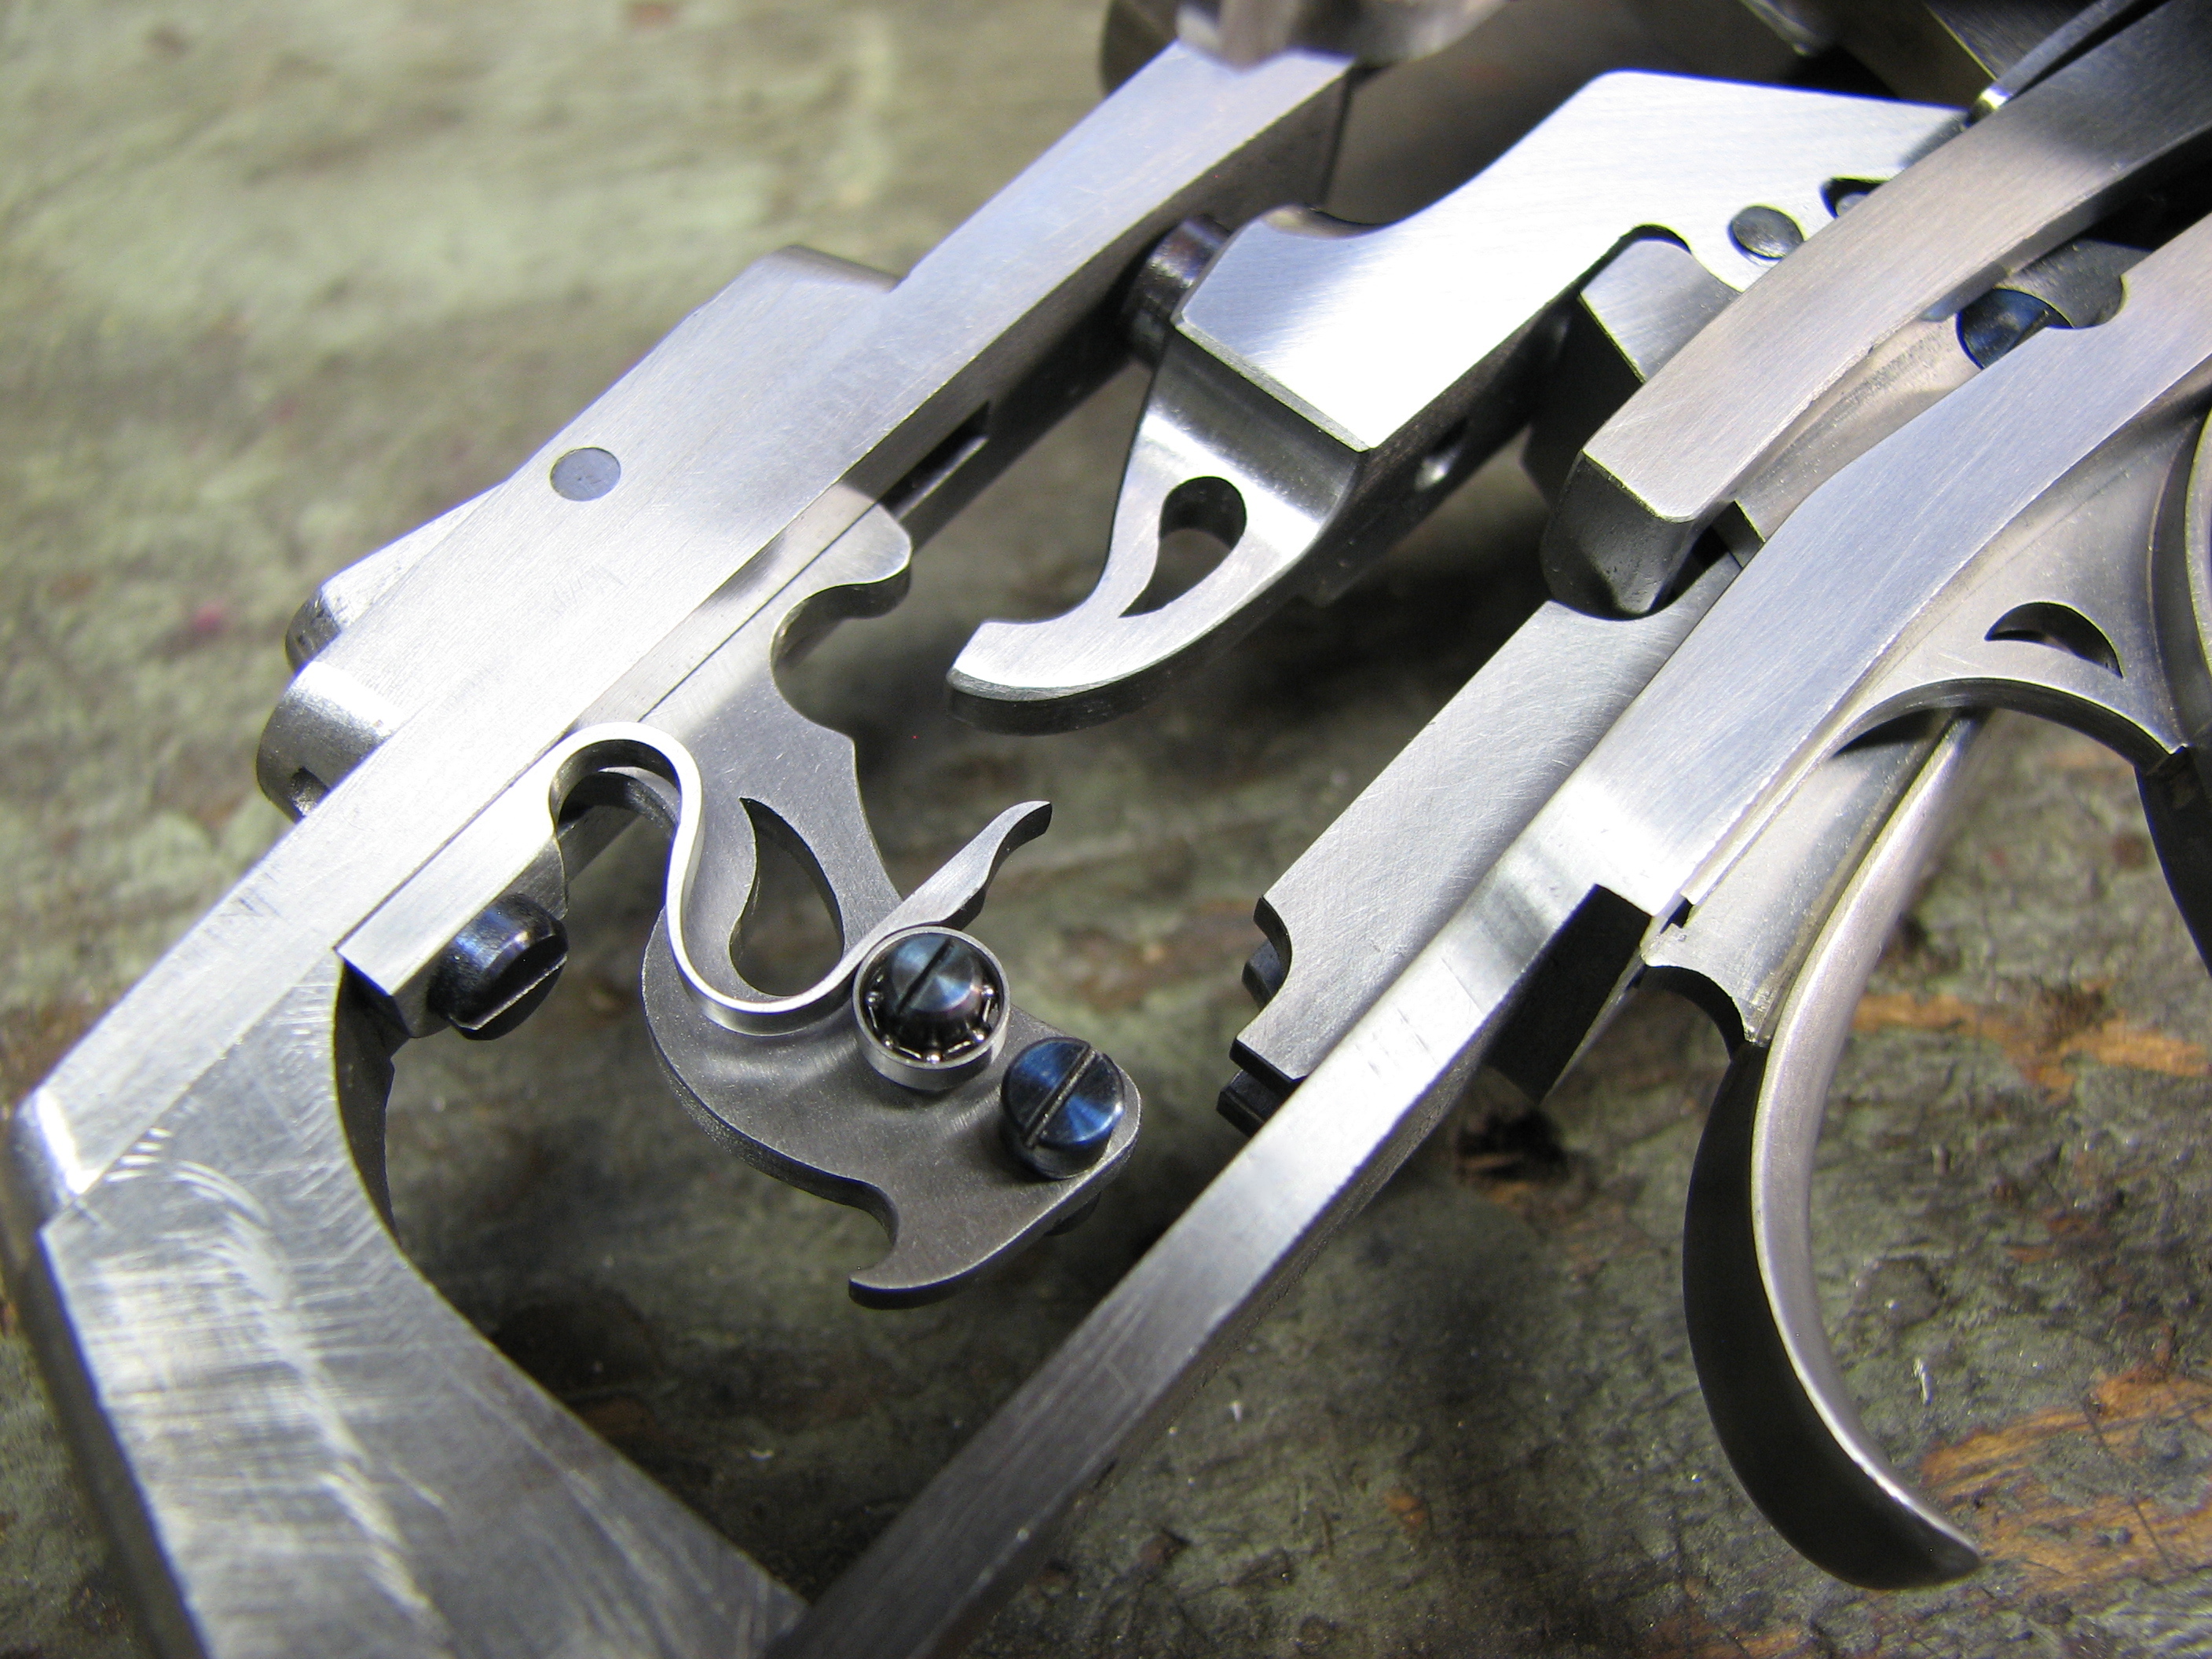
This is the portion of the sidelever that is driven by the above pictured lever. A simple roller may have sufficed but this is even smoother. Yes, it's an actual ball bearing.

The bolt closure and auto-safety linkage train.


A bit over three hundred hours from the start and it's again a functional gun, meaning that the bolting mechanism, lockwork, triggers and safety mechanism are made and fit. Everything pictured is bench-made, from the solid, properly heat-treated according to the particular material and hand-polished. The triggerguard will be made from the solid, rather than being fabricated, as is my usual practice. Part of the reason for this is because of the mounting method that will be employed, wherein there are no visible screws. Once that is finished, the external, cosmetic reworking can begin. After the "ordeal" of the sidelever conversion, that will be a welcome change of scenery.
I took no before photos of the inner workings in their stock form, so here are some photos of a Philadelphia-made, A-grade small frame, for comparison. Rumor has it that the "graded" guns were somehow "better finished" than the Sterlingworth. Much like the myth that the Philly guns were better than the Utica guns, this one holds no factual merit either.


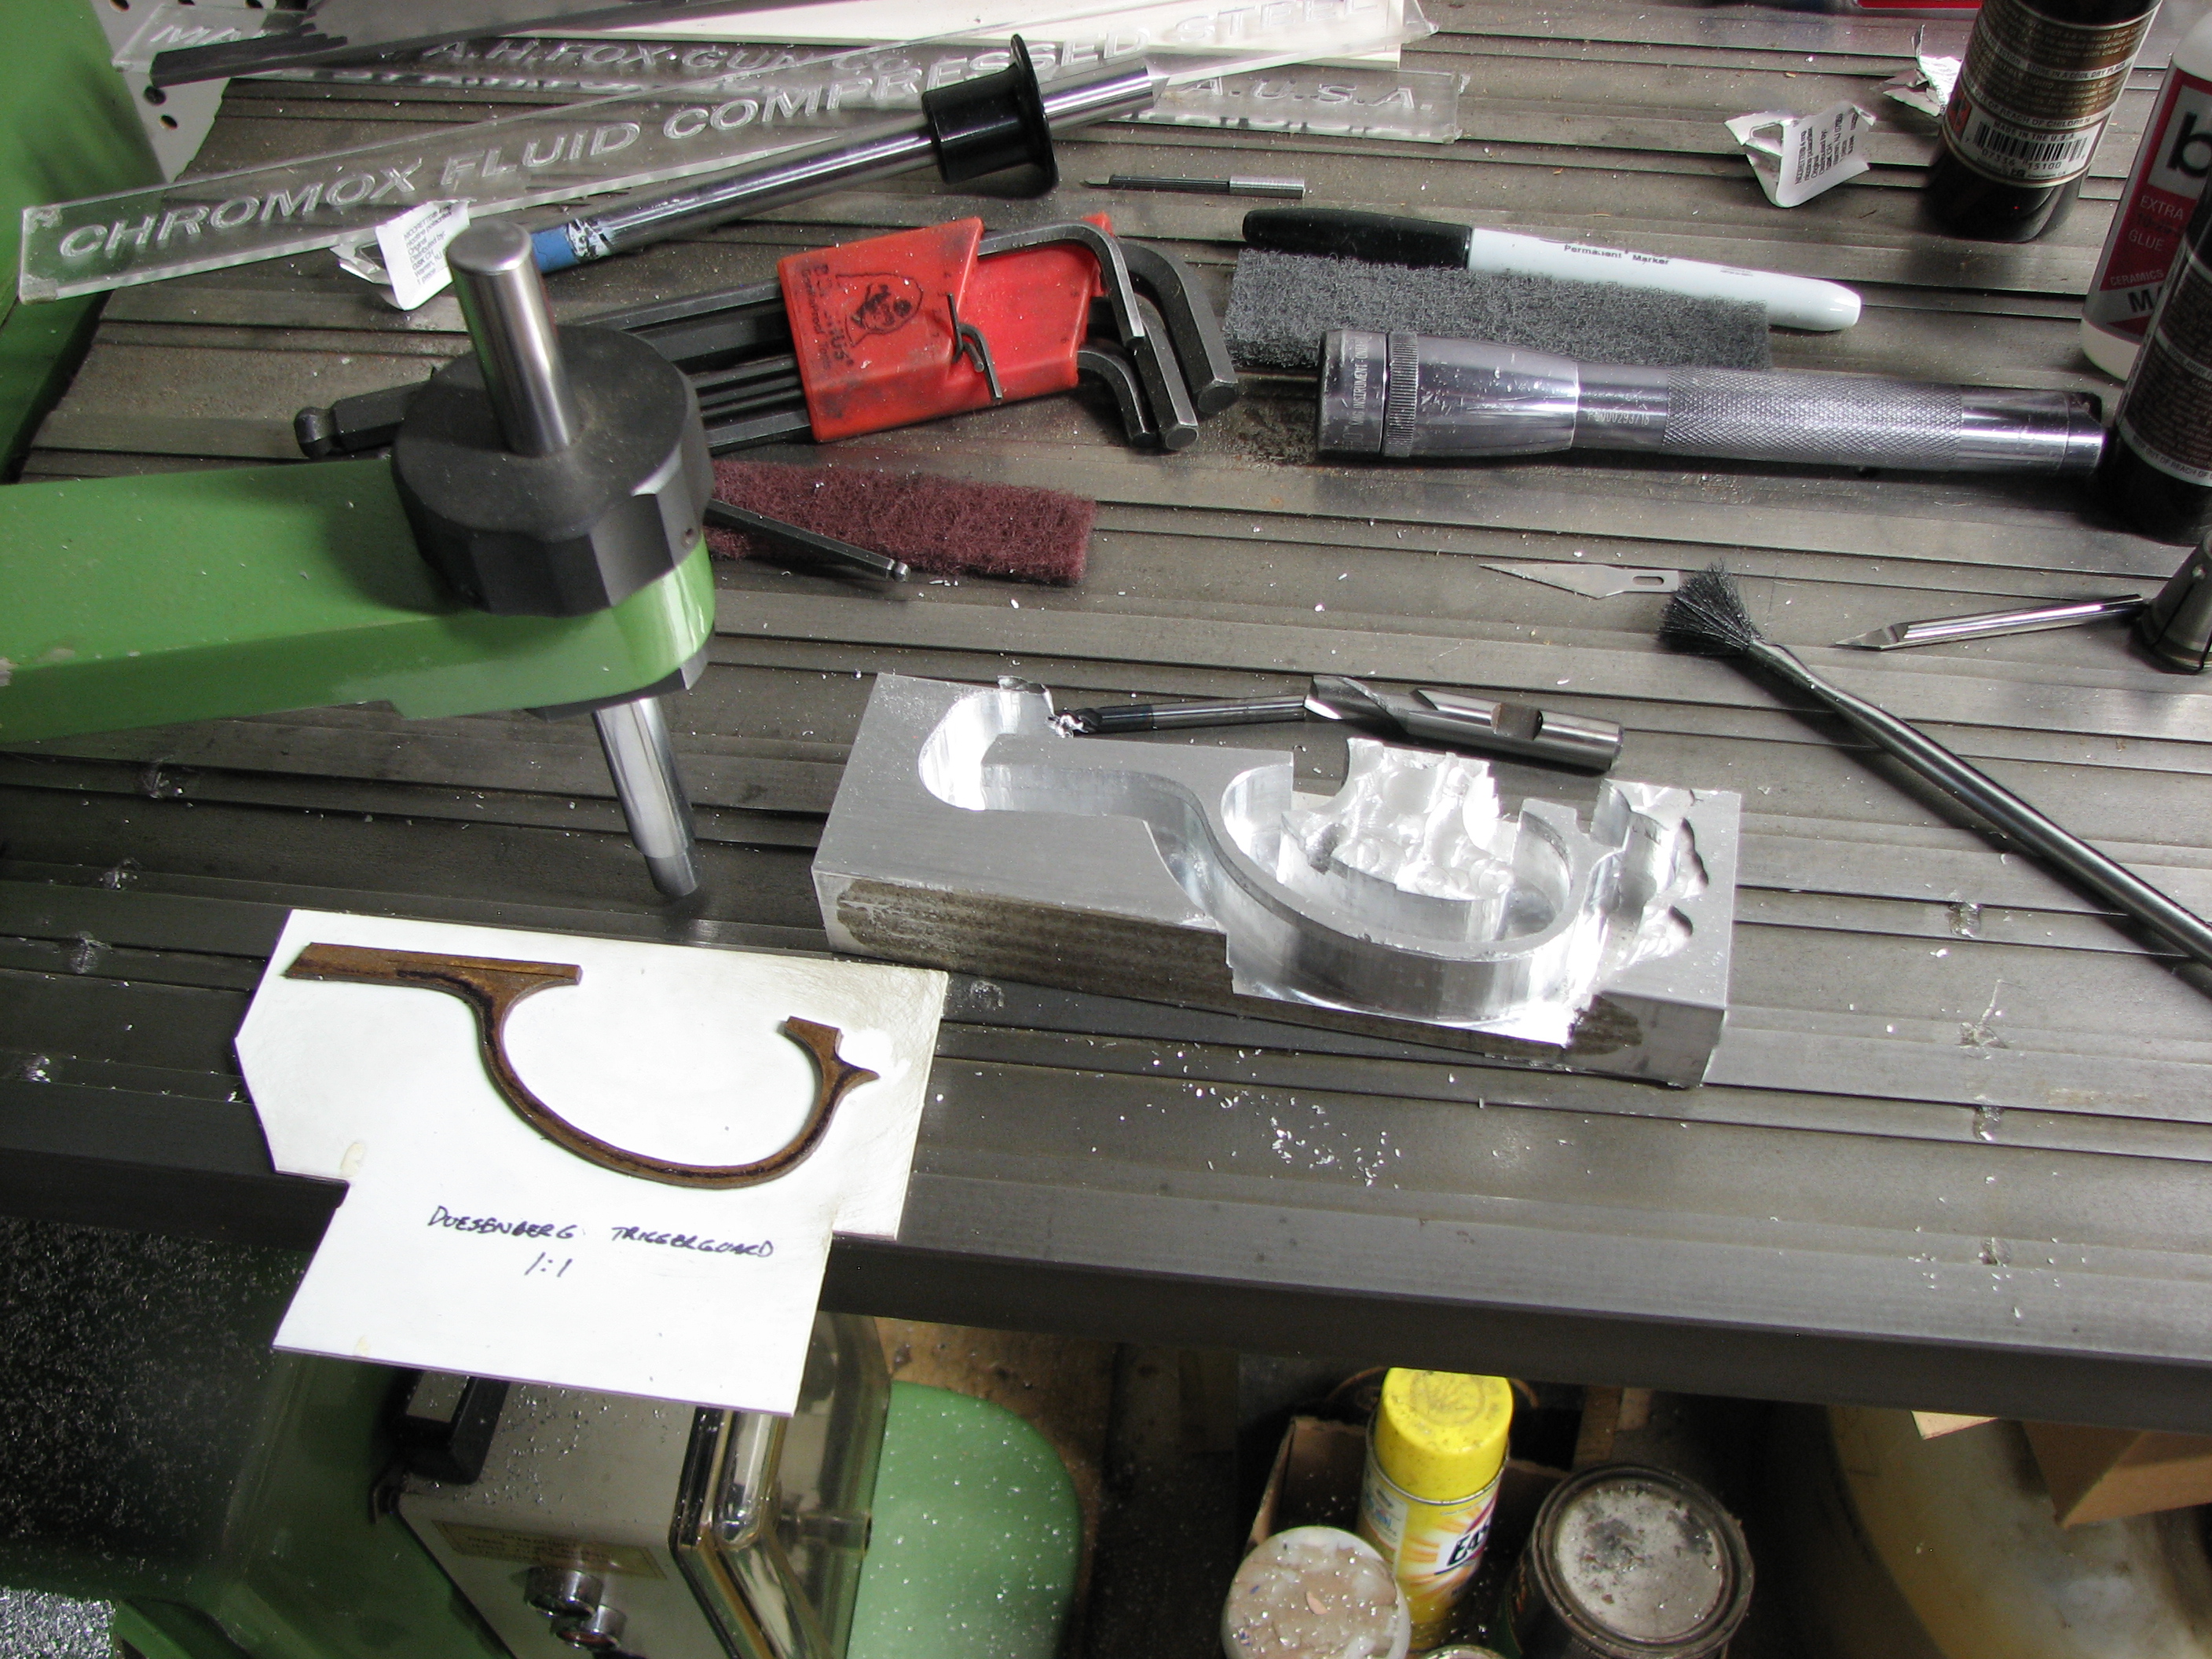
The side pedal and island safety conversion necessitated that the stock retention method be converted to a drawbolt (the block between the top and bottom straps is a temporary place-holder). This, combined with the desired "look" of the gun, meant that I had to design the triggerguard in such a manner that its screws are not visible externally. I made a template of the guard's profile, which I then used as a pantograph pattern. Once the profile of the guard was cut out, I made the mounting hardware (a screw at the rear and a sliding dovetail in the front) and then shaped the guard by hand.


Can't wait to see the finished product!
ReplyDeleteBeautiful work
ReplyDeleteYou are probably "used" to your skills but they are beyond amazing to the rest of us.
ReplyDelete