Craft Gunmaking, No compromises, No corners cut, EVER

Thursday, December 20, 2018

Bass Ackwards, But...

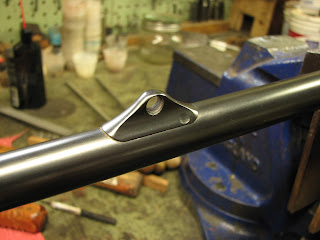
Sometimes you just don't have a choice.  The gun is a Westley Richards GN-series, 12 gauge and the problem is that the forend tip somehow went missing in action.  The shank of the screw that held it on was still in the pushrod tube portion of the forend iron.  So, after removing the remains of the screw (it's a 7BA, for those of you who are curious) and cleaning up the original inletting, the real fun begins.  Normally, one inlets the wood to accept the metal part, but here it's just the opposite, meaning that I've got to make a part to fit the original inletting and external contours.  I assure you that smoking steel and scraping wood is a WHOLE lot easier than shaping steel to fit the wood.  The fact that the forend tip is a total bastard to hold while shaping doesn't make the job go any faster either.  I did as much as I could while the part was still attached to the bar of 1020 from which it came but eventually, it had to be cut free in order to finish shaping it.

The forend, disassembled

Little by little, the part is sunk into the existing inletting

Then it's cut free to shape the external contours

The shaping is complete

One last check of the fit and then it's prepped for finishing.  I had a few other small parts to color case harden, so this went in with those.

The finished part


Wednesday, November 28, 2018

Barrel "Ringing"

"Ringing" the barrels of a multi-barreled gun to check the integrity of the rib joints seems like it should be an easily done and easily understood procedure.  Apparently, it's not.  It seems that some can't tell a "ring" from a "clank".  I don't think that this is because of any hearing deficiency but rather, they just don't know exactly what it is that they should be listening for.  The following videos will hopefully shed some light (or add some volume) on the subject.  Another thing to keep in mind is that the "ring test" is only valid when the barrels are bare, no extractors, ejectors, forend latch parts, cocking slides, etc.  BARE barrels.  This applies especially in the case of American guns because of the level of imprecision with which these parts are fitted.  If these parts are left in place, they will affect the way the tubes vibrate and therefore, the way that they sound when struck.  The barrels must also be hanging freely, ideally from a wire by the hook.  Definitely not with the lump pinched between the thumb and forefinger, or with the hand wrapped around the chambers.  Finally, it does not matter whether the barrels are for a rifle or a gun, they should sound the same.

You'll want to make sure that the volume is turned up.

Here is an example of what you don't want to hear.
 

 This is the sound you do want to hear.   Not "sort of" or "kind of" or even "pretty close", this is the only sound that will emanate from barrels with sound (pun intended) rib joints.
 

 For comparison, here is a video with both barrels, hung side-by-side (ha! I kill me).

Thursday, November 15, 2018

Westley Richards 1897

This was a Westley Richards 1897 falling block rifle in .450 caliber.  It had at one time been rebarreled and whoever made the sling eye didn't get the shape of the sling eye quite right.  It looked more like that of a Rigby rifle and had a deep machine mark in the base as well.  I reshaped the existing part to more accurately reflect the shape that would have been found on a Westley Richards.

The sling eye as received

After a bit of file work

Wednesday, November 14, 2018

Things You Hear, Part 2: Insults and Ignorance

In the interest of full disclosure, the following will be a rant.  Parts of it may be amusing, but still a rant, none the less.  It might even serve the purpose of clarifying a few things, so here goes.

Sometimes people ask things that just make me shake my head, other times, they ask things that make me think that my head is going to explode.  I'd like to think that most of the time there is no ill will intended, but sometimes.....

To wit:

So, What Do You Actually Do? 
A.k.a., What's your "real job"?
This one is really a head scratcher.  Perhaps it has its roots in the number of hack dabblers that have taken their crimes against craftsmanship to the next level by getting an FFL, hanging out a shingle and "going pro" when they should concentrate on their day jobs. 
My business is my livelihood and my sole source of income.  I do not have a stock portfolio, I do not collect a pension from a prior real job and my wife does not have a "sweet gig" that allows me to "play gunsmith".
Please note:  The above is in no way an indictment of the serious, and seriously talented, hobbyists out there.  Many of those guys could teach the "pros" a thing or two.

Who Does Your _________?
For the billionth time, I DO NOT FARM OUT WORK.  If I offer a service, I'm the one who does it, period.  It's insulting and it clearly means that you assume that I could not have done whatever it is you're asking about.  Maybe I should answer this question with one of my own, like: "Who f**ks your wife?"

But He's a Master Gunsmith.
No, the person who bodged up your gun is not a "master gunsmith".  There are NO "master" gunsmiths in America precisely because there is no guild or apprenticeship system in America to create apprentices, who then go on to become journeymen, and then finally, masters.  Anyone who presents himself as a "master gunsmith" should be viewed with as much suspicion as one can muster because he's the one who gave himself that title.  There is at least one gunsmithing school that actually awards a "master" diploma, for completing a 16-month course.  One and a half whole years of "school", truly, they must be masters.  I could go on and on about gunsmithing schools in this country, but It's too depressing.

But He's an English-Trained Gunsmith.
A British accent is no guarantee of competence, nor of honesty.  Why gun people go all gooey over a Brit accent is a bit of a mystery to me.

Who Would You Recommend To _____________?
I get this one a lot.  Why someone would call or e-mail a gunsmith and ask them to recommend a gunsmith is a bit baffling to me.  It seems a bit like asking your dentist if he knows a good dentist.
It's rude, don't do it.

Can You Tell Me How To ______________?
When people e-mail me or call me on the phone asking how to do something (usually very specific), it can only be seen as a minor miracle that my f*****g head doesn't explode.  Do these people call a lawyer asking for free advice?  How about calling the car dealership and asking how to fix your car?  Call a plumber and ask him to literally talk you through replacing the water heater?  I didn't think so, but for some reason there are some people who own guns that think that's okay to do.  They go on forums and spout off about socialism and other political nonsense, but when they need information about working on a gun, they suddenly turn into a pretty good imitation of "socialists", meaning they want free stuff, in this case, information.  The internet seems to have made everyone believe that "mere information" should be free, for all (community and all that).  Well then, go to the internet gun forums if you want free information, it will usually be worth exactly what you pay for it.

Can You Give Me a Quote?
No.  I can give you a rough idea of the cost but, until I get inside the gun, I won't know the extent of a problem, nor can I know what previous "gunsmithing" needs to be corrected.  Most old guns have been worked on at some point in their existence and that work varies widely in quality.

That Seems Awfully Expensive.
What is your frame of reference to have any opinion, at all, as to what something as esoteric as this kind of work should cost?  You're paying for skilled labor that, literally, a handful of people in this country are capable of performing.  This is not flat-rate wrench-slinging at the Chevy dealership.  I won't even get into how many hours that I don't bill for just because I want anything that I do to be as good as I can do it.
I'm also pretty sure that most good plumbers charge more per hour than I do.

So and So said he could do it for this much.
Then take it to them.  I'm not a hack and, as they say, you get what you pay for.

But I've Already Got _________ Dollars In It.
To be blunt, I don't care.  What you paid for the gun has zero effect upon the value of my time, which is non-negotiable.

What Can You Do For ______ Dollars?
Nothing.  I do not, and never will, work down to a price.  I would either have to do the entire job for your price, at lower quality, OR, I stop work once I've hit your dollar limit.  I choose neither.

Can I Have It By ________?
See here:
https://vicknairgunsmithing.blogspot.com/2017/09/gunmaker-math.html

Thursday, November 1, 2018

Sidelock Sear Spring

The patient is an AyA Number 2 SLE with a failed primary sear spring in the right lock.  Luckily, the interceptor performed as designed and kept the tumbler from falling and causing an unintended discharge.  The Number 2 is a straight Holland pattern sidelock, nothing unusual or novel about the design.  So how does something so ordinary warrant mention in my gallery of the weird, odd and unusual?  Well, first off, there are no unimportant parts in a shotgun.  Secondly, because the failed part is a perfect example of how not to make a spring.  I don't know if it was because an apprentice was entrusted to make the part, if it was made just before the weekend or if a bit too much txakoli during lunch played a part but, no matter, let's get on with it.

The original spring.  Now, we all know that the limb(s) of leaf and V-form springs should taper, gracefully and continuously, being thicker at the root and thinner at the extremities so that the entire limb flexes from tip to root.  The maker of this particular part didn't get the memo, however.  The lower limb collapsed right where you'd expect it to do so.

This spring has an integral tab on the back side of the top limb that engages a slot in the lockplate to keep the spring from simply rotating around the mounting screw.  A piece of O1 flat stock with sufficient thickness was selected and the blank for the new part was cut from it.  O1 generally isn't the first choice for forging but it can be done in thin sections (such as a spring), as long as it's done at the proper temperature.  With the crotch of the spring formed, the back side was machined and filed to create the aforementioned locating tab.  Then the mounting screw hole was drilled and the rest of the spring was filed up in the usual manner.

I also filed up the "ring" around the mounting screw hole a bit more artfully than the original.  After fitting it was heat treated, polished (by hand) and the lock reassembled.

The gun also needed a new right side striker because the original was bent, causing it to stick and not retract.  I didn't document that part of the job because we all know what a Holland pattern striker looks like.

Sunday, October 28, 2018

Some More Mythbusting

If you ever find yourself at a gathering of collectors of American doubles and need a conversation starter, the subject of triggerguards and nitre bluing should make for a lively exchange.  There are those who correctly state that the nitre method was the finish used and, invariably, there is a self-styled guru in the opposite camp. There are only two factory-original finishes found on the triggerguards and other peripheral parts of a classic American doublegun: nitre blue or casehardening.
The assertion that the only color that the nitre methods yields is the bright "peacock" or "fire" blue is patently incorrect, and serves only to illustrate ignorance on the subject.   The nitre method can yield colors anywhere from a light straw color to black.  I routinely blacken parts using the method, and I do mean black.  This is without adding any chemicals to the nitre bath.  The idea that the finish is too "delicate" or "short lived" to be used on a triggerguard is nonsense as well.

Prior to 1937, the hot caustic black oxide (commonly known as "hot bluing") method did not exist.  The Mauser firm was the first to use it and by 1938-9 it had made its way to America.

The methods that existed for blackening steel prior to the above-mentioned "hot blue" were rust bluing, nitre bluing, charcoal bluing, heat bluing, Carbona bluing (also known as machine bluing, among various others) and paint (that's not a joke, Winchester finished their stainless steel barrels with a product called "black Japan" which, effectively, was paint).

Where "classic-era" American doubles are concerned, no American maker EVER rust blued any parts EXCEPT barrels, neither did the British.  The British used the labor-intensive charcoal method to blacken the furniture on their best-quality guns and the nitre method on their lesser, production guns.  Only the Germanic makers ever rust blued everything (they seemingly had quite an affinity for the process).  If I had a buck for every so-called "restoration" (there's that word again) of an American double that I've seen with rust-blued triggerguards and forend irons, I'd be able to retire to the Bahamas.
I repeat, all American doublegun makers used rust blue for barrels ONLY.  Any peripheral parts such as triggerguards, toplevers and forend irons that were not color case hardened were in fact, nitre blued.  I know this to be true because the finish is called out on the parts drawings of some American manufacturers.  There is no reason to believe that all American makers would not use the exact same finishing methods, especially when that method is perfectly suited to mass-production by semi-skilled labor.  I have seen actual original examples of the finish on these parts and I can duplicate them perfectly, as can quite a few others.

Savage was an early adopter of the hot caustic method which greatly sped up the finish process.
The only Fox guns that did not have nitre blued furniture are the very latest production, Savage-built guns. In fact, the very last Utica-made guns may be encountered with hot-caustic blued barrels because Savage started brazing the entire barrel assembly, ribs, forend lug and all, specifically so that the time-consuming rust-blue process could be eliminated entirely.  This practice apparently continued on with the production of the 311 and Fox Model B (which itself was a tarted-up 311).

Speaking of Fox guns, there are times that I wish that Michael Macintosh had never written that book.  As a biography, I can find no fault because I know nothing of Ansley Fox's life, but the book does contain technical inaccuracies regarding the gun itself. 
 Things like the Sterlingworth pin guns being made from surplus PAC frames (which is not possible) and the existence of Chromox frames.  All Fox frames were made of SAE 1020, this is proven by the material callouts on the actual drawings of the frame forgings.  This includes all Philadelphia-era drawings and the Utica-era drawings.

The drawings, #D264 (dated 01/28/1910), #D302 (dated 07/25/1911), #F1 (dated 05/24/1938 Savage) and #F201 (dated 06/31/1938 Savage) all call out the same material specification and that specification is SAE 1020.  How do I know this?  I have photocopies of the drawings.  

The exception to the above are the New Britain Fox guns.  Those frames are made from 8620, which is a Chrome/Nickel/Manganese alloy with the same carbon content as 1020.  It has a much higher yield and ultimate strength than 1020 and is meant to be carburized (case hardened) like most other low-carbon steels.  The assumption that modern break-action guns use "4140" in their frames is also incorrect and seems to be rooted in the notion that 4140 is some sort of magical "gun steel" that is universally used in firearms production.  I blame this on gun-rag writers that (for the most part) know less about guns than their readers and toss this number into an article in order to sound credible.  The use of 4140 is nowhere near as widespread in the gun industry as many people believe.

Macintosh's assertion that a "Chromox" frame can be identified by how "shiny" it gets when worn is hogwash of the highest order.  The late frames' wear to a brighter finish is entirely due to the cyanide carburizing process that replaced the bone-charcoal carburizing process (coincidentally at the same time that the Chromox frames were supposedly introduced).  The cyanide process yielded a much harder surface than the previous method and a harder surface will naturally be brighter as it's worn from handling. 
"Chromox" was a name that Fox's catalog copywriters came up with for a particular barrel steel.   The fact that a catalog copy writer stated that the frames were also made from the same material means nothing.  It's called advertising.

He also stated that the early Sterlingworth "pin" frames were made from leftover P.A.C. frames, which is physically impossible.  There is, in fact, evidence that the P.A.C. guns were not even made in Philly, but that's a story for another post.  Suffice it for now to say that the P.A.C. frames (and forend irons) may well have come from the same forgings as those of another well-known maker.

A comparison of Fox "pin" Sterlingworth and P.A.C. frames: clearly neither was, nor could have been, made from the other. 

An example of nitre blued parts that are neither "peacock" nor "fire" blue in color.  The triggerguard, trigger, barrel selector and the toplever spindle screw (just ahead of the guard) are all nitre blued.
How do I know?  Because I'm the one that finished the parts (and the rest of the gun).


Wednesday, October 24, 2018

A Solid Rib for a Winchester Model 12

While not the typical job that comes through the shop, it was quite an enjoyable diversion from the usual doublegun work.  This started as a plain barrel Model 12 in 20 gauge and like seemingly every Model 12 on Earth, it's been reblued at least once.   The owner (who is a good friend and colleague) is going to restock it and refinish the entire gun for his daughter and he wanted a solid rib installed.  Not really for any reason other than a Model 12 always looks better with a rib.  It enhances the "lines" of the gun and makes it look finished, while the bit of extra weight forward certainly doesn't hurt the gun's handling.  NOS Model 12 ribs are pretty hard to come by and I didn't have a solid rib donor barrel to take it from, so it was made from scratch.  The material for this project is 12L15, which is a resulphurized and rephosphorized steel with lead (hence the L in the designation) added to further enhance its already exemplary machining characteristics.  With a yield strength of around 35KPSI, it's a perfectly suitable choice for a non-structural part such as a rib.  Making it from scratch also allowed me to make it of a width that looked good when mounted on that small-diameter barrel.

Unlike the factory rib, I hollowed the inside of this one to within a half-inch of the muzzle.  This saves a bit of weight but more importantly, it makes it a bit easier to get a skin-tight fit to the barrel when blacking it down (fitting to the barrel contour).

In this photo, the barrel appears to actually be "swamped".  It's really a bit of an illusion caused by a combination of the barrel taper, and the vertically tapered rib.

The rib was serrated by hand.  The guide lines were scribed .025" apart, using a height gauge and surface plate and then deepened using a carbide single-line checkering tool.  The two outermost serrations were cut twice as deep, using a purpose-made cutter, in order to "frame" the serrations.

 The next step was to tin the barrel and underside of the rib.  After cleaning all traces of corrosive flux, the rib was clamped in place and soldered down permanently.   Once all of the rosin residue was cleaned, the excess solder was cleaned up, the hole for the sight bead drilled and tapped and then all was reassembled for return shipping


Friday, October 12, 2018

Another High Condition Smallbore Sterlingworth Ejector (#006)

The soon-to-be #006 goes "under the knife" (or gets "ruined", depending upon one's point of view).  It started as a Philly-made Sterlingworth ejector in 16 gauge.  Actually, at this time, almost nothing remains of this gun as it was.  This may be the most radical alteration of a Fox that I've ever done and will incorporate an idea that I've had in the back of my mind for quite a while.  The client's inspiration for the gun was the Beretta Serpentina, which meshed very well with the plan that I had been pondering for so long.  Once I get some time to get the photos in order and type it up, I'll post it up.  In the interim, here are a couple of "before" photos.


Wednesday, September 26, 2018

A Dispassionate Look at the Design of American Doubles: Postscript

The original post generated a lot of "interest" but there are a few points that need to be cleared up.

Apparently, some think that it was my intent to compare American doubles to English (or Italian, German, etc.) best guns.  It is not.  It was, and is, meant for the edification of those who would say nonsensical things like "Classic American doubles are the equal of anything from anywhere" or the equally ignorant, "There's no such thing as a best gun, it's just British pretense".  Believe me, there are plenty of American shooters that believe this way about their treasured doubles.

I evaluated each of the guns listed based upon their own merits, or lack thereof.  Anyone with a modicum of mechanical comprehension would not compare these guns to bests from anywhere, since American doubles were factory mass-produced, consumer items, like toasters.  The highest grades of American doubles were invariably mechanically and materially the same gun as the lower grades.  Pretty engraving and wood does not a best gun make.  I've said it before and it bears repeating, a best is a best even before it's engraved or finished, and no classic-era American double fits that description.

What I wrote was based upon observation and experience, not uninformed opinion: in other words, factual truth.  If any are offended by that (and there have been a few), that was not my intent but it's also not my concern.  There are any number of collector-types that have apparently sworn a blood oath to their chosen favorite brand, and part of my intention was to provide some actual knowledge about the workings of the guns that some of these people seem to lack.

As an aside, it's a bit surprising how many collectors, many of whom possess encyclopedic knowledge of their favorite brand's company minutiae, are utterly lacking in the ability to vet quality workmanship or the mechanical condition of the very guns that they collect.  The fact is, one is buying the gun, not the company's history and when evaluating a potential purchase, all of that knowledge of company "history" is exactly worthless.  Enough said on that subject.

I've also been asked why some makers were omitted, names like Baker and even Crescent.  That's because those particular guns were barely a step away from a gas-pipe strapped to a two-by-four in build quality and are not worth mentioning any further.  A couple that I did neglect to mention are the Remington Model 1900 and the Syracuse Lefevers.  I will correct that presently.

Remington Model 1894/1900:

This is basically an A&D boxlock  and because of that, it is a robust, reliable design.  Perhaps the A&D patent had expired by the time the Remington was built and that is why they could build the gun without taking out a license as H&R had to do.  Perhaps they actually did take out a license.
I do not know the answer to that as I'm not a Remington historian and honestly don't care.  That particular bit of knowledge is of no value to me as far as the gun on the bench is concerned.  As would be expected from this company, the workmanship is of uniformly good quality for a production gun.

Syracuse Lefever:

Early (pre-1900 I think) Lefevers were an odd hybrid of boxlock and sidelock, with the sears and their springs being mounted on the sideplates and the hammers and mainsprings mounted in the frame.  The early guns were also possessed of "uncle Dan's" gimmicky adjustment mechanisms for just about every wear point in the gun.  The actual value of these wear adjustments is debatable and they were omitted in the later guns.  The later guns were also true boxlocks (sideplates notwithstanding) with the sears moved to the frame in an overhung fashion.  The one adjustment mechanism that did make it to the later gun was the famous "ball and socket" barrel hinge.  The  adjustability is a byproduct of the fact that the ball itself simply screws axially into the frame knuckle.
Lefever collectors will wax eloquently about how all doubles should have been designed this way but the truth is that, much like Brown's rotary bolt, it's just another way of accomplishing a goal.  Not better, not worse, just different.  Where it was superior was in the production of the gun, when, instead of blacking the barrels down to the frame in the traditional time-consuming manner (which few American makers did right anyway), the barrels are assembled to the frame, the ball is screwed up tight and the job is done.  The late Syracuse Lefevers really only have a few legitimate engineering issues.  The first is that the hammers are pivoted in cantilever fashion from the frame, with no outboard support for the pivot.  This is probably more academic than real since the hammer pivot pin (which also makes up half of the cocking mechanism) is of a fairly large diameter and derives sufficient stiffness from its diameter.   Another is the geometry of the cocking lever.  The Lefever's cocking lever is fairly short and engages the barrels a significant distance aft of the barrel's pivot point.  This, combined with the fact that the cocking lever also rotates the hammer pivot pin itself in order to raise the hammers to full cock, makes for a gun that takes noticeable and considerable effort to open when both locks are tripped.  In English, the Lefever's cocking mechanism enjoys less mechanical advantage than most other designs.  Lastly, the design of the cocking mechanism demands that the hammers float on the pivot pin, while the cocking lugs on the pin are fairly small and engage in an arc segment cut into the hammer itself.  This reduces the amount of contact in the pivot area but more importantly, during cocking large stresses are imposed on a very small area where the cocking lug of the pivot pin meets the notch in the hammer.  I have seen the cocking lugs worn to the point that the hammers don't go fully into bent (full cock) when the gun is opened as far as it can go.  I've also seen hammers crack, with the crack initiating at the square cornered opening above the pivot hole.  Lefever's ejectors were as unique as the rest of the gun, with the mechanism being completely contained within the frame and powered by the mainsprings.
Some guns will be found with a screw that retains the extractor in the barrel. This is redundant as the only time the extractor can come out is when the barrels are opened and at that point, the cocking lever (which also cleverly acts as the extractor cam) retains the extractor in the barrels.  I suspect that the retainer screw was used to prevent the extractor being lost when the barrels were dismounted from the frame.

Wednesday, July 25, 2018

Things You Hear, Part 1: General Nonsense

There are so many myths and so much just plain bullshit in the gun world and it simply refuses to go away.  So in the interest of disposing of some of it, I'm going to address some of those myths and some of that BS here.  There is surely enough to make this a regular series, to say nothing of the brand-specific BS.

I'll start the list with my personal favorite.

"Restoration":
Everybody with a buffing wheel, a Dremel tool and a Brownell's catalog thinks they do it.  The ones that ACTUALLY do it own neither a buffing wheel nor a Dremel tool and I, personally, rarely (almost never) order anything from Brownell's.  Possibly the most misused word in all of the gun world.  If you restore Rugers, the above does not apply.

"Mint Condition":
The second and third most misused words in the gun world.  I prefer to use the dictionary definition versus the gun dealer's/seller's definition, which apparently allows for repairs, refinishing and other assorted deviations from the actual meaning of the phrase.

"As Far As I Know...":
The gun dealer's/seller's "get out of jail free" phrase.  Typically used thusly:  "As far as I know, those 18-inch barrels are original, probably rare", or, "As far as I know, it's a real A1 Parker", or the ever popular "As far as I know, it's all original".  If you hear this phrase, beware.  What it really means (usually) is "I do know but I'd rather make the sale".

"I Had a Local Shop/Guy Do It":
This is a common answer to the question: "Who the #$%^&* did this?!!"

"Hand Rubbed Finish":
This DOES NOT mean slathering Tru-Oil (or whatever) on a stock with your hand like a preschooler fingerpainting.  "Hand rubbed" means the same thing in wood finishing as it means when referring to a paint job on a car.  It means that each coat and the final coat is polished, by hand and using blocks and appropriate abrasives, in order to level the finish between coats and impart the chosen level of gloss on the final coat.  A hand rubbed finish can be brushed on, sprayed on, mopped on, dipped, it doesn't really matter.  It can be oil, lacquer, varnish, paint, shellac, etc. What matters is what is done between applications and after the final application.

"Seven Pin Sidelock":
This utterly meaningless term is a favorite of advert copy writers for Turkish gun companies and self-styled "experts" on all things doublegun.  The number of exposed pins in a sidelock gun's lockplate have absolutely no correlation to the quality of the gun, period.  Here is a short list of some of the best guns made in the world and the number of visible pins in their locks.

- Fabbri Over/Under, either 0 or 6
- Boss Over/Under, 6
- Fratelli Rizzini Over/Under, 1
- Fratelli Rizzini R1 SLE, 0-4
- Purdey Over/Under, 8
- Purdey Beesley SLE, 8

Think your Turkish side by side is a "best" because it has "seven pin" locks?  It's not.  The number of pins has only to do with the design of the lockwork, nothing more.

"High" and "Low" Brass Shells:
The height of the brass base of a shotshell has zero correlation to the chamber pressure, at all, period.
Shotshell pressure depends upon variables like hull internal volume and powder burn rate, not the height of the exposed brass.  Remember Active shotshells?  They had NO brass.

"Light Target Loads":
Most big-box target loads are only light in the recoil department.  Many of them generate pressures of 11-12 KPSI.  Remember, chamber pressure and recoil have no correlation.  The next time you think, "It's OK, I'll just use light target loads", maybe reconsider and use shells for which your gun is proofed.

Measuring Pull Length:
Common "wisdom" has the shooter put the butt into the crook of their arm (at the elbow) and determine their "proper" pull length by noting where their trigger-finger lands.  This is total nonsense, unless you actually shoot the gun that way.  What you want is about an inch to an inch and a half between your thumb knuckle and the tip of your nose when the gun is properly mounted.  Better to err on the long side as too short will make you lift your head.  And no, a fourteen and a half inch pull length is not "really long" unless you're a member of the Lollipop Guild or you have arms like  T-Rex.

"Relaxing Springs":
A spring's lifespan is measured in the number of cycles it will perform and the number of cycles is determined by its design, the choice and quality of the material used and the quality of its manufacture.  It's funny that everybody worries about "relaxing" the mainsprings for storage but no one gives a thought to the ejector mainsprings, which are always compressed unless the ejectors are tripped.  In actual use, a spring is never really "relaxed" since they are always installed with a considerable amount of preload.  So in reality, if you're the type to always drop the hammers for storage, you're actually "using up" the finite number of cycles that make up the spring's lifespan.  Don't worry about the springs and relax yourself.

"Water Table":
 I have no idea where this idiotic term came from.  They're either action flats or frame flats, the water table is under your house, where your well is drilled into.  Nobody has a problem calling the barrel flats by their proper and sensible name.  Maybe we should start calling them the "lawn", since they are above the "water table". 

 "Rabbit Ears":
They're hammers.  Don't sound like an illiterate moonshiner.

"Sidekicks":
This is one that makes my ears bleed. Unless your parents are brother and sister, please don't refer to sidelocks as "sidekicks".  

"Scattergun":
Oh Jeez.

Next time, maybe some brand-specific mythology.

Friday, July 6, 2018

Joseph Harkom & Son 20 Bore Hammergun

  This Harkom 20 bore hammergun was tarted-up and "repaired" for resale by a party that won't be named but, I will detail the complete lack of anything resembling correct workmanship used in the repair.

To start, not all steels are satisfactorily weldable, this includes the oil-hardening varieties.  This fact did not stand in the way of the "gunsmith" attempting to repair the left tumbler precisely by that method.  The welded tumbler was discovered when the left lock was disassembled to remove the broken remains of the hammer screw, the head of which had fallen off.  After examining the broken screw, two things became apparent.  One was a noticeable amount of some sort of epoxy around the tumbler shank, the other was evidence of attempts at prior removal of the broken screw shank.  These two items might lead one to believe that the screw head was simply epoxied in place.  Not surprising when the workmanship of the other repairs became apparent.

The gun as it came in,

The horrible, bird-shit welded, warped, butter-soft and buffing wheeled "repair" of the tumbler, keep in mind that these are top-quality Stanton locks.
Let's take good, detailed look at the "craftsmanship" and note the utter lack of similarity to the original workmanship.


The new tumbler blanked from O1 on the lathe, from here on, it's pretty much hand work.

Almost finished,

Ready for heat-treating and final polishing, the full and half-cock bents are filed to final shape and will be stoned for smoothness after heat-treating, the recess for the swivel is cut and the flats that drive the hammer are filed up.

A little comparison,

The lock assembled,

The new hammer screw was made in the usual fashion.  Here it's in my engraving vise...

...And finished

The finished job.

 This is a perfect example of how anything less than best-quality workmanship in repairs can have a detrimental effect on your investment in a fine double.  Yes, doing it the right way takes longer than the half-assed way, but the right way lasts longer and maintains the value of the gun precisely because the repair is indistinguishable from original.