Like it says in the title, this will be a Boss-type over/under with rising bite and a side pedal. The Boss-inspired bits are the bifurcated lumps and the external styling but that's where the similarities end. This will be a lever-cocked, triggerplate action with the firing pins inline, rather than being set at the over/under's typical (and mechanically dis-advantageous) oblique angles. Before you sneer at the idea of a lever-cocker, keep in mind that the world's most expensive rimfire rifle (Hofer's Hummingbird, 500K+) uses lever-cocking and, function trumps fashion. Other departures from Boss orthodoxy are the use of fixed barrel trunnions, rather than the "live" trunnions used in the British gun and, being a rifle, extractors rather than ejectors.
As always, the entire gun is hand-made, with no computer intervention, from raw materials and at my bench.
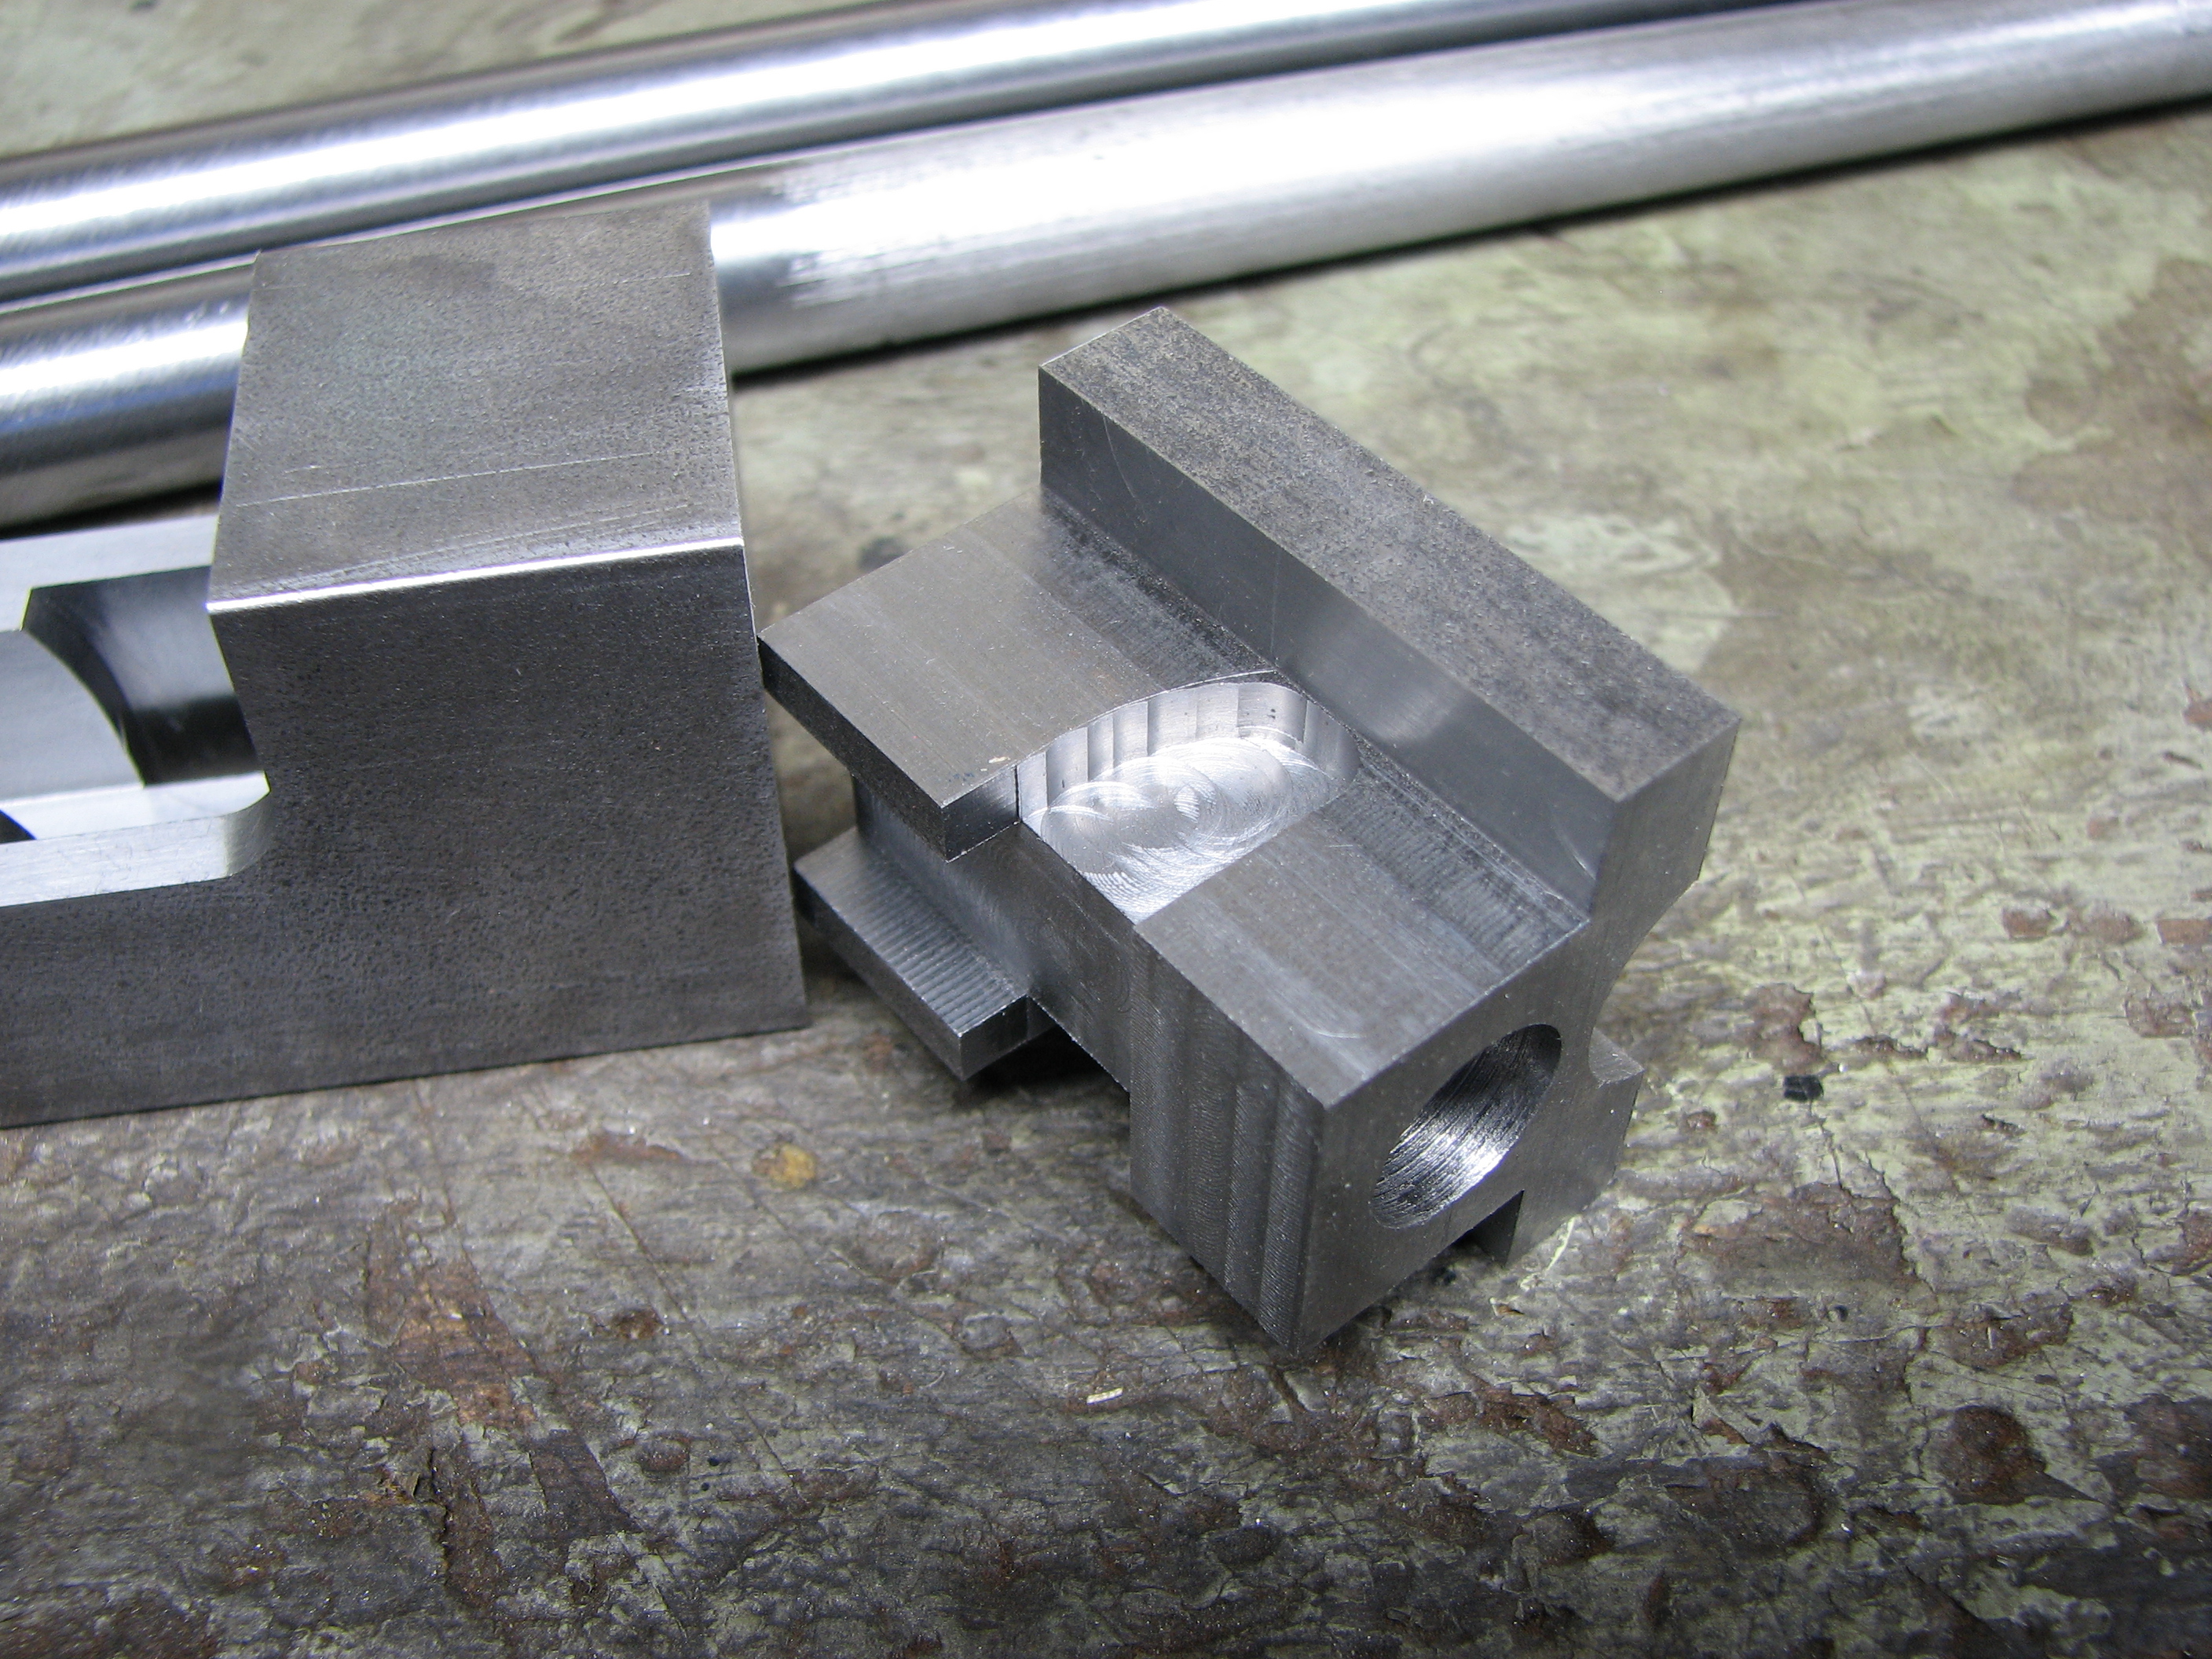
Here is the bar stock (1018), from which the frame and forend iron will come, along with the rifled barrel blanks.
The beginning of the frame:
The barrel pivot locations are machined and recesses (draws) for the lumps are cut. The draws were "pocketed" in using an end mill, and were finished by hand filing.
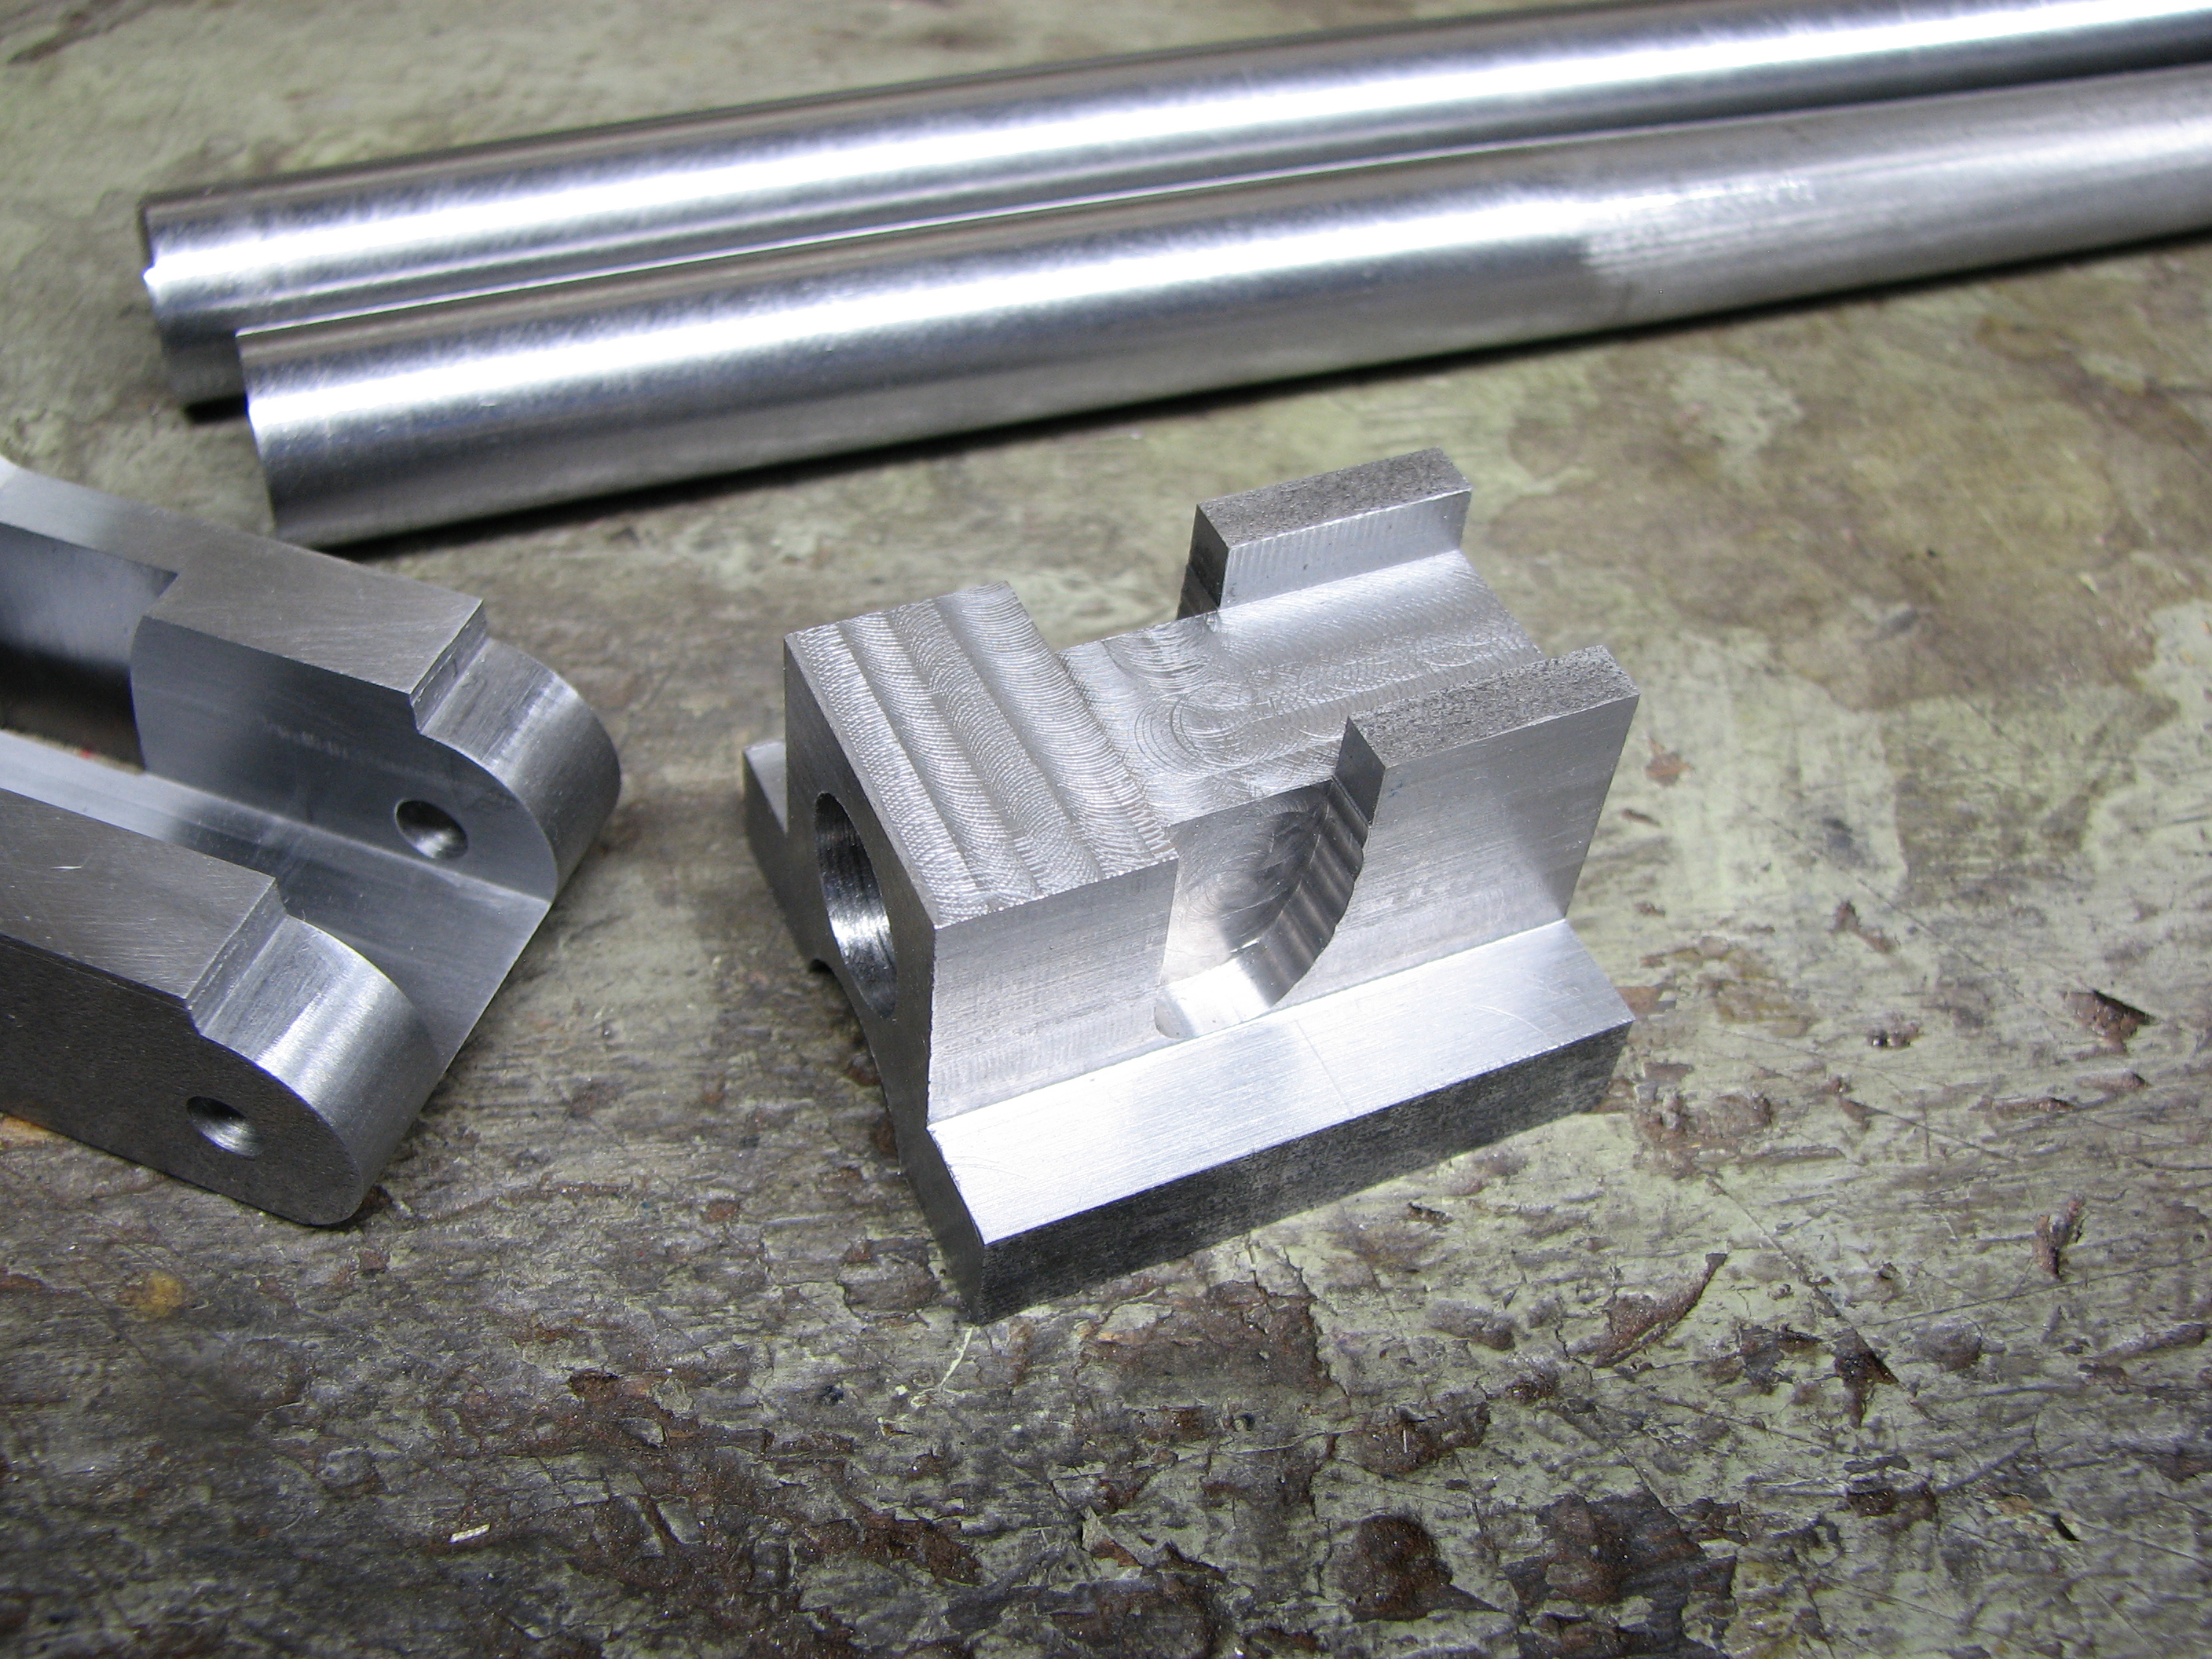
Next, the "knuckle" of the frame was filed, using hardened buttons as a file guide.
The next piece is the barrel hook/lump/semi-monobloc. I say "semi-monobloc" because only the lower barrel is inserted in that manner. The upper barrel is attached in shoe-lump fashion. The lumps were rough machined and the draw faces were shaped by hand using chisels, files and scrapers. Yes, they make full contact for their entire length.
Then, I machined the hooks and their recesses in the frame, as well as the barrel stop shoulders and the clearance in the frame floor for the lower barrel.
Here is a video of the fit. The barrels are temporarily attached to the lumps.
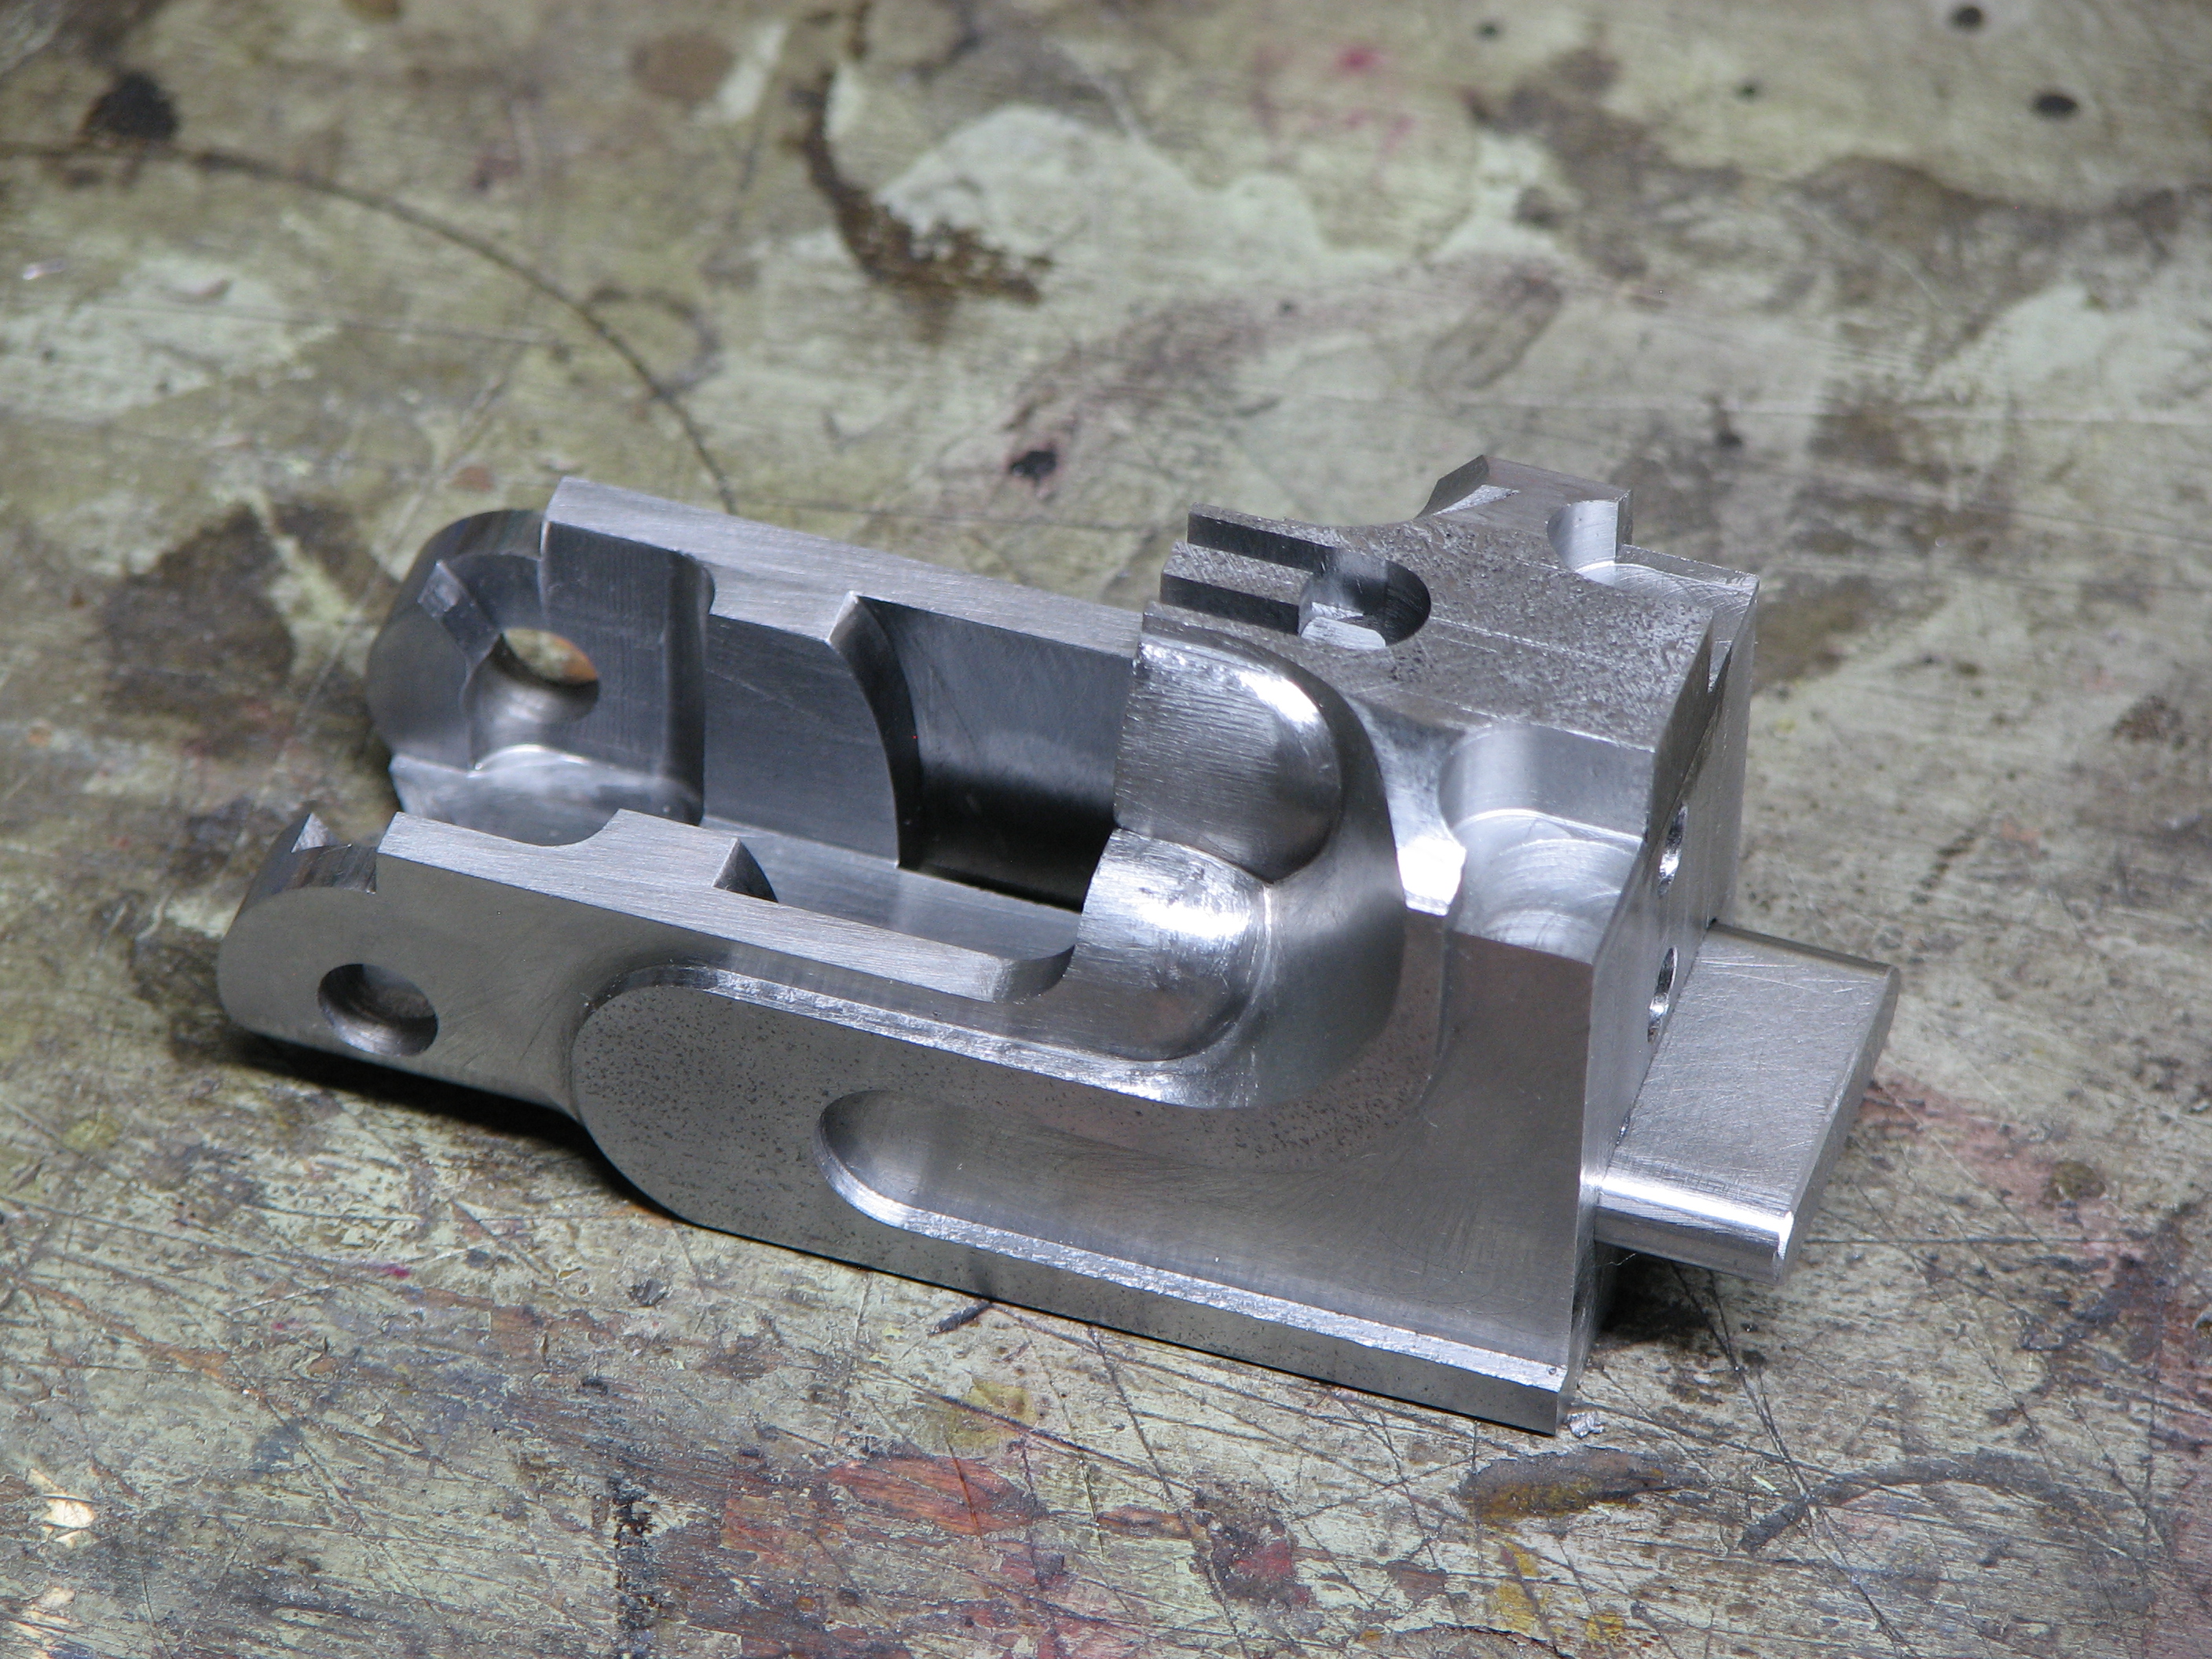
The frame is machined for the underbolt, the "monobloc" shoulders are machined for the extractor shafts and some more external shaping cuts have been made.
At this point, I was a bit apprehensive about shaping the fences in the Boss style. So, I figured I'd just "rough-in" one side. Confident that I was able to create the needed shapes, construction continued. This included machining the firing pin bores, machining the vertical bolt bore and pocket for the rib extension, and making the vertical and horizontal bolts. The bolts in this design do not use a "translating link". The bolts are themselves physically linked together, via a cam and slot arrangement and positively drive each other. That meaning, movement of either bolt, in either direction, will operate the other bolt.
Here is a video showing the operation of the bolts.
It was now time to permanently mate the barrels. The breeches are brazed in the usual manner.
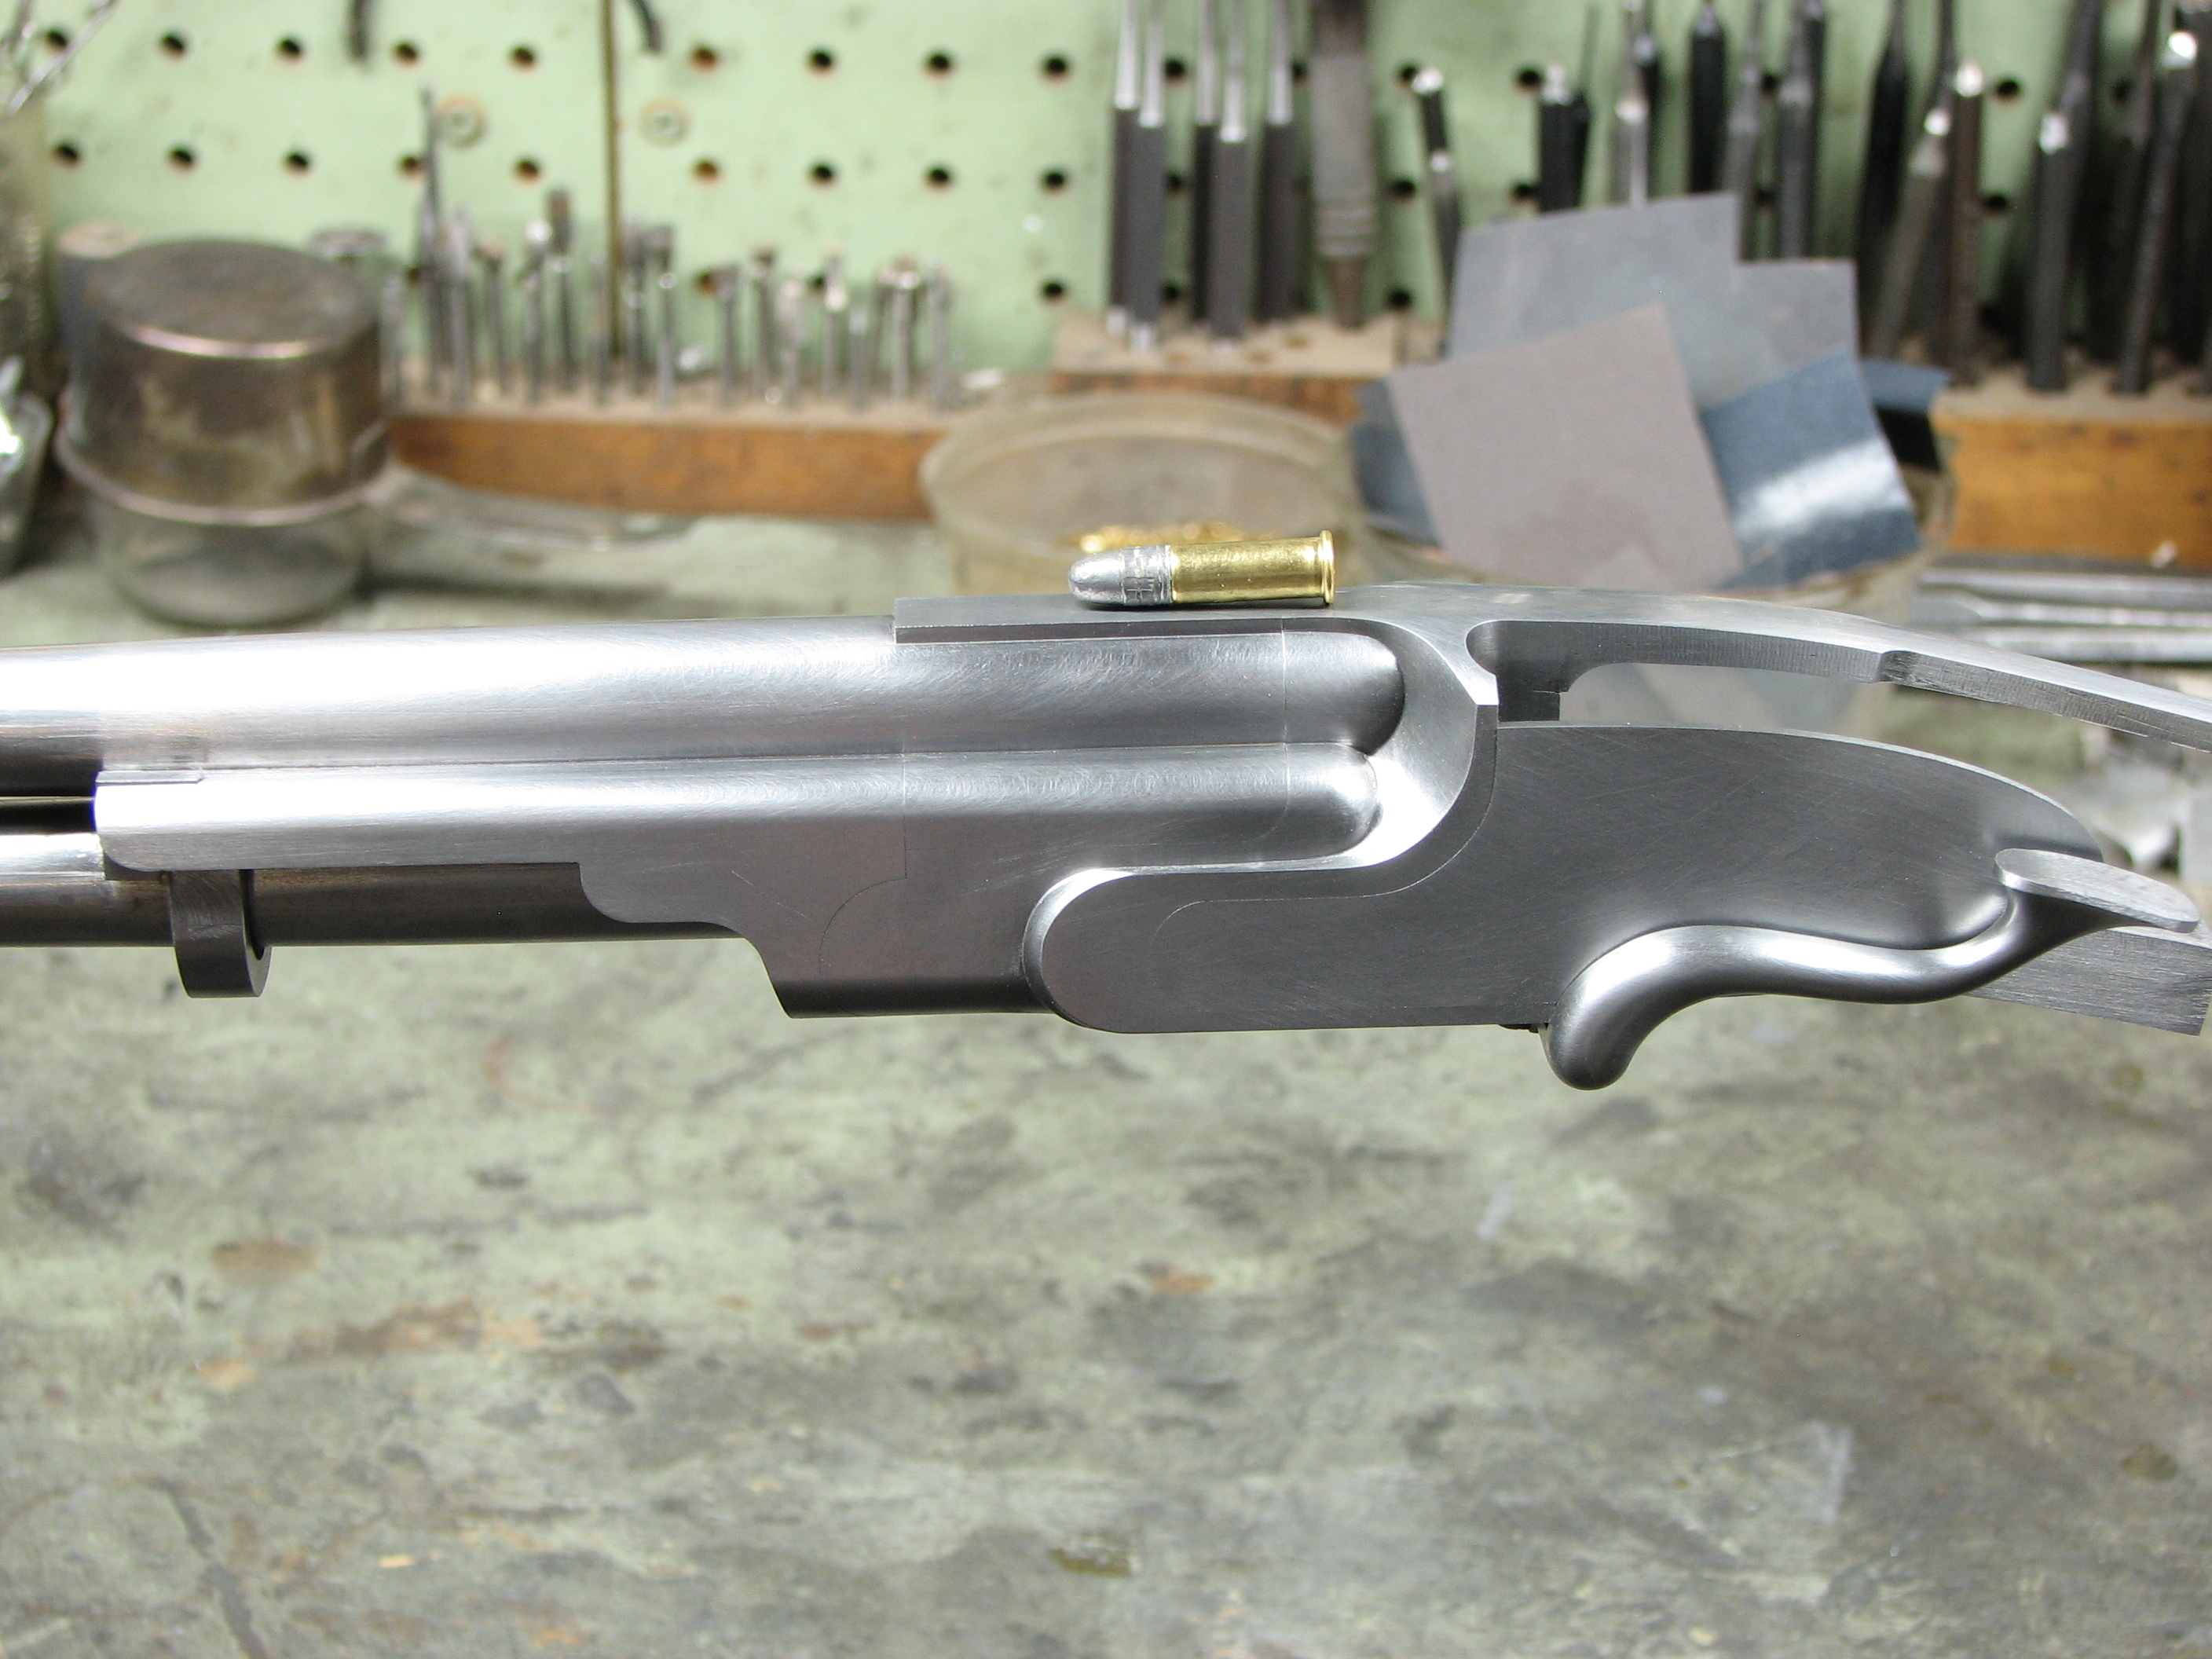
The frame was counterbored to accept the barrel pivots, then the barrels assembly was blacked down. The triggerplate was roughed out and fit to the frame, the top strap is welded in place and shaped, the sidelever "stub" was made and fit to the underbolt, the sidelever itself was made and welded to the stub and the rib extension is fitted. We now have a jointed action. Is a rising bite really necessary on a .22? Or on a Boss action, at all? No, not at all but I can, so I did.
Now was as good a time as any to shape the right side of the "fences". The majority of material was removed with chisels, then files and scrapers. Yeah, it took some time. Also visible are the barrel "webs" that allow the inside edges of the forend iron to be straight lines.
The forend iron was machined from a single piece of bar stock. This includes the "hoop" on the underside. It's all one piece and was probably the single most challenging part of the project so far.
I did mention that it's in .22 long rifle, right? Here are some photos showing the scale of the action.
On to the lockwork. As I said, it's lever-cocked but, thanks to the wonders of geometry, that doesn't mean it has to be high-effort. Also contributing to smooth function are the rollers that bear against the hammers during cocking, and bow-type mainsprings that are actually pivoted at their ends, the way they should be. One might be tempted to think that I copied the idea from Dickson or DMB but the reality is that the concept of the bow predates their work by a little bit, and, neither of them use a pivot at the anchor end of the spring. Please keep in mind that these photos show the lockwork in a rough stage of manufacture. The finished product will have all pivots jeweled (as in bearings, not the misnamed decoration) and it will be finished to my usual standards. Yes, it will be a single trigger, of my own design. As always, the working parts are O1 and the springs are 1095.
Filing up the overhead sear carrier:
The right side sear:
The beginning of the right hammer:
Pocketing the triggerplate for the mainspring drums:
Making the bridles: The support posts are machined using a shop-made hollow cutter after machining away the bulk of the material. The rest is done by hand.
The right side lockwork, so far:
In this video, the firing pins and retainer/anvil are removed for clarity.