My friend Pete sent me this. It made my day, maybe it'll do the same for you.
Tuesday, September 13, 2022
Thursday, September 8, 2022
Un-****ing a Fox XE 20 (those four letters aren't the ones you think)
There is always a story and this Fox XE 20 is no different, so let's start at the beginning.
The gun letters as a Philly-made XE, 20 gauge with 26 inch barrels and full choke in both tubes, and that's just what it is, except the barrels it currently wears didn't come from Philadelphia, but from a certain shotgun manufacturing company. I can only surmise that the original barrels were lost or damaged and the above referenced shotgun manufacturing company made a new set for the gun.
They are in fact 26 inches in length and both barrels are full choked, but it appeared that they did not start as 26 inch barrels, or at least the top rib started life as a longer part. The lightening slot on the underside of the top rib was plainly visible (as it always is when barrels are cut), the left and right tubes weren't even in the same zip code, the triangular filler pieces were absent and the whole muzzle was simply chopped off square. The barrel "addresses" were hand-engraved (not well) and the floral "wedges" at the breech end were clearly done with modern, powered equipment as all of the cuts are far too smooth and bright. Also missing were most of the shading lines in these wedges and the "lining" on the bright polished surfaces. This is entirely incorrect for an XE and the correction of these issues is the subject at hand.
The first step was to disassemble the ribs and forend lug and "adjust" (via file) the spacer blocks between the barrels to correct the muzzle convergence. Next was to adjust the top and bottom ribs (again, by smoking and filing) to properly fit the newly acquainted barrels, followed by "shutting off" the slot in the top rib and making the missing filler pieces. Then the whole works was tinned and reassembled.
After removing all of the burnt rosin and stray solder, the barrels were polished and I went about making the muzzles look like those of an XE.
Next was to chase the engraving, using a hammer and appropriate gravers, to more closely duplicate the "ratchet-ty" look of the engraving cuts that would have been done at the factory. I then cut the shading lines in the background, which is every bit as tedious as you'd think.
Removal of the hand engraved barrel addresses, and preparation for recutting them in the correct style, was the next item on the to-do list. The addresses were originally (Philly and Utica, that is) roll stamped and the quality of the finished marking varied widely. I cut them on my pantograph using patterns that were made to duplicate the original font. After some minor touch-up to the shading lines that I'd previously cut, they were finally ready for rust bluing.
Following bluing, I detail polished all of the surfaces that would be appropriate for an XE. These are: the breechfaces, rib extension, raised portion of the barrel flats, the lump and the muzzle bevels and face. Reassembly and installation of two NOS Lyman beads completed the job. The photos are below.
The muzzles, as received


The rib


The works, reassembled


Correcting the barrel address


The finished job


Saturday, August 20, 2022
Side Pedal Fox (#006) Update
The most radical redesign of an existing gun that I've yet done has reached a major milestone. Click the link for information:
https://vicknairgunsmithing.blogspot.com/2019/10/a-side-pedal-fox-006.html
Thursday, July 28, 2022
Another Bad Idea That Refuses to Die
The following are my thoughts regarding stock bending and why I'll have nothing to do with it:
Any
gun of quality manufacture has its cast (be it on, off, or neutral)
"built in". Meaning, the cast starts at the point where the frame meets
the wood. In many instances, the frame straps are actually displaced
in the direction appropriate for the stock's intended cast. In other
instances, the frame straps are straight but the cast still originates
at the frame/stock juncture because the inletting will be offset. It
also follows that the triggerguard strap will follow in the direction of
the stock's cast.
Now
imagine if you will, bending a cast-off stock into a cast-on
(or even neutral) configuration. With the frame strap/inletting situation being fixed,
the only option is to bend the wrist (hand) portion of the stock. This
means also bending the triggerguard tang to match. For this thought
experiment, we will disregard the difficulty in actually bending the
wood and the vanishingly slim probability that it will stay in its new
configuration.
Think
about what we end up with in the above scenario: a visibly "S" shaped
gun with the head of the stock heading off to the right, bending through
the wrist and the balance of the stock veering off to the left. Things
look even worse from the underside of the gun, where the triggerguard's
bow and its tang are no longer in line.
The
drop situation is no better as this is another dimension that is "built
in" and the same limitations apply. The bend would necessarily need to
be applied through the wrist and, if the bend is of sufficient
magnitude, it will affect the aesthetics of the toe-line of the stock,
the pitch of the butt and the fit of the triggerguard and frame tangs.
Stock
bending is one of those things that is long accepted but that doesn't
mean that it is, or ever was, a good idea. The wood is, by necessity,
being bent through the area of least cross-section and bending entails
setting up enormous internal stress in the fiber cells of the wood, both
tensile and compressive (tensile on the outside of the bend and
compressive on the inside of the bend). It is these stresses that will,
eventually, cause the wood to return to its original state (or close to
it). If the wood is bent far enough that the fiber cells break, the
wood will stay in its new configuration but its strength will be greatly
diminished.
Bending, or more accurately, attempting to bend a stock that far is a
bit like bending your car's body to make it go where it should, rather
than altering its wheel alignment. Bending a stock is a "low cost" expedient with a
low probability of long-term success that also entails significant
aesthetic compromises.
Sunday, July 24, 2022
The How and Why of the Rising Bite
A reader recently asked about the benefits of the rising bite and how it works. I thought that the answer may be of interest generally, hence, its posting here.
Hello D****l,
I appreciate the compliment but I think of myself as much more a student than an expert (there are enough "experts" in this field already).
The
rising bite (Rigby and Bissel's patent) is a so-called "third fastener"
in which a vertically-oriented bolt engages a horizontally-oriented,
"horseshoe" shaped rib extension. What this type of fastener provides,
that no other "third bite" does, is positive axial restraint of the breech.
Meaning, that it prevents the barrels and standing breech from moving
"fore and aft" (in opposite directions, due to breech thrust) during
firing.


Most break-action
designs only restrain the barrels in the vertical plane and, while this
keeps the barrels from pivoting open during firing, it also allows the
standing breech to deflect axially, since this axial deflection is
resisted only by the mass and strength of the material at the juncture
of the standing breech and the frame flats. This is the reason that double rifles usually exhibit "bolsters" of added material at this juncture. Unfortunately, many of these bolsters are little more than ornamental by design.
Here is an example of the value of those bolsters, in a design that is only underbolted and fit "on the circle":


Many
third bites, such as Purdey's and Holland& Holland's hidden third
bites, also allow this deflection to occur due to the fact that these "hidden bites" also act to restrain the barrels only in the vertical plane. The so-called "doll's head" rib
extensions are supposed to prevent this axial deflection but, with the
exception of Westley Richard's bolted doll's head, all fail in this
regard. It must be noted here that Westley Richard's bolted doll's head was their primary (and only) fastener for quite some time and they later added the underbolt in order to make the gun have three bites, so WR's doll's head is not technically a "third bite". The Greener-type crossbolt has the potential to prevent this
axial movement but only if fitted properly, which most are not. In
fact, in most guns (other than Greeners) that employ this type of third
bite, the bolt makes little, if any, contact with the rib extension.
The
rising bite demands appreciable skill in its fitting during
manufacture. The underbolt and the vertical bolt must fully engage
their bites when closed, and the linkage that connects them must be
designed so that both bolts clear their respective bites at the same
time, in order to allow the barrels to open, while also translating the underbolt's horizontal movement to vertical movement of the rising bolt. The added time in design
and manufacture obviously adds to the cost, and this is probably the
primary reason that it's not seen more often.
All
of the above applies to single-barrel and side-by-side guns, whose
frames are inherently quite flexible. Over/unders (especially a
Boss-type) are a bit of a different story since their frames are much
stiffer (more resistant to deflection), due to their frame height and
the deep sides of the frame acting as shear webs. The rising bite in
the Boss guns is a very technically interesting design but, owing to the
frame's inherent stiffness, it is little more than technical curiosa.
The
over/under's inherent stiffness in the vertical plane, not only in the
frame but also in the barrels, is one of the reasons that the O/U is
technically superior to the SxS.
I hope this helps. If you have any further questions, feel free to ask.
Dewey
Thursday, July 14, 2022
Python Hammer for a Super Redhawk
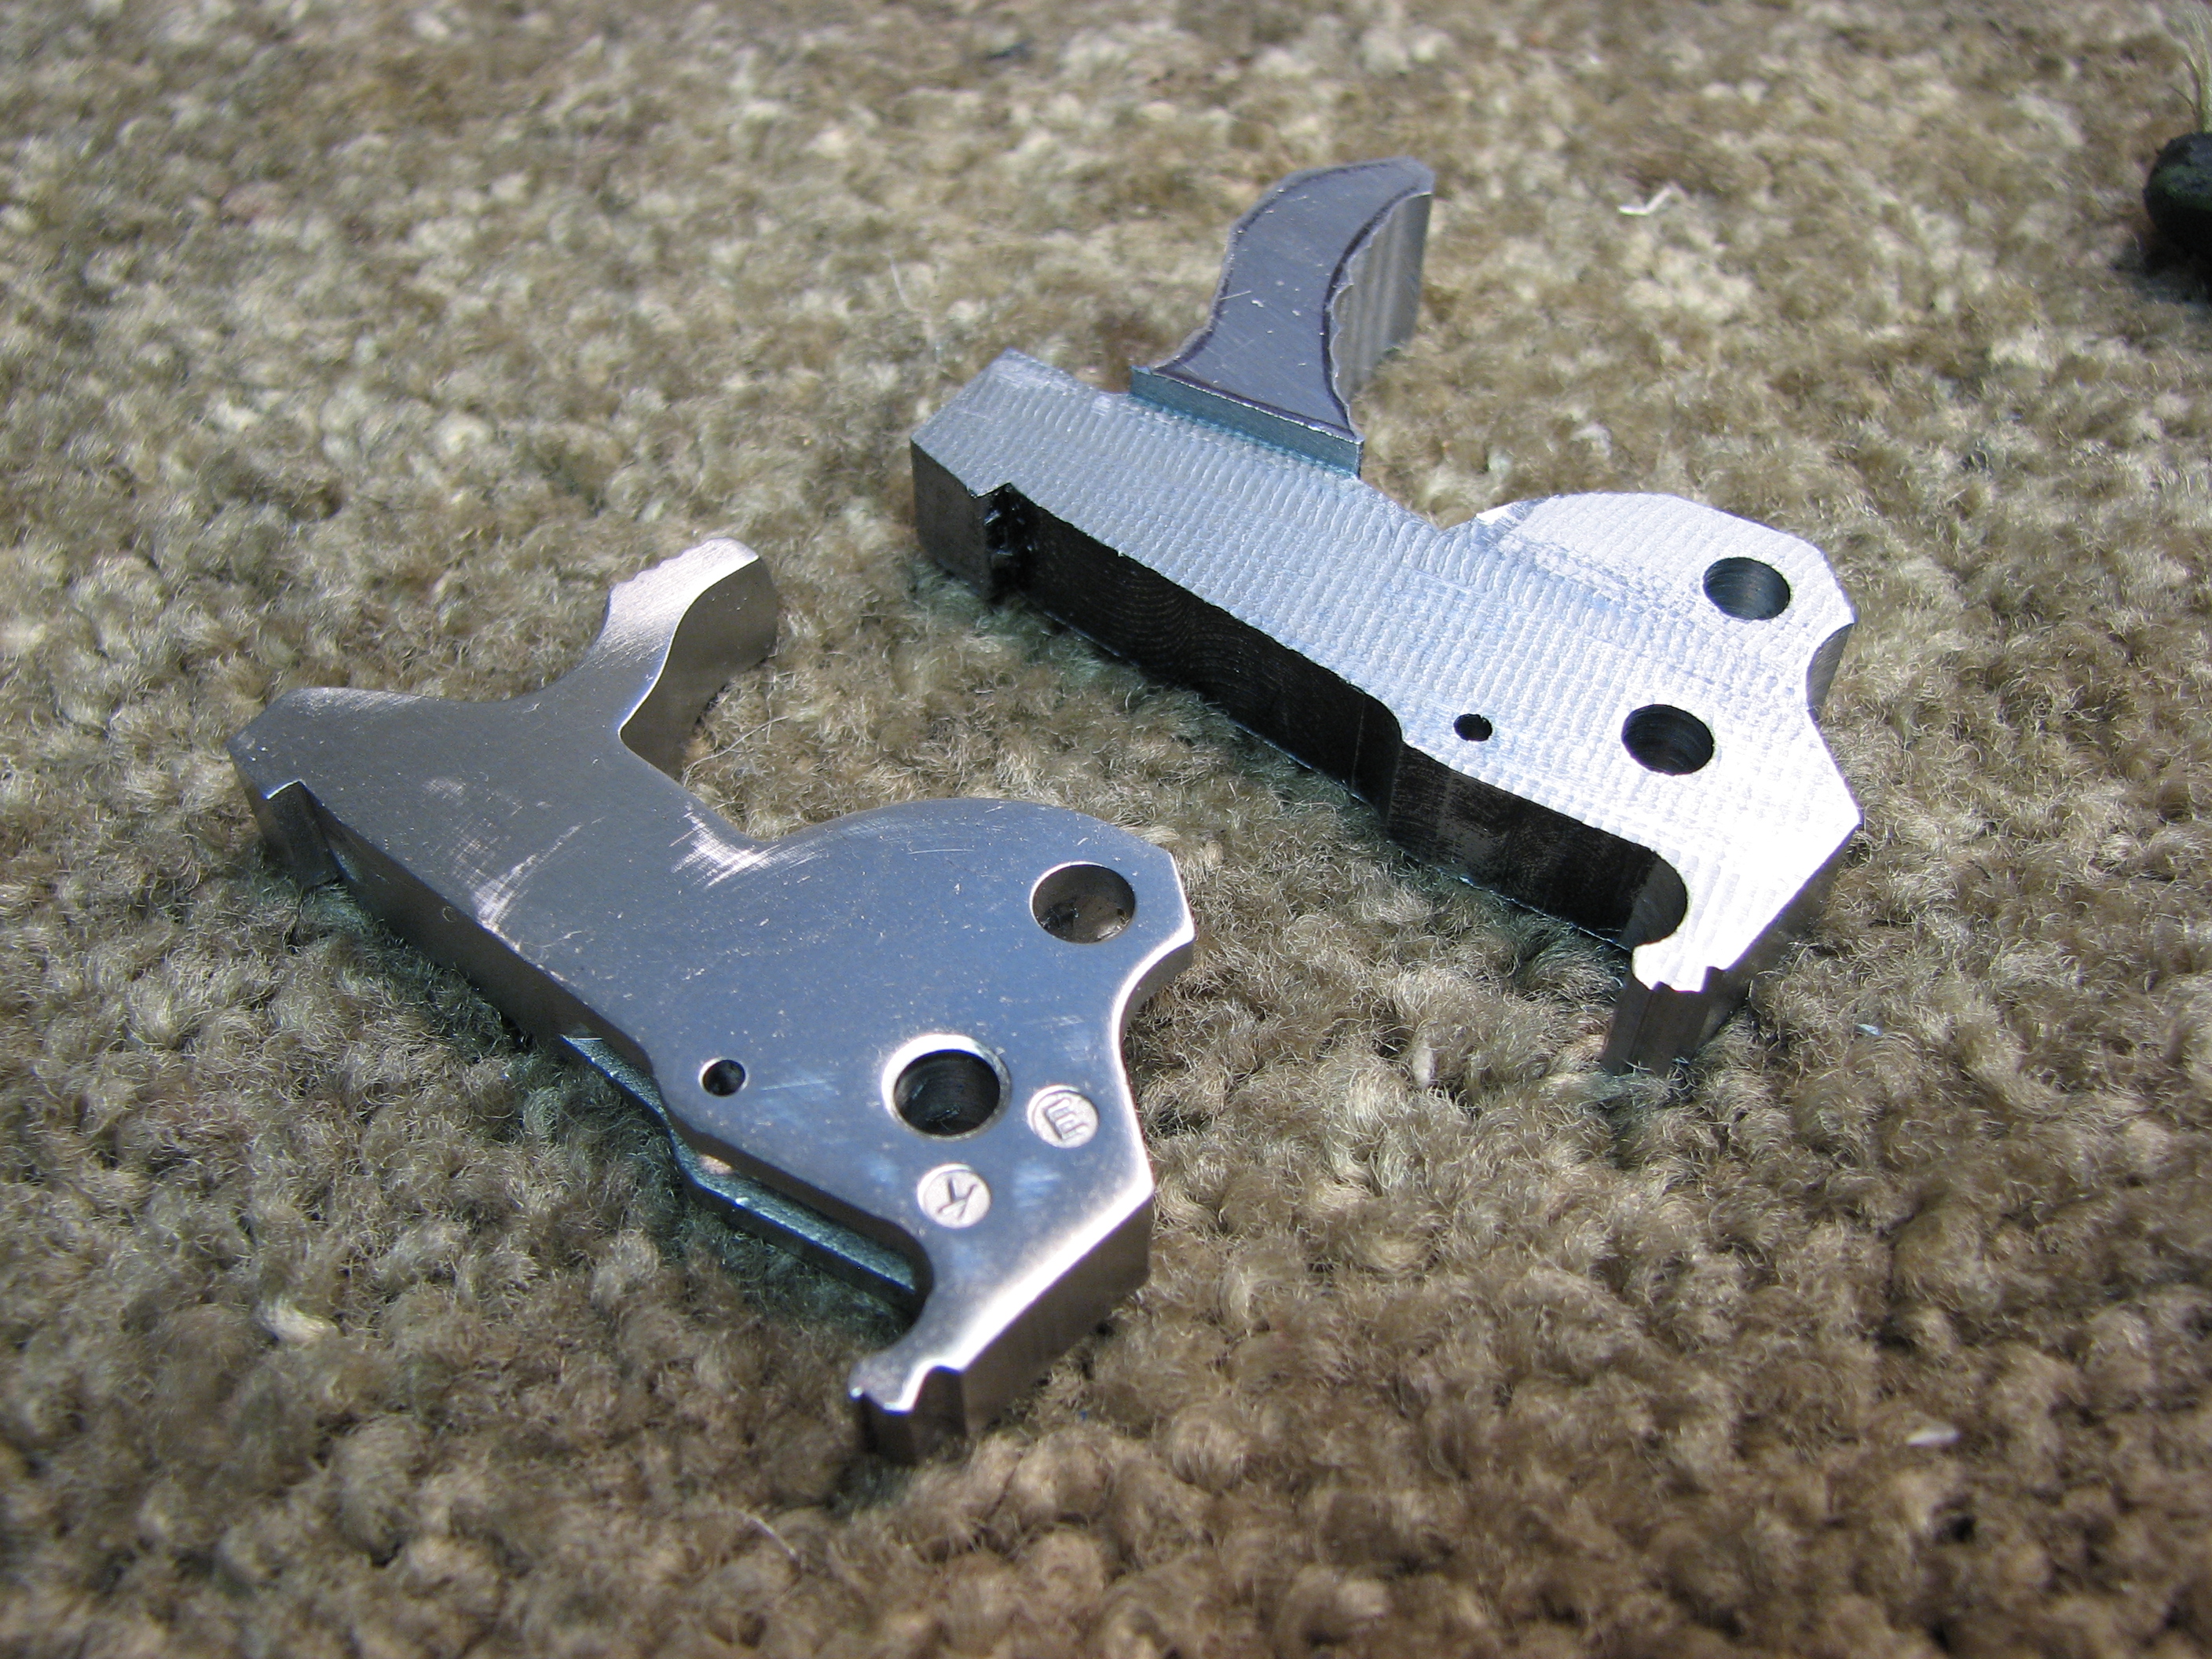
The customer wanted a Python-esque hammer spur for his Ruger Super Redhawk. This was a bit more involved than simply welding a new piece to the existing hammer. In order to capture the look of the Python hammer, a good portion of the upper half of the existing hammer would have had to be welded up in order to have enough material with which to work. I did not want to do that much welding on the part for a couple of reasons, namely that the original hammer is a casting and I didn't want any casting porosity spoiling the looks of the finished part. The second reason is that, due to the hammer's height and speed, it's carrying quite a bit of inertia, and the last thing I'd want is for the hammer to stop while the spur keeps going. The obvious answer is to simply make a new hammer from scratch, in the configuration needed.
The photos below detail that process.
The original hammer and the blank that contains the new part. I simply remove everything that isn't the new hammer.


From this point, it's all hand work. Reaming the pivot pin holes, shaping and checkering the spur, fitting the DA sear and timing the DA hand-off, and preliminary setting of the SA sear angle are all done at this stage. Heat treatment and final polishing, followed by final fitting of the SA pull are next.


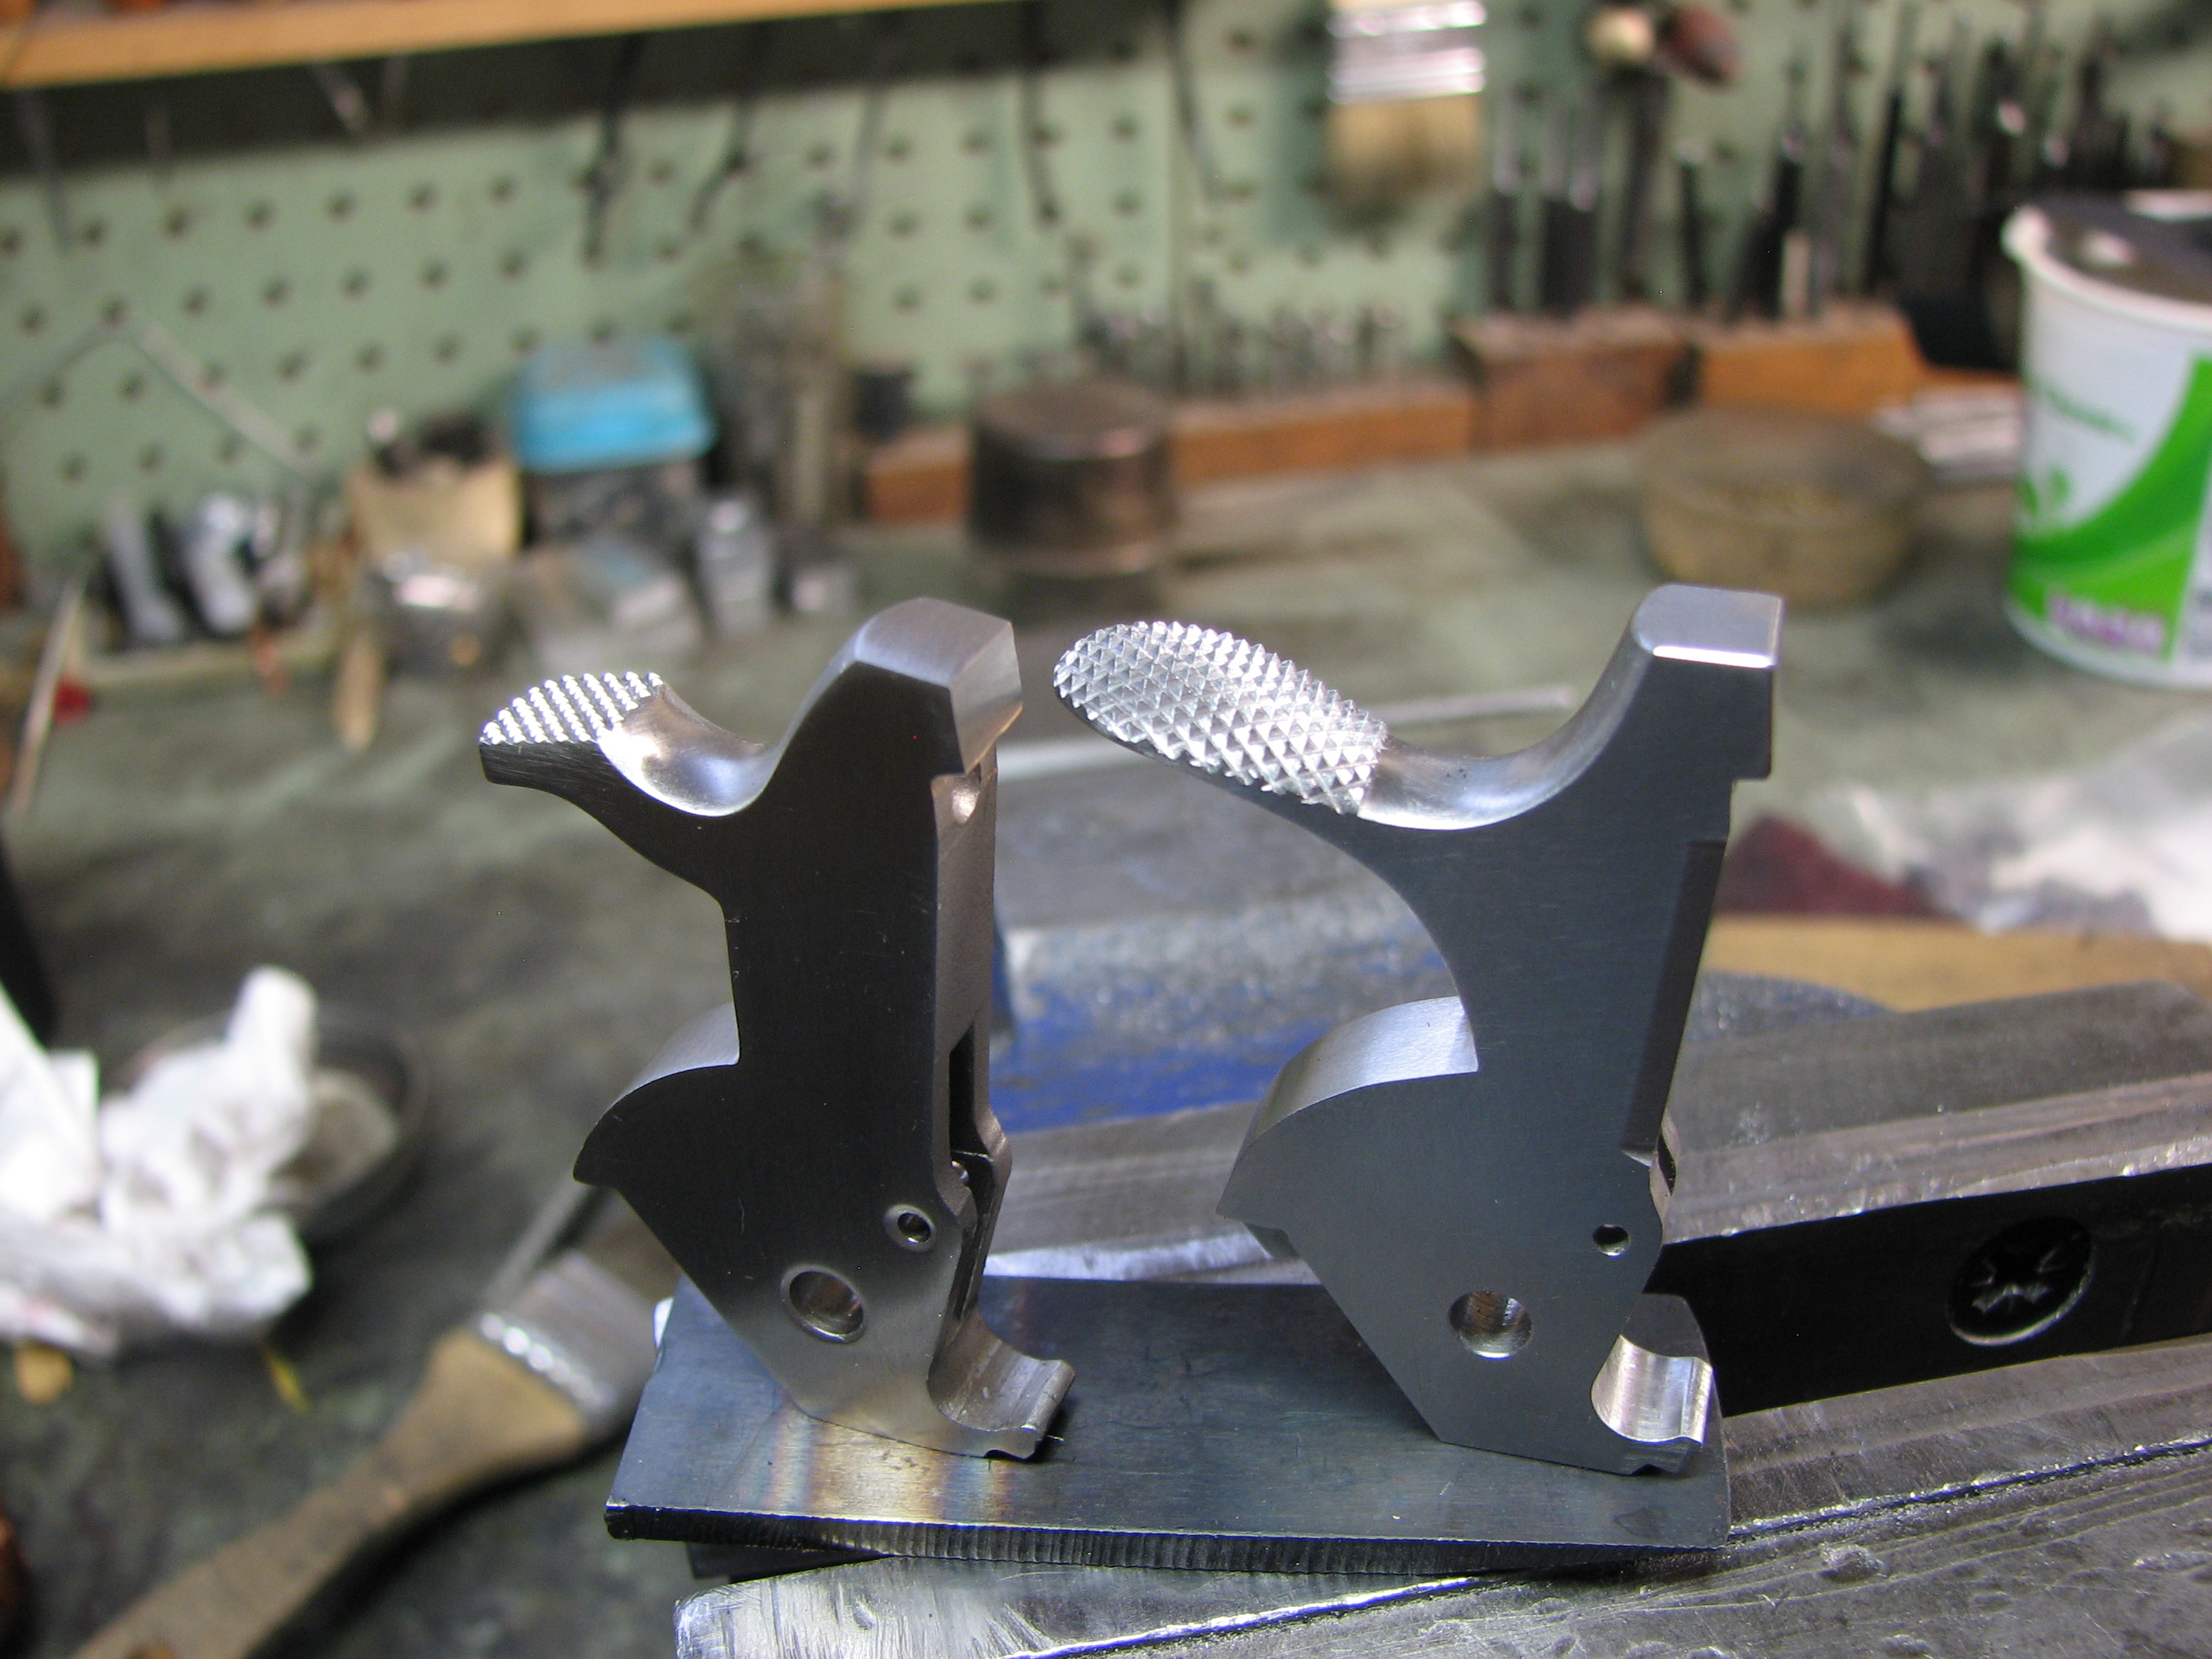

The finished job


Sunday, June 5, 2022
A Neglected Prussian Daly
This Daly had clearly sat unused, and apparently uncared for, for quite some time. The forend tip and grip cap were missing, it was coated in rust and caked-on dirt and it didn't "present well". The client was willing to bet that this gun was a diamond in the rough so he sent it here to be properly cleaned and have it gone over and through.
The before and after condition is fairly startling, and highlights the importance of employing proper methods of cleaning, in order to preserve any original finish that may remain, as well as any patina that the gun has acquired over the decades.
I know, everybody thinks that cleaning a gun is a "piece of cake", "it's easy", "we'll shine that right up". Well, I've too often seen the results of well-meaning but ill-informed attempts at cleaning vintage guns and it's often not very pretty. Here's a hint, wire wheels and wire brushes are never the answer. Neither is any sort of abrasive compound like Flitz or Simichrome. That kind of treatment may well get the gun "clean" but its value (and looks) will surely suffer for it.
Before:


After consulting with the client, it was decided that the missing forend and grip cap would be made in ebony.


After:


Subscribe to:
Posts (Atom)