This one started as a Philly-era Sterlingworth in 16 gauge with 30 inch barrels. The client commissioned it as a gift for his son's graduation from West Point. Being a perfectly normal young man, the son's interests include, among other things, exotic cars. One exotic car in particular would figure heavily in the aesthetics of this gun, that being the 2015 Bugatti Atlantic. For those not familiar, some photos are shown below. Features worthy of note are the bright-trimmed crease that runs along the car's centerline and the similarly trimmed Bugatti-signature "coves" around the doors. This isn't going to be the typical "me too" custom gun.


As stated previously, the gun that I started with is a Philadelphia-made Sterlingworth, 16 gauge with 30 inch barrels. As always, the most important criteria for a gun that will serve as a base, is excellent, unaltered bores. It seems most of the guns that meet this criteria are also in pretty good condition overall, and this one was no exception. The gun, as received, is pictured below. I'm sure that the collector types will have a fit over the fact that I "ruined another one" but that isn't my concern.


Making a custom gun is about far more than simply good looks and pretty wood. Those things are actually incidental. The real motivation is to make it as close to perfect as can be and, believe me, when you're starting with a production American double, that is a long journey. There is a commonly held belief that Philadelphia-made small-frame Fox guns are somehow "better" than those that were later made in Utica. This is nonsense. Externally, the Philly guns may have been slightly better finished and there are some parts of those guns that might have slightly more pleasing shapes, but internally, where it counts, they're just as crude as any Utica gun. That being so, the first order of business on any custom Fox project, after disassembly and annealing, is to make the frame flat and standing breech surfaces smooth and actually flat. These surfaces are never either of those things as they came from the factory, usually looking like they were finished with a clogged-up bastard file. The reason that this is the first operation is that once this is done, the action must be rejointed so that the barrels meet the frame as they should have when they were built. Is all of this really necessary? Not if you're a hack that cares not for quality in craftsmanship. Poorly finished surfaces anywhere, internal or external, are inexcusable on a custom gun. The idea that, just because something is hidden from view means it need not be done right, is the mindset of the mediocre.
Fitting the new hinge pin and hinge pin lock pins. Note the bevel around the barrel lug slot and the radiused corners. Beside looking good, this also serves to eliminate stress raisers in that area.


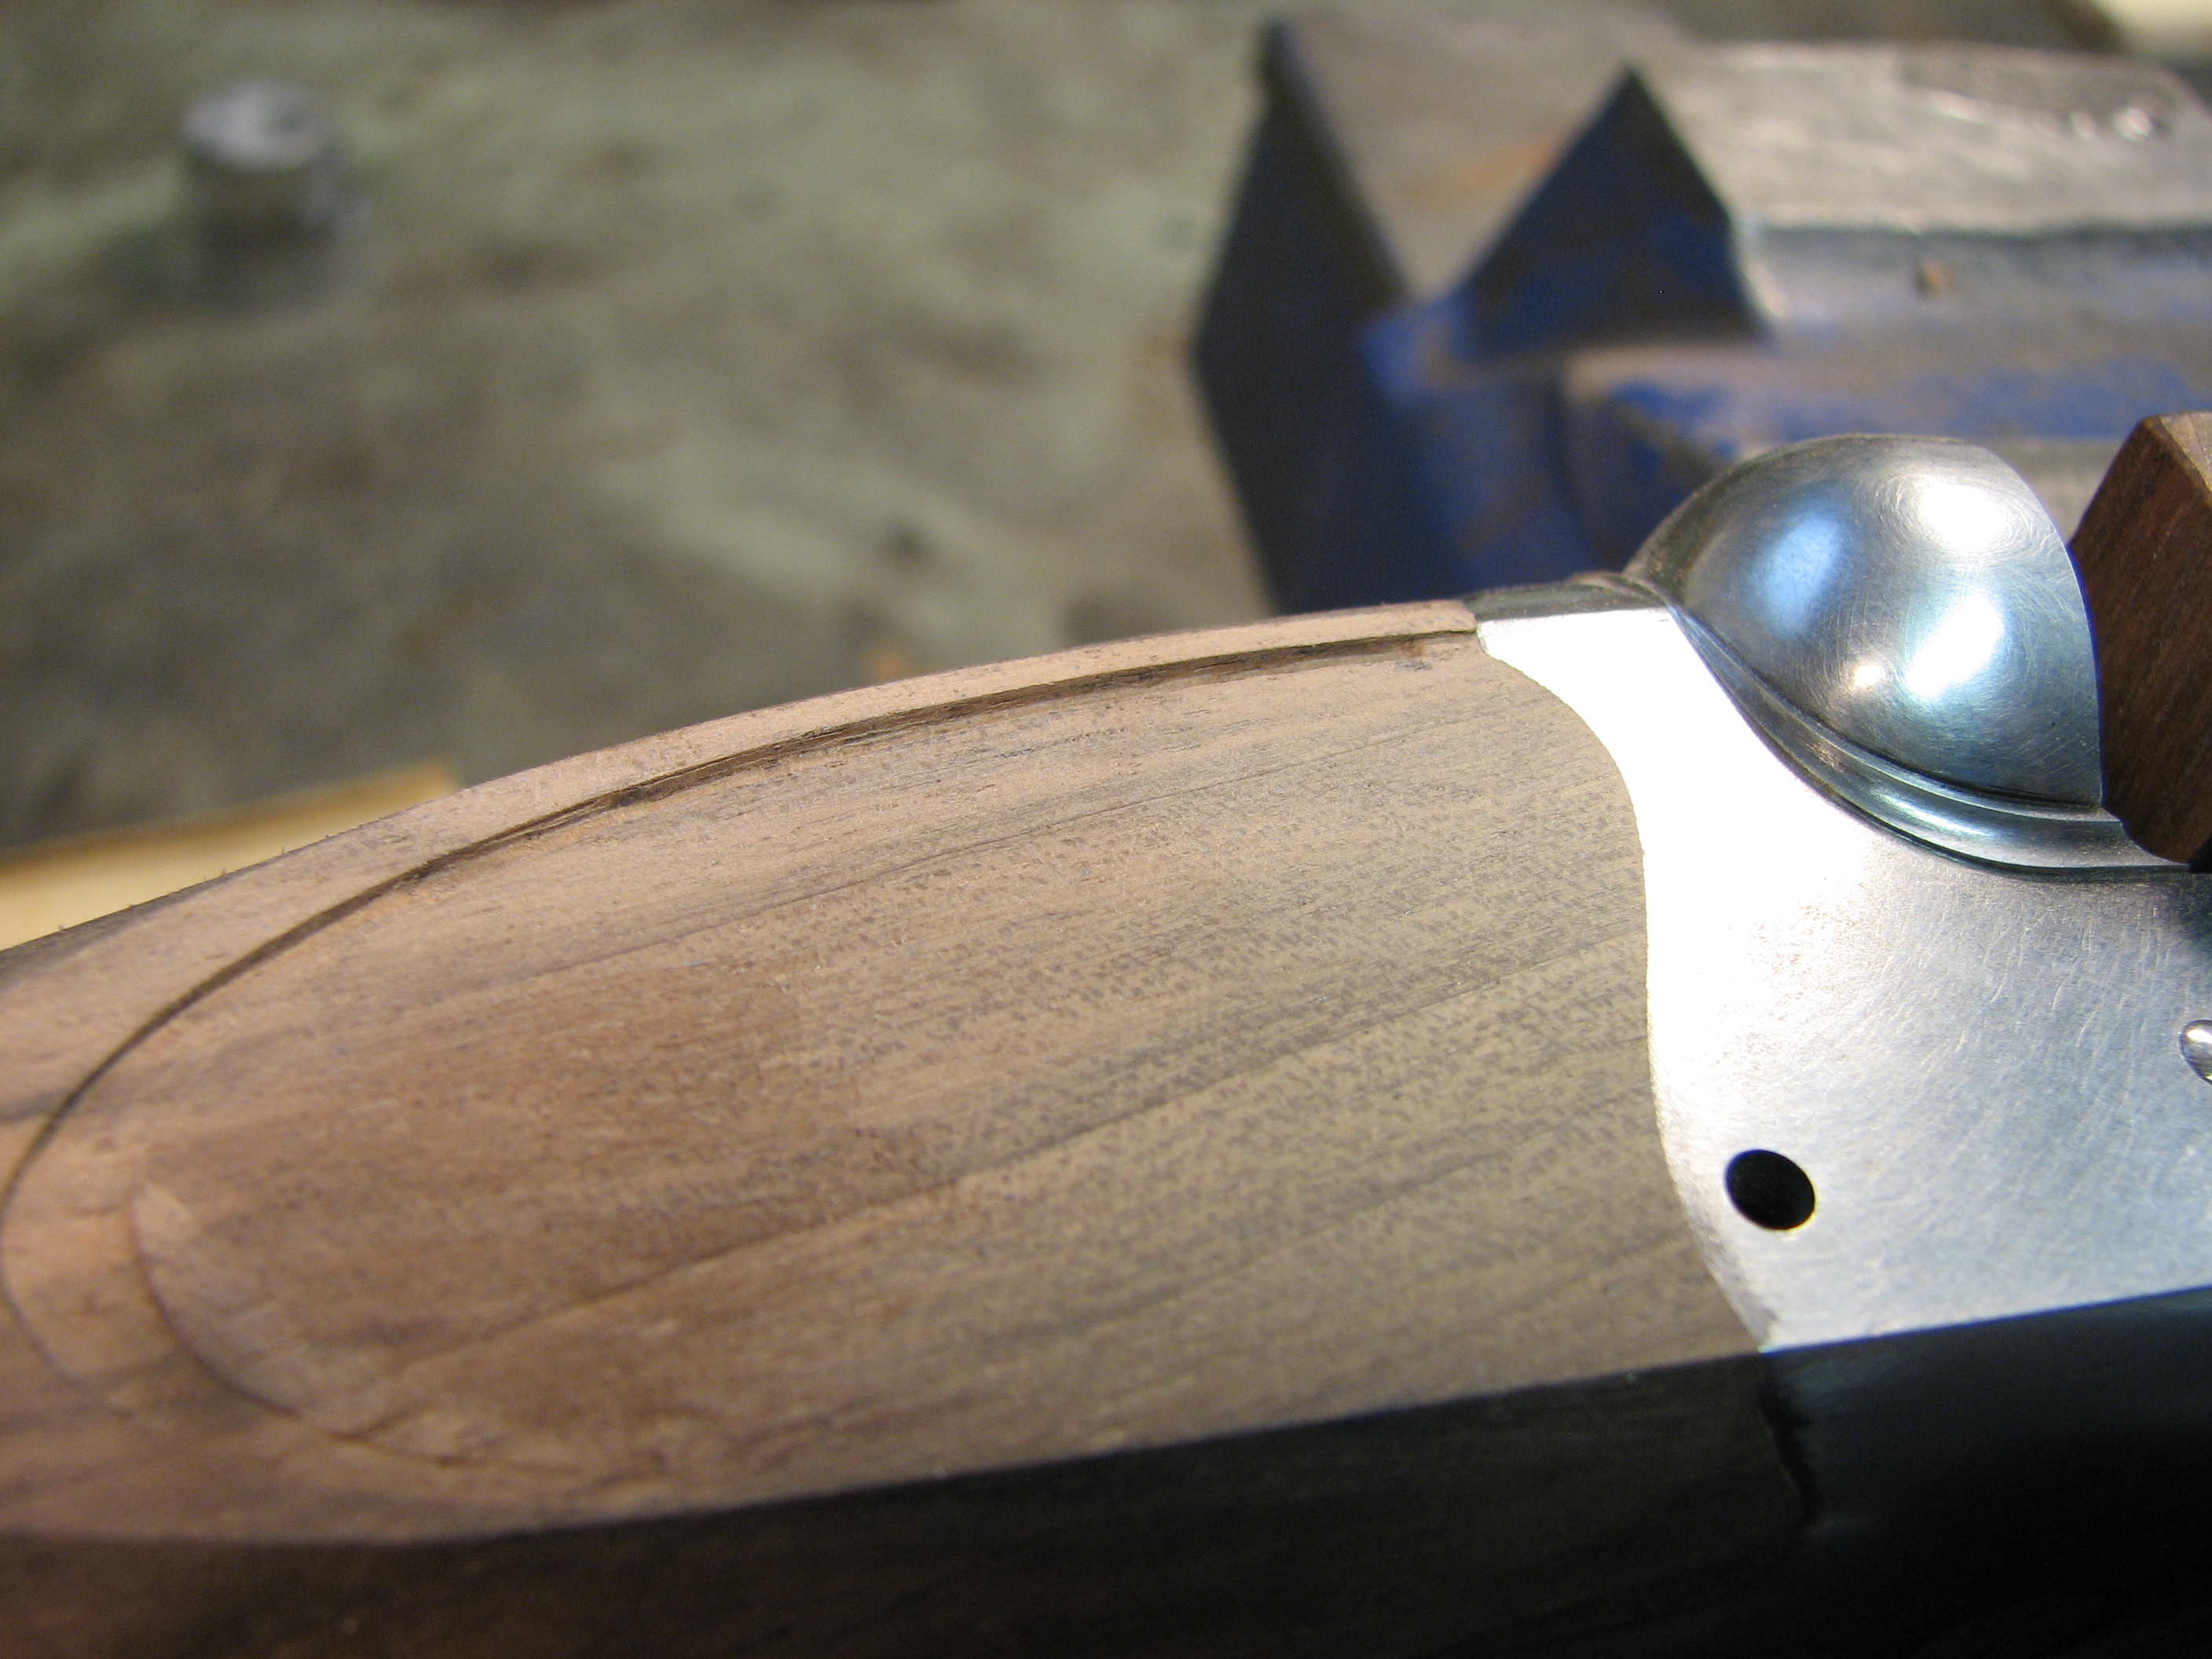
Here are a couple of photos of the bolt bore area. Tell me more about Philadelphia "quality".


With the barrels and frame rejointed, refitting and shaping the forend iron was next. But before that, the internal finish of the forend iron needed to be addressed, since the sides of the forend iron looked like they were cut on a table saw with a dull blade.
Before:


The iron was refit and the "shoe" area was reshaped using chisels and scrapers.


The forend gap cover and its associated parts were made and fit.


Blanking out the new toplever


I made a new top rib that is flat on its top surface and narrower than original. This was done so that the portion of the stub rib that meets coves around the fences could be used as a styling element. With the barrels closed the coves appear to actually extend over the barrels.


The forend tip blanked out:

And finished:


The escutcheon and screw that hold the forend tip in place:

The forend iron screw escutcheon:


The area inside the raised "trim" won't go to waste. The number 35 (a number of personal significance to the owner) will reside there, in raised figures, made from .020" thick nickel sheet. The numbers were cut on my pantograph mill using a shop-made 12x pattern. Being round and operating in rotary fashion, the cutters leave radiused inside corners, which I sharpened-up by hand after machining.


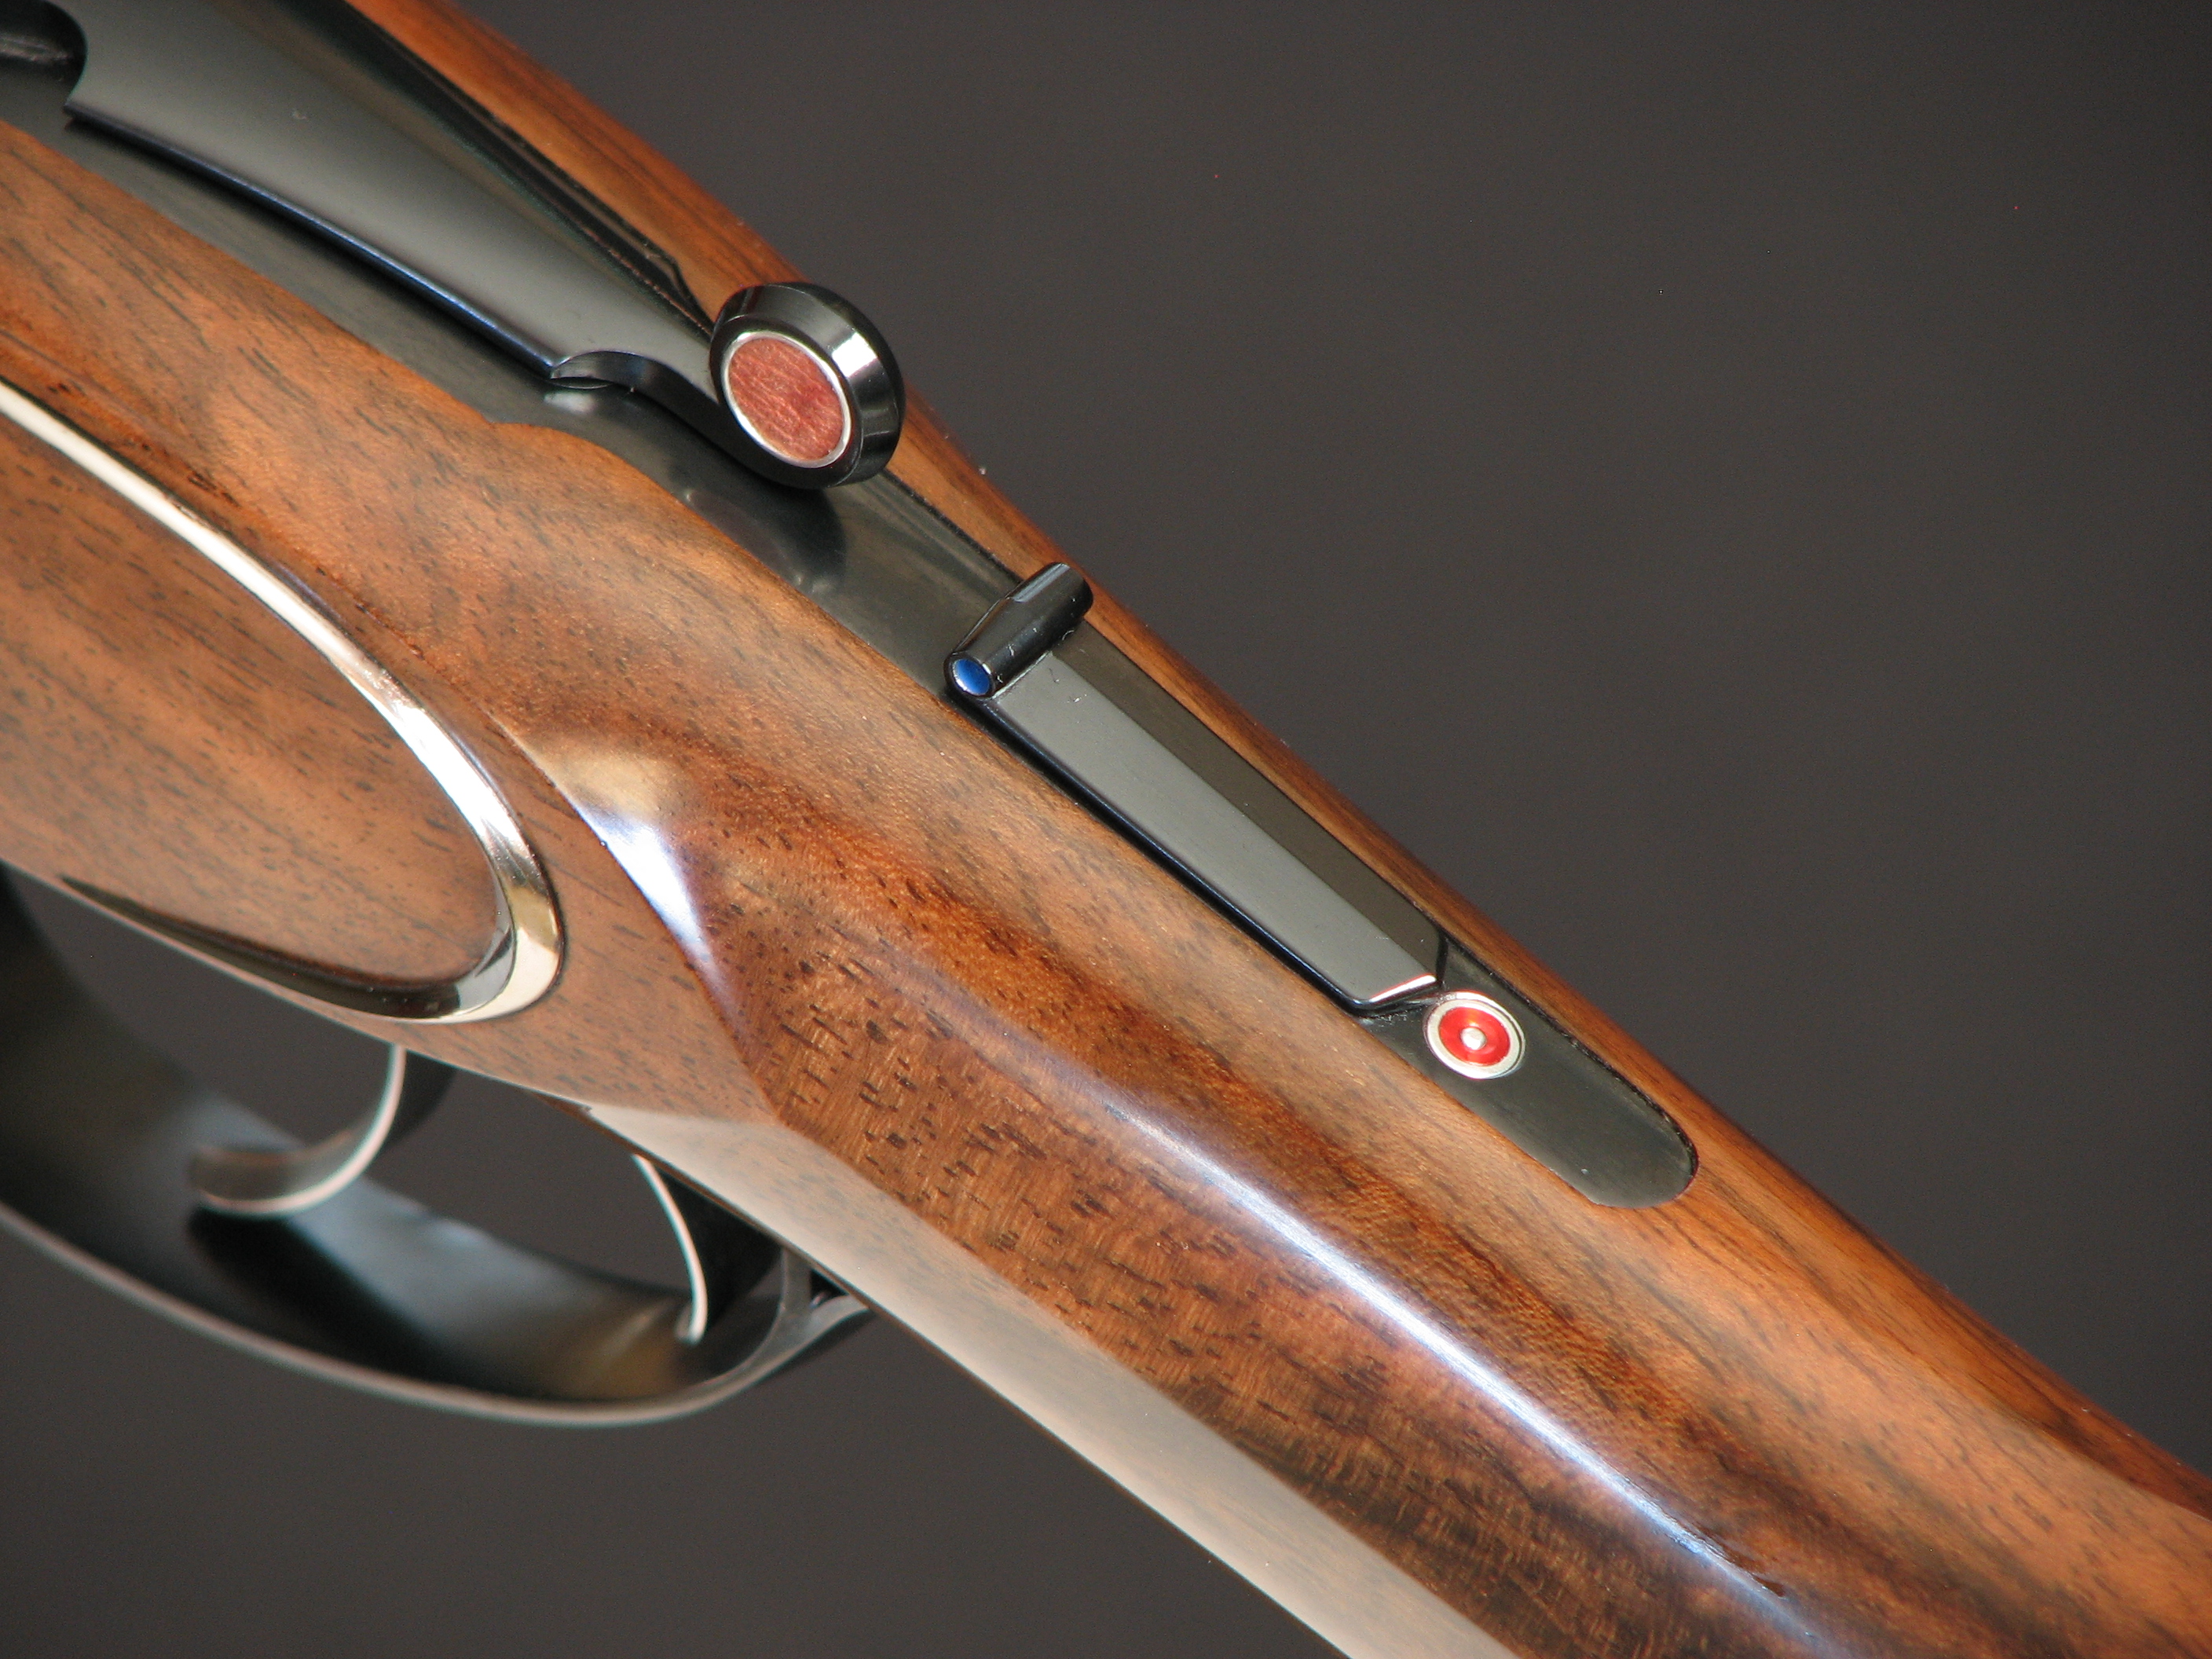
Rather than using any sort of marking for the "safe" position of the safety slide, it was decided to use an indicator for the "ready", or "fire", position. This is the part that will serve that function. It's pocketed into the top strap.

The "trim pieces" that will frame the stock cheeks. They are cut out and filed up by hand from 1008.


Rather than checkering (of which there will be none on this project), the toplever's thumb pad uses a leather insert with a bright finished surround.

I did not photograph many of the other parts as I made them because it would be redundant. The making of triggers, triggerguards, safety slides, etcetera, has all been covered here before.
Here is the gun wearing its pattern stock and forend. In keeping with the automotive styling theme, there are no exposed screws on the gun. The triggerplate screw is hidden under a cover that is retained by the triggerguard, there are no triggerguard screws (no, I'm not showing how I did it), and the breechscrew is hidden by the toplever. The hole for the hand screw is welded shut and there is a threaded lug on the tang to receive the screw. The added hand screw lug also creates a much larger bearing surface in an area of the inletting where this is sorely lacking.


The recoil pad is covered in black kangaroo and hand-stitched around its periphery, using a modified saddle stitch. The contrasting thread color was chosen to key to the color of the Turkish walnut blank with which I will stock the gun. Yes, the stock's crease continues into the rubber of the pad and yes, it was a bastard to do.


Here is the blank I will be using to stock the gun.

Here are some photos of the interior of the action. The finish on the triggers, sears, safety block and hammers is called "gratte" and is quite time-consuming to complete. The triggerbox and the "floor" of the triggerplate are frosted, the verticals polished and the edges beveled. The triggers are handmade and pivot on a .100" diameter screw rather than the original .077" diameter drift pin. This modification is standard-operating-procedure for any Fox-based custom project. The pin that retains the safety detent spring is also no longer a drift pin. It is a self-locking pin that locks to the safety blade under pressure from the detent spring. It is impossible for the pin to walk out in either direction. This is all done because I like things to look as good on the inside, as they
do on the outside, which can be a challenge when the mechanism(s)
you're working with are about as complex as a prison shiv and, in stock
form, exhibit roughly the same level of craftsmanship.


With the metalwork finished, it came time to stock the gun, a straightforward operation, except for the pocketing of the side trim pieces. You thought they were surface-mounted, didn't you?


Note the step at the end of the inlet.


In order to be sure that all of the pieces fit the wood after finishing, all external metal was installed prior to each finish coat, then removed for the wet-sanding of each coat, followed by reassembly before spraying each subsequent coat. This process was repeated sixteen times.
Finishing of the metal came next. The internal parts (hammers, sears, etc.) were polished and finished in what is known as "gratte" as shown in the previous photos and will be left bright. Since the internal space of a gun is roughly analogous to "under the hood" of an automobile, and Bugatti's racing colors have always been blue, I took an unusual (for a gun) approach to the internal finishing.


The number 009 is my sequence number and is cut from the same material as the numbers on the forend escutcheon. How small is it?

The frame flat, breechface and upper surface of the forend iron are also finished in gratte. In this case the gratte is blued over, yielding a finish that appears almost as carbon fiber.


The finished gun:


Here are some photos from the owner, who wasted no time in putting the gun to work.


Please understand that what I say is said with the utmost of respect: You, my man, are a freak. That is utterly astounding workmanship and very aesthetically pleasing to boot. My hat is off to you!
ReplyDeleteThank you for the compliments.
DeleteLovely gun Dewey. How is my side lever Duesenberg gun coming along please?
ReplyDeleteEveryone interested in double guns should be reading your blog.I wish I had been able to read these blogs 50 years ago.
ReplyDeleteThat Bugatti Fox is gonna be killer. I can’t wait to see the finished gun.
ReplyDeleteMy old man bought me a brand new Ruger Red Label when I graduated from VPI. I thought that was an extravagant gift but this thing is over the top.
ReplyDeleteMr vicknair, your work is truly amazing and inspiring. It was a great pleasure to speak with you today in regards to the missing screw on the Spanish sxs I’m working on. And your follow up call was very much appreciated. You sir are a good man. Thank you for your time today. Be well, Paul from nc
ReplyDelete