Wednesday, March 23, 2016

Driven Pheasant and Red-Legged Partridge...In the US.

A couple of Saturdays ago, I took a rare day off to take my friend and client Henry Pitts up on his offer to experience a real English driven bird shoot.  No, it wasn't in the UK but the air travel and customs hassles were probably the only things missing from the experience.  Now, I know that there are a few places in the US that advertise "real English driven shooting" but this crew truly delivered the goods with four separate drives in nicely varied terrain, lots of tall birds to test even the best wingshooter's mettle and a fantastic catered lunch and libations afterward in the beautifully appointed dining room of the facility's restored 1880's farmhouse.  It was the last driven shoot of the season (which runs from October to March), nine guns were in attendance along with a few more dog handlers taking the opportunity to work their wonderful pups.  I think Henry even arranged English weather for the occasion.  It was a chilly, damp and overcast day just right for the birds.  About half way through we broke for "elevenses" (sorry, no alcohol until after the shooting) to allow the guns and dogs to have a little break and recharge for the second half of the shooting day.  It was a most exciting day of shooting, and watching the dogs work was in itself worth the trip.  Henry and his son David have been to more than a few driven shoots in the UK and have tailored their enterprise to offer American shooters the very same experience.  As I said, this is as close as one can come without traveling to the UK, not a mere tower or circle shoot (although the club does offer those also).  What is the name of this 1100 acre wingshooter's playground?  The club is called First Mine Run, located in White Hall, Maryland.  The driven shoots are not specifically listed on their website so use the contact page to get the schedule for the upcoming season.  Their website is http://www.firstminerun.com/
If you've ever wanted to shoot driven birds the way it's done in England, but would rather not travel overseas with your prized shotguns then I would heartily suggest that you give FMR a go.  An added bonus is that the cost is a fraction of what a UK shooting holiday would cost.  FMR also offers Sporting Clays, Five Stand and quite a few other options for wingshooters.

Here are some photos from the driven shoot.

Thursday, March 17, 2016

Repairing a Thomas Newton SLE

Here is a Thomas Newton sidelock ejector gun.  The strikers were both broken and it suffered from the butchered, buffed and heat-blued screws that so many self-styled gunsmiths are so fond of.  Here's a tip for all of you, widening slots, rounding the edges, smearing the engraving with a buffing wheel, and heat-bluing screws DOES NOT make people think that you're and "English trained gunsmith", it merely makes you look like an incompetent twat.

The new strikers and the new striker retainer and lockplate screws.  The screws will be case hardened and lacquered, as they should be.

Repairs to a Mortimer & Son Hammer Gun

Here is a sleek Mortimer hammer double from the 1880s with an unusual safety.  Like many old guns, this one has suffered at the hands of one or more bodgers in the past.  The head of the right hammer screw had been snapped off, leaving the shank in the tumbler, the screw slots have had the obligatory damage inflicted upon them and the safety allowed the right lock to fire when applied.
Here we go.

To remove the broken screw from the tumbler, I drilled the screw to the root diameter of the threads (6 BA) and then turned the remaining piece out using a sharp tool.  The new screws were all made in the usual fashion.

Next up were the toplever screw and the breech screw.  The toplever screw was also broken off but the two threads under the head were still holding the head on.  Removal of the broken shank was via the same procedure described above.

 The new toplever screw ready to be engraved.

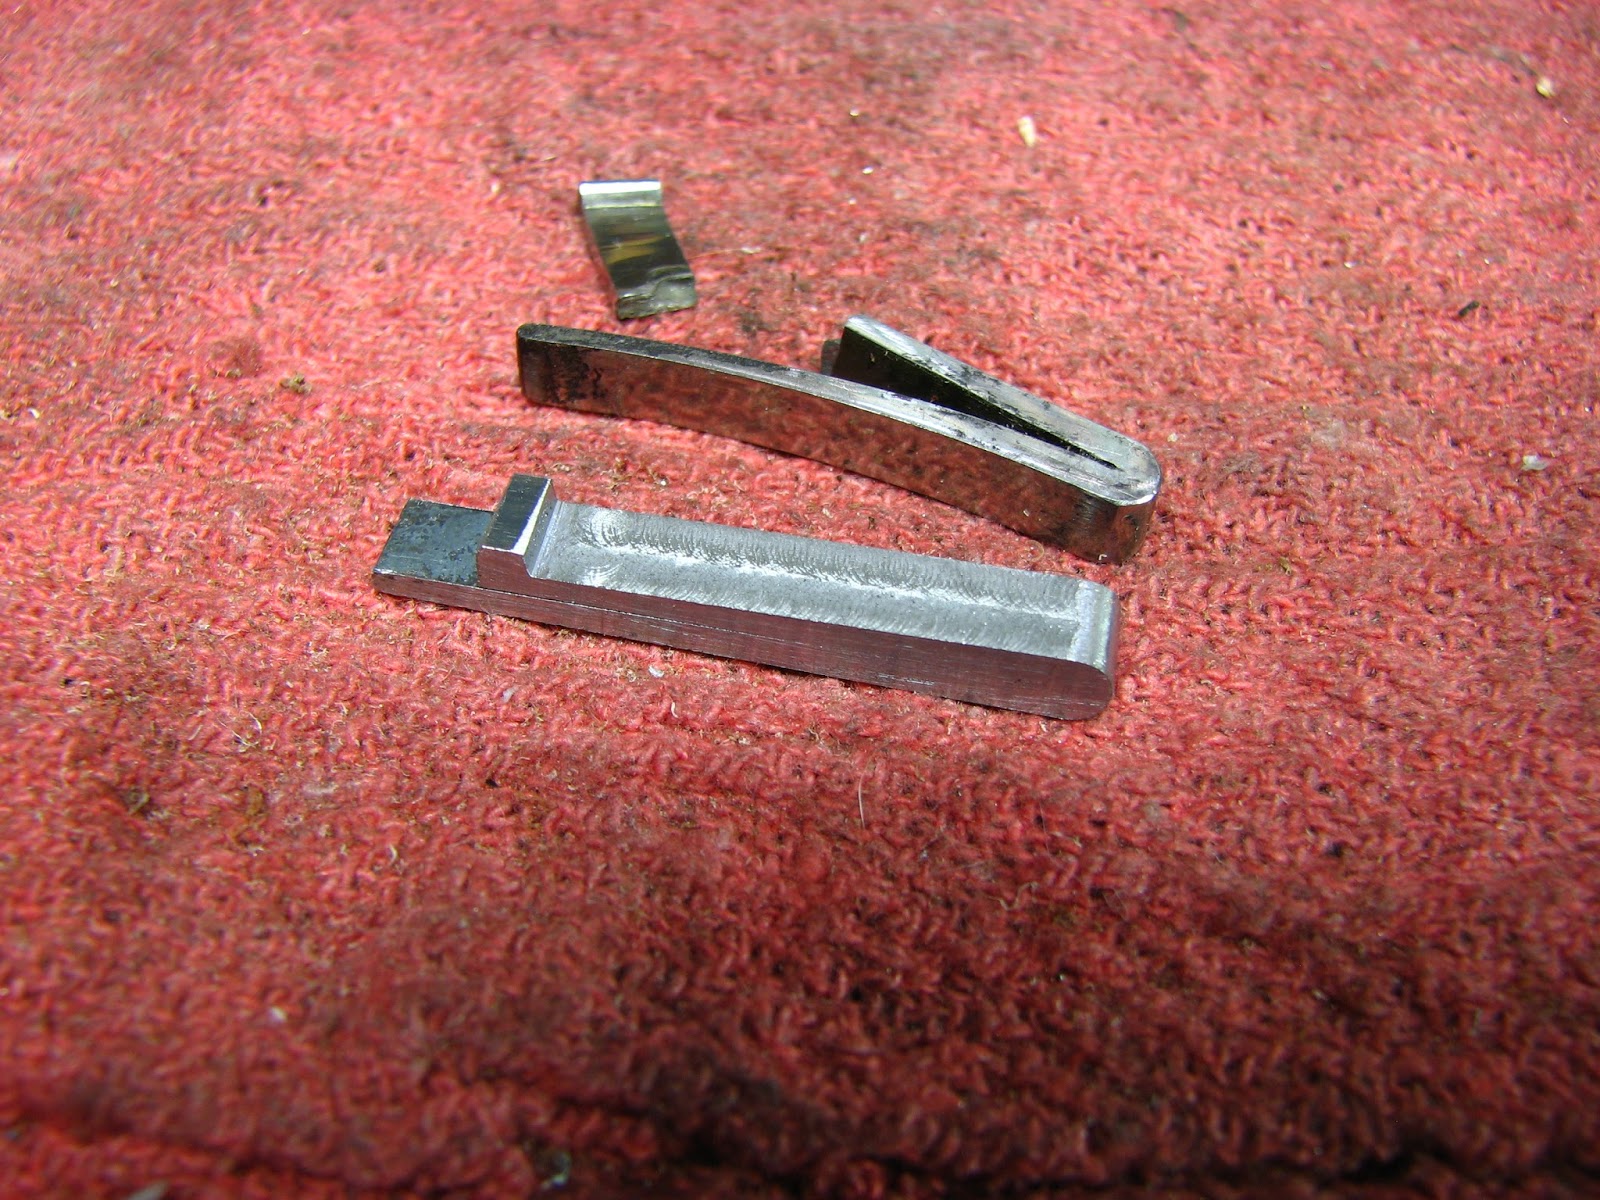
 The breech screw and guard screws in this gun have heads that taper and fit into mating tapers similar to a wood screw.  This means that the slot gets shorter in length as the depth increases.  When a wanna-be gunsmith uses a screwdriver that "fits" the slot lengthwise at the top (but not the bottom) this is what happens.

To correct the damage, I machined a new seat for the screw head.  It is now a straight-sided, shouldered seat but since I'm making new screws that is of no consequence.  Normally I would have kept the tapered seat but the damage was so extensive that once the hole "cleaned up", the new screw head would have intruded into the engraving on either side.

The guard screws and guard had suffered the same fate.  In this instance I was able to salvage the holes while keeping the same type of screw head.


Lest you think that repairing the guard screws was as simple as machining the screw seats, making news screws, indexing them, contouring them, engraving them and case hardening them, fear not.
The screw holes in the stock were in fact, made of glue.  Apparently they were stripped out at some point so the hack did what anyone worthy of the title would do, use glue to make new threads.
I drilled the holes, turned threaded inserts (2 BA) and secured them with epoxy.

Here is one of the new guard screws.  Thin gunmaker slots are used throughout in order to discourage tampering.  The slot is deeper than the lighting of the photo makes it appear.

Here are photos of the finished screws.  These photos were taken after repair of the safety and final assembly.  I will detail the design of the safety after.

A safety on a hammer gun (with rebounding locks, no less) is very uncommon.  This safety is even more unusual.  It consists of a vertical lever which is located at the front of the triggerguard that engages a sliding plate inside the action (on top of the triggerplate).  This vertical lever is pivoted at the bottom, its movement translating into fore and aft movement of the internal plate.  In the forward position, the internal plate engages slots in the rear of the trigger blades, thus blocking their movement.  When the safety is pulled to the rear, the plate also moves to the rear, disengaging the trigger blades and allowing their movement.  The internal plate has a stud that serves to block its movement back to the "safe" position by the raised right trigger blade when the right barrel is fired.
It's a fairly cumbersome device to use as the "safe" and "fire" positions seem counter-intuitive.  Safe is forward and fire is to the rear.


Saturday, February 13, 2016

A Merkel Model 130E...

...That needs some help.
Here is a very nice Merkel Model 130 sideplated boxlock ejector with intercepting sears, side clips and articulated front trigger that has suffered some ham-fisted gunsmithing in the past.  It has been the victim of the kind of "restoration" that is practiced by "gunsmiths" (not gunmakers, there is a vast difference) on both sides of the pond.
One of the most offensive hallmarks of this kind of work is the practice of buffing the screw heads, rounding off the edges so that they no longer properly mate with the edges of their holes and partially obliterating the engraving on them.  As if this weren't bad enough, the screws are then heat blued, drawing further attention to the poor craftsmanship of the "restorer", not to mention the almost obligatory damaged slots.  How anyone that actually charges money can perform this kind of work and think that it looks acceptable is far beyond my ability to comprehend.  It has been said that the incompetent don't know that they are so, exactly because of the fact that they are, incompetent.   I guess that ignorance truly is bliss.  Behold,
The triggerplate screw...
and the guard screws
I will not go into great detail regarding the making of the screws and mainspring because I've covered both of those subjects in great detail elsewhere in this blog.  I will mention that the screws in this particular gun are all possessed of proprietary threads which made me wish that my lathe had a quick-change gearbox instead of change gears (ugh).
The new screws.
The mainspring, forged and rough machined.
The finished mainspring.

Here are a couple photos of the entire gun.  It is number one of a pair, if anyone has number two, please contact me.  Clearly this is a fine example of Gebruder Merkel's high quality gunmaking.  It was built in 1911.  The beavertail forend is not original and appears to have been made by the same gunsmith nonpareil that did the other work on the gun.  Hopefully the owner will have this rectified in the future.