For those of you who might be interested in such things, I've created a separate blog to cover the watchmaking work.
Showing posts with label Other. Show all posts
Showing posts with label Other. Show all posts
Monday, December 4, 2023
Saturday, February 25, 2023
Bored of Looking at Gun Work? Alright Then...
What the hell is a classic mechanical watch doing on a gunsmithing blog, you ask? Two words: precision and craftsmanship. These are two things that should be exercised with religious devotion by any real gunsmith (or anyone who works with their hands). The first, precision, is fairly self-explanatory. Craftsmanship, though, seems to be a bit more "fluid" in its definition among some people. What I'm getting at is, if something this small can be made (and serviced) without marring screwslots, there is no excuse for f**king up the slots on gun screws. If something this small can have mirror-polished surfaces AND sharp edges and corners, there is no excuse for the buffing wheel f**kery that is so commonly visited on gun parts. If something like this can be designed and understood by the mind of (and made by the hands of) man, there is no excuse for the acts of mechanical incomprehension that I see on a regular basis. And, lastly, I like watches and it's my blog.
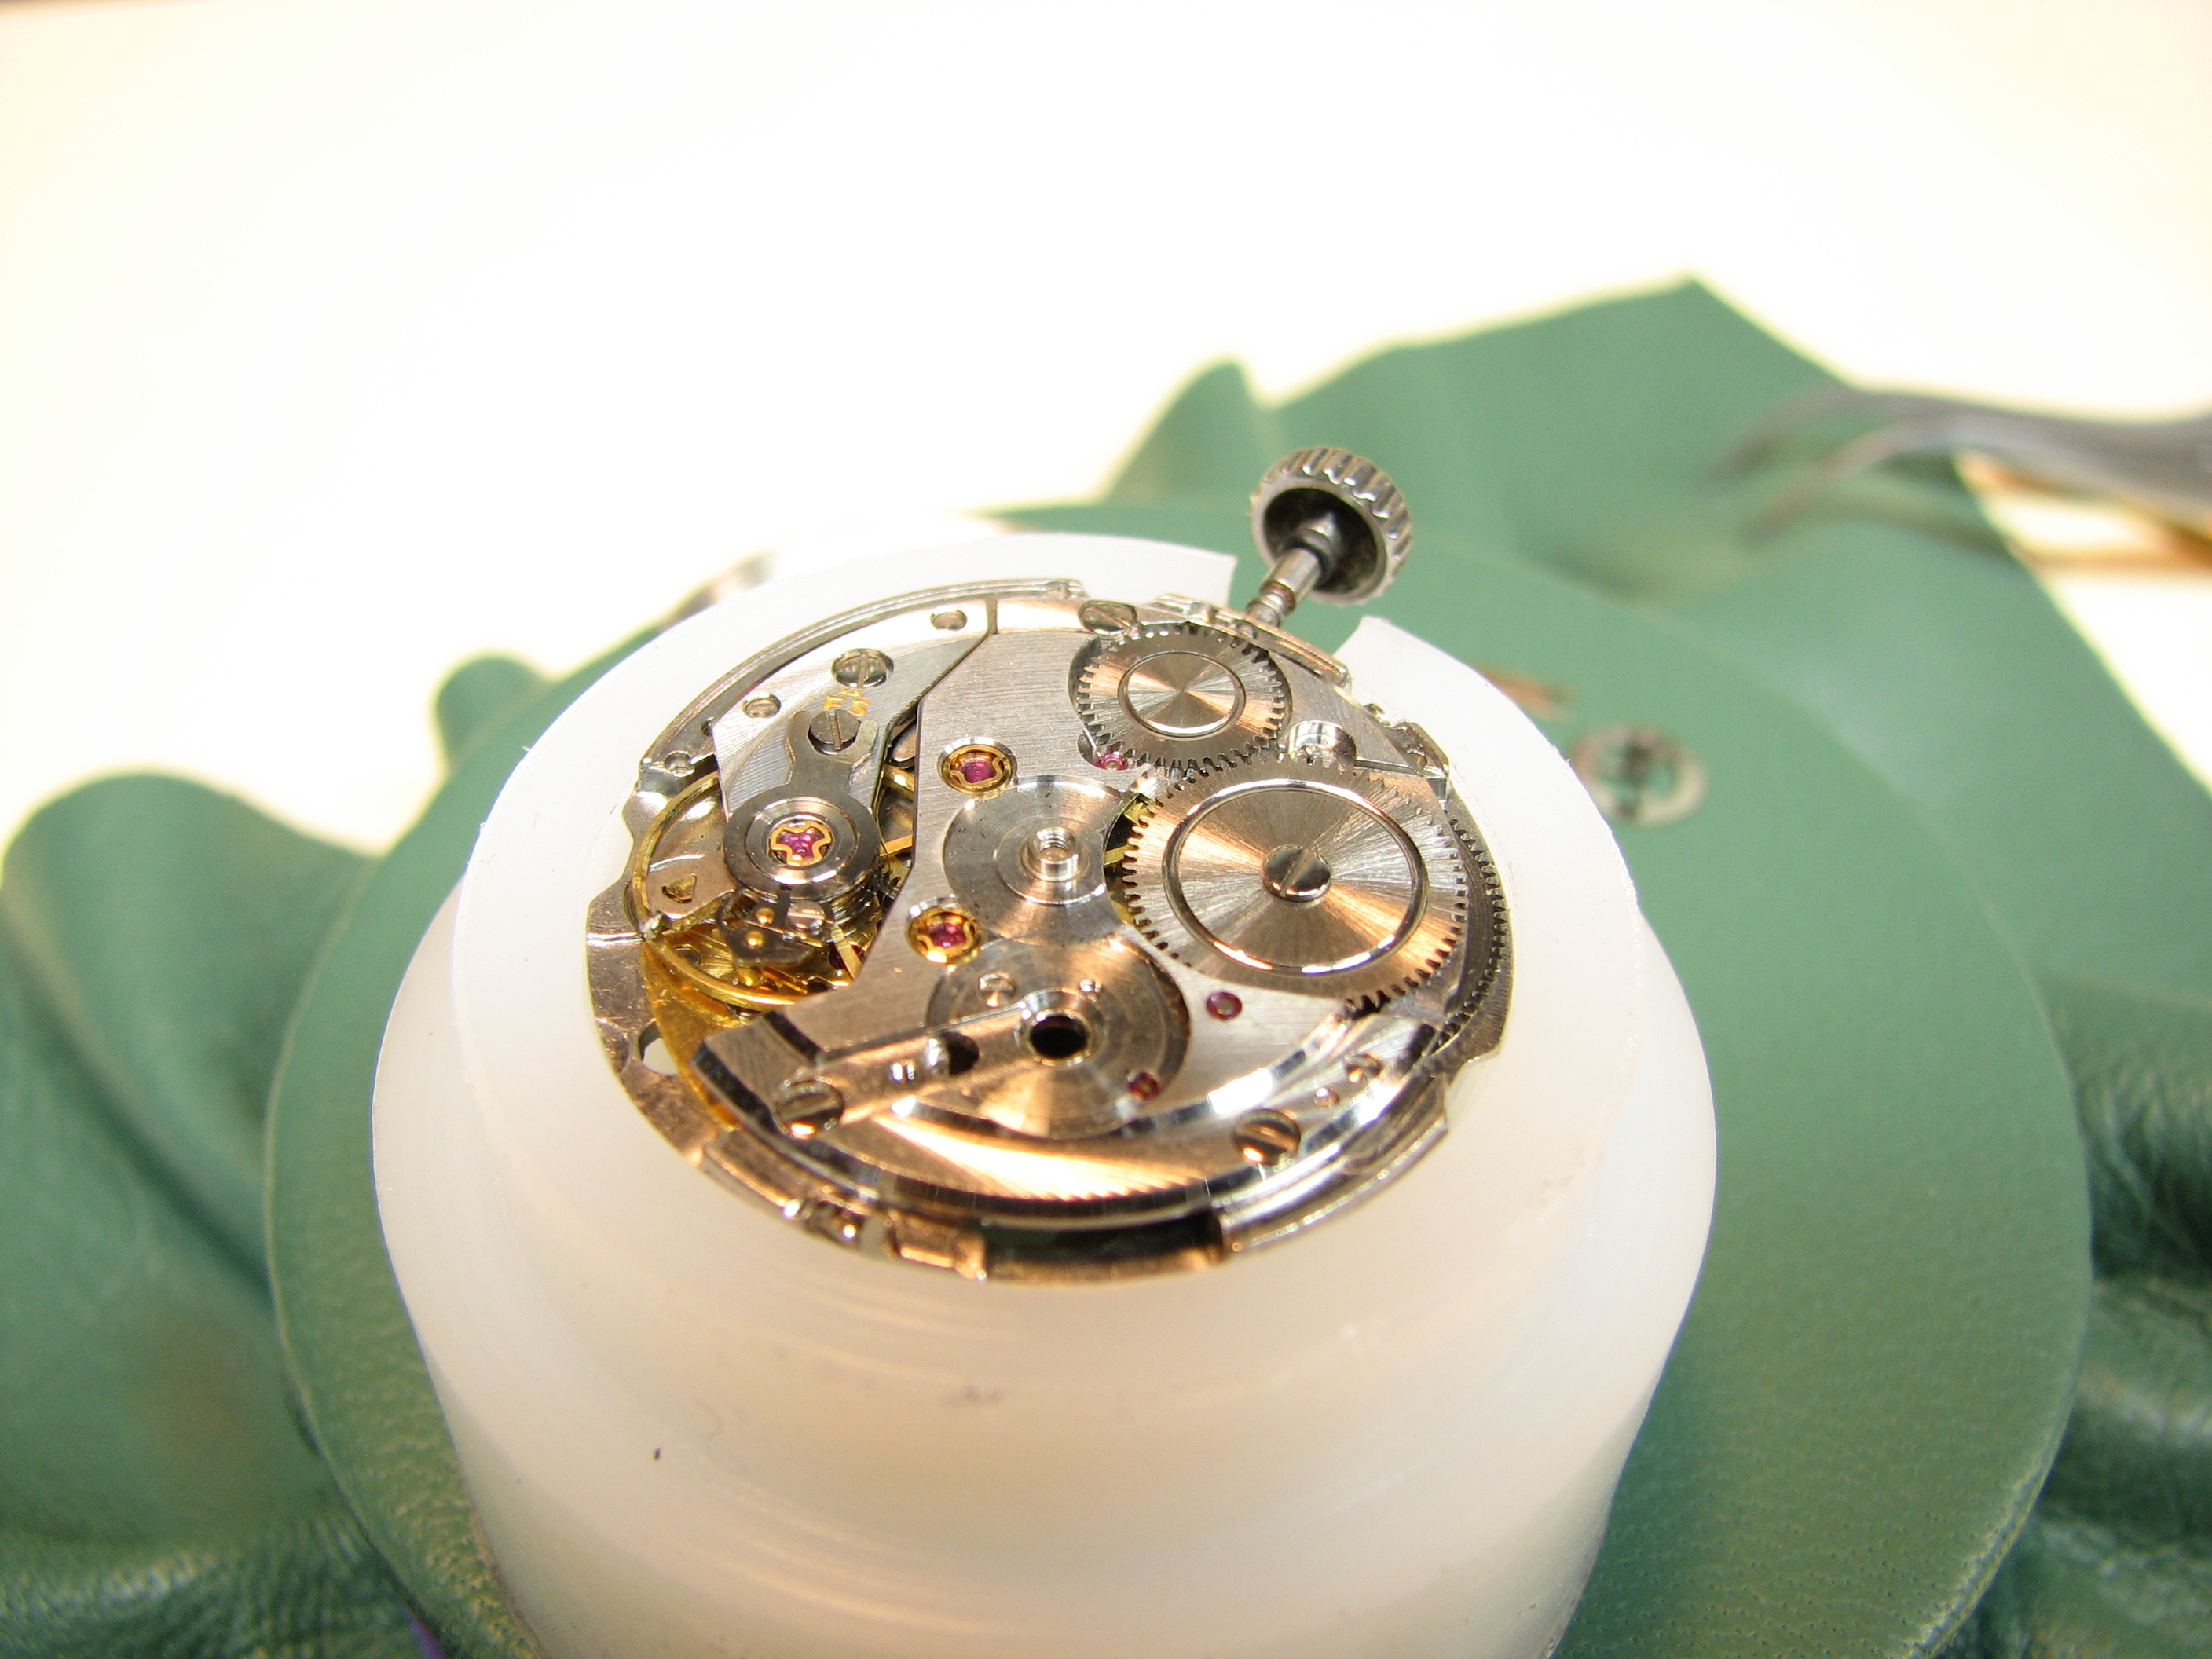
This is a King Seiko (5626-7111), manufactured (for the Japanese domestic market) in December of 1972. As you will see, it came to me in pretty sad shape. The case was pretty beat up, the crystal was broken, many small shards of same made their way to the dial face and, it was not running. Upon disassembly, I discovered no evidence of any prior service being done. Not a mark anywhere, no buggered screwslots and most importantly, the case, while damaged from hard wear, had never felt the corner-rounding, edge-smearing sting of the buffing wheel. Yes, buffing wheel damage caused by the ham-handed is just as common among "watchmakers" as it is among "gunsmiffs". What I did find inside was hardened oil, everywhere. This meant a complete teardown, to the baseplate, and a thorough cleaning before reassembly and lubing, which is only correctly possible during reassembly.
This watch uses Seiko's 5626B movement, which differs from the 5626A in a couple of areas. The first is that the A version uses an externally accessible regulator (through a plug-screwed hole in the case, between the lugs) and the second is that the day/date corrector "star wheel" is steel. In the B movement, the regulator is internally accessible (not really an issue, thanks to the screw-back case of the B-equipped watch, versus the mono block case of the A-equipped version) and the day/date corrector wheel is made of a nylon material. Those are the major material differences, but the A and B also differ in the finish of certain components like the mainspring barrel cover and the pallet fork stanchion. Enough geekery, let's get to it.
Here is the watch, as it arrived. Yikes! Note the deep scratches in the case.


The first thing to do is to remove the movement from the case, which is accomplished by unscrewing the case back, removing the crown/stem and withdrawing the movement from the rear. Then the front bezel is removed using a case opener, followed by the gasket and the crystal/rehaut assembly. Here's what it looked like once disassembled. Not too pretty.


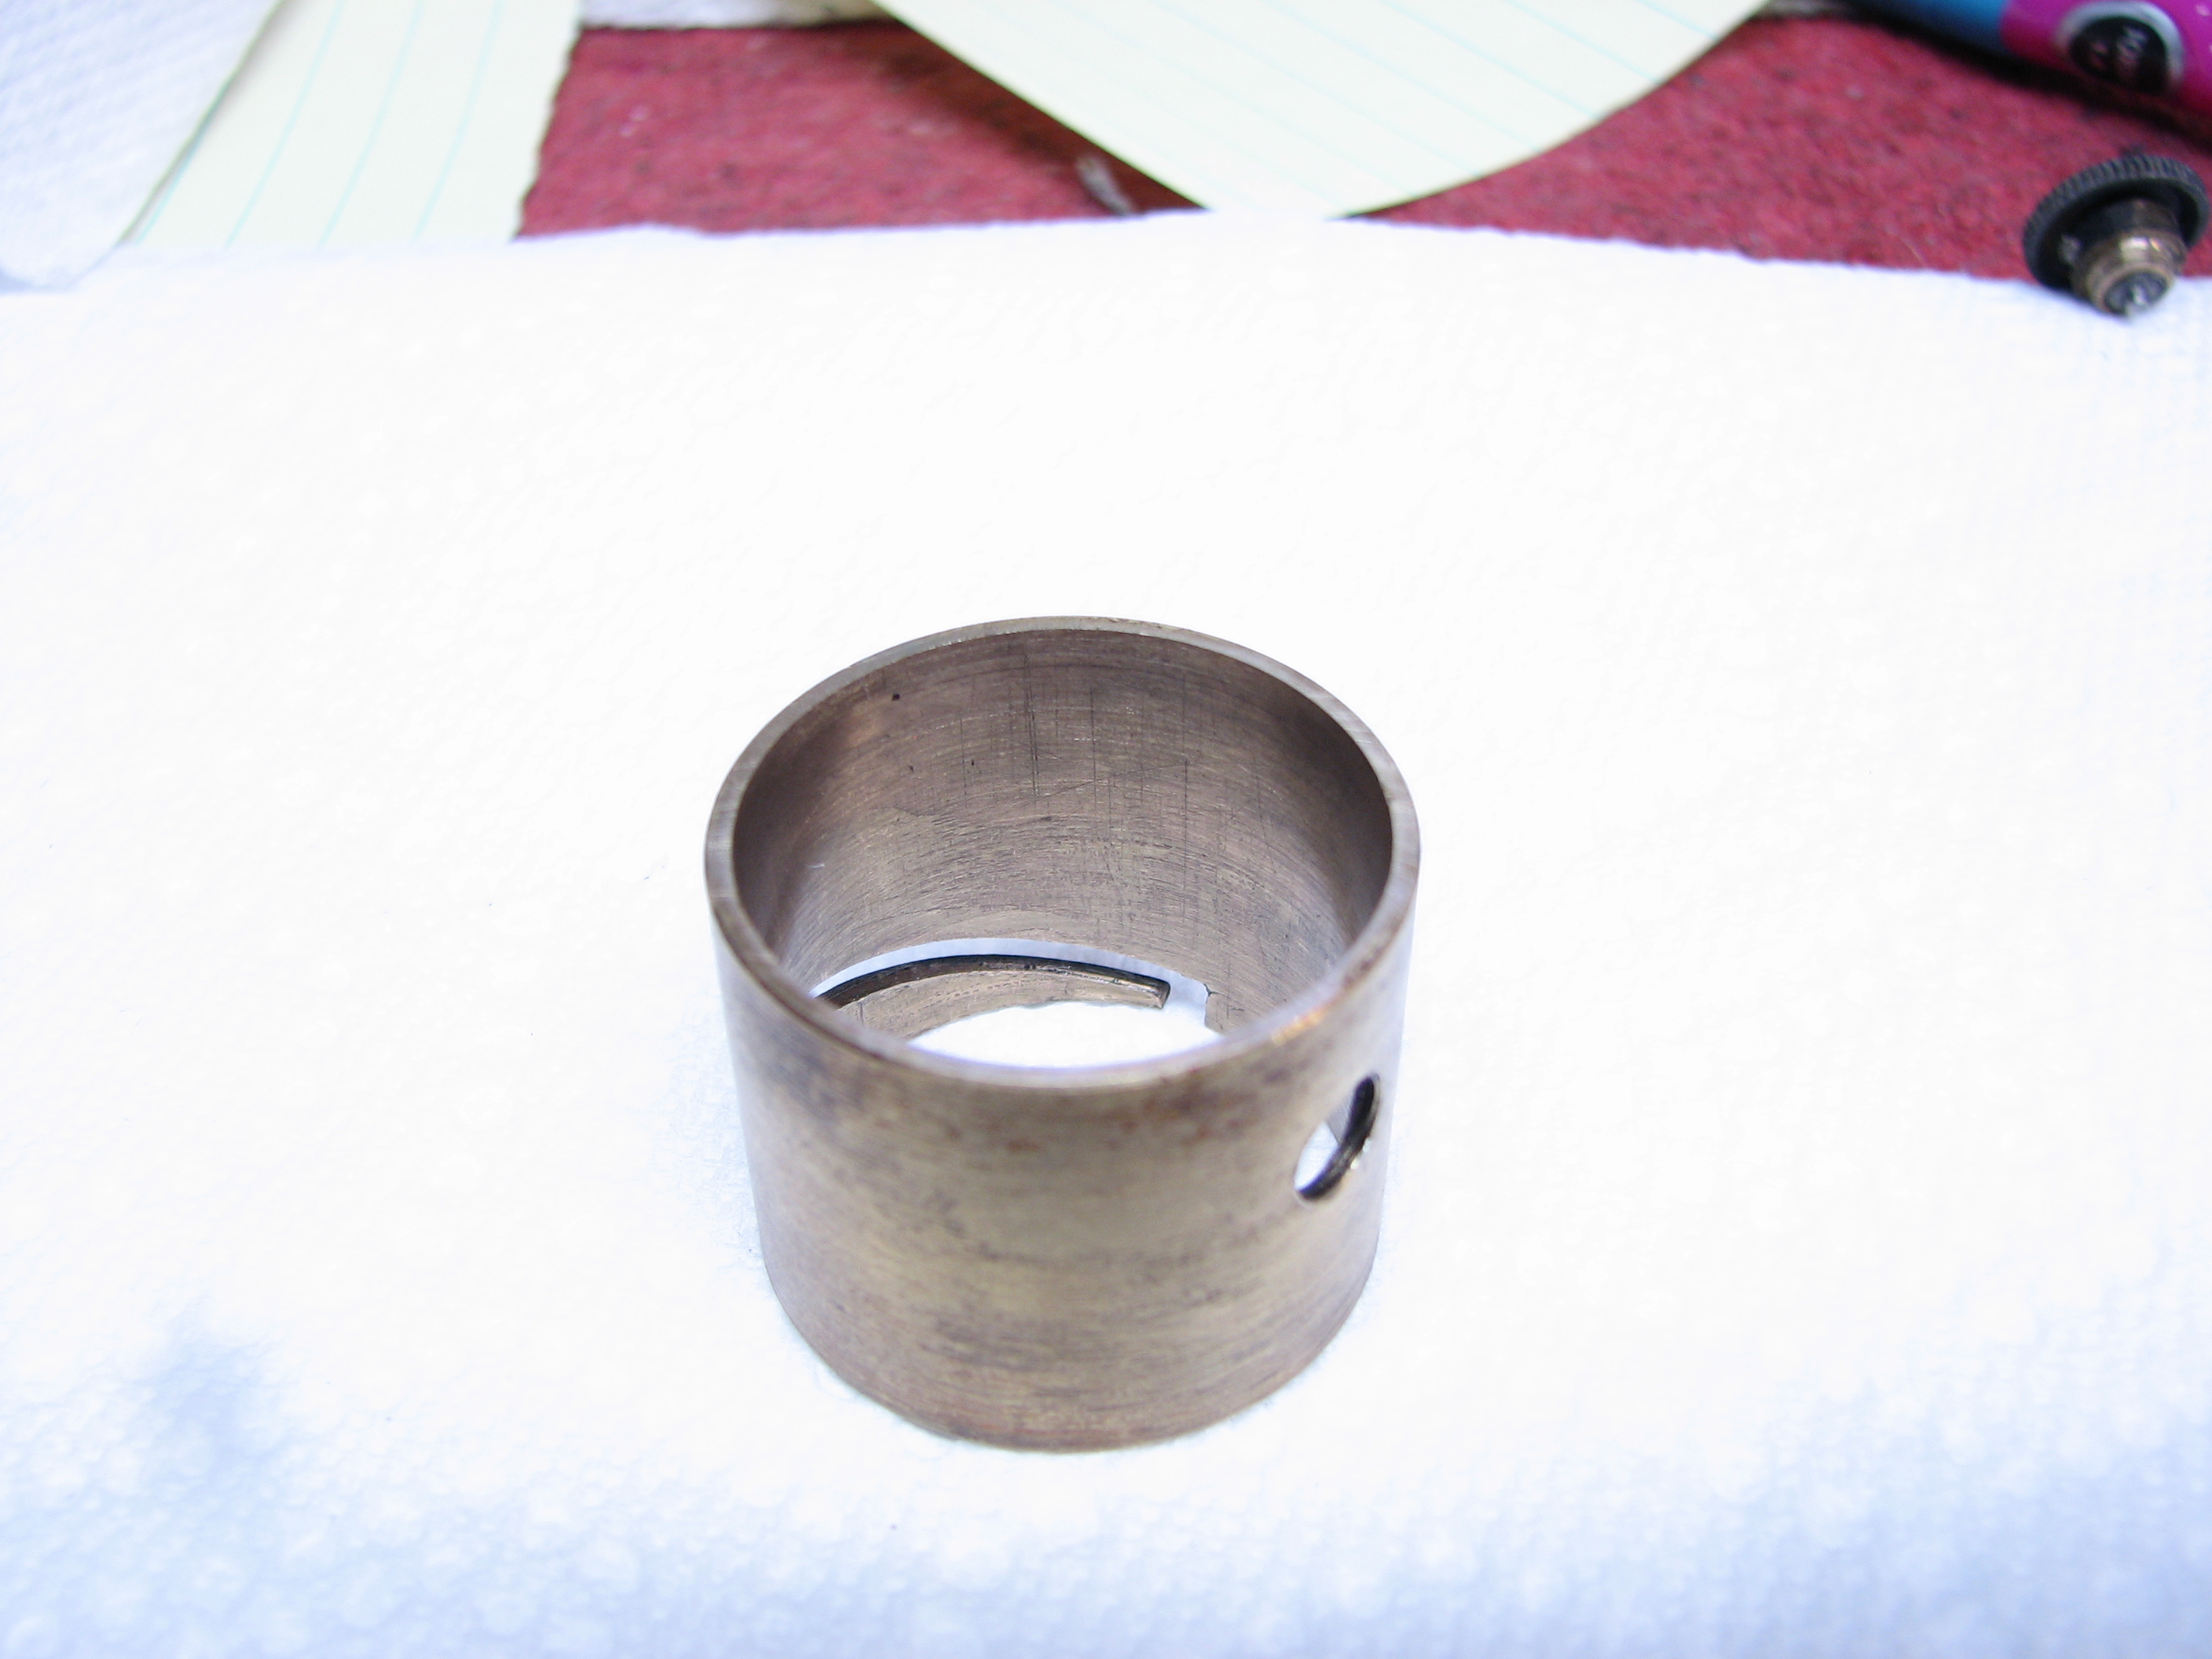
After dropping the case parts in the solvent tank, I began disassembling the movement. The first step is removal of the hands. This is done with a pair of shop-made miniature pry-bars and using a thin poly sheet that prevents damage to the dial surface, as well as containing the hands when released. Then the dial is removed by loosening the two retaining screws on the side of the main plate. This also allows the casing spacer to be removed.


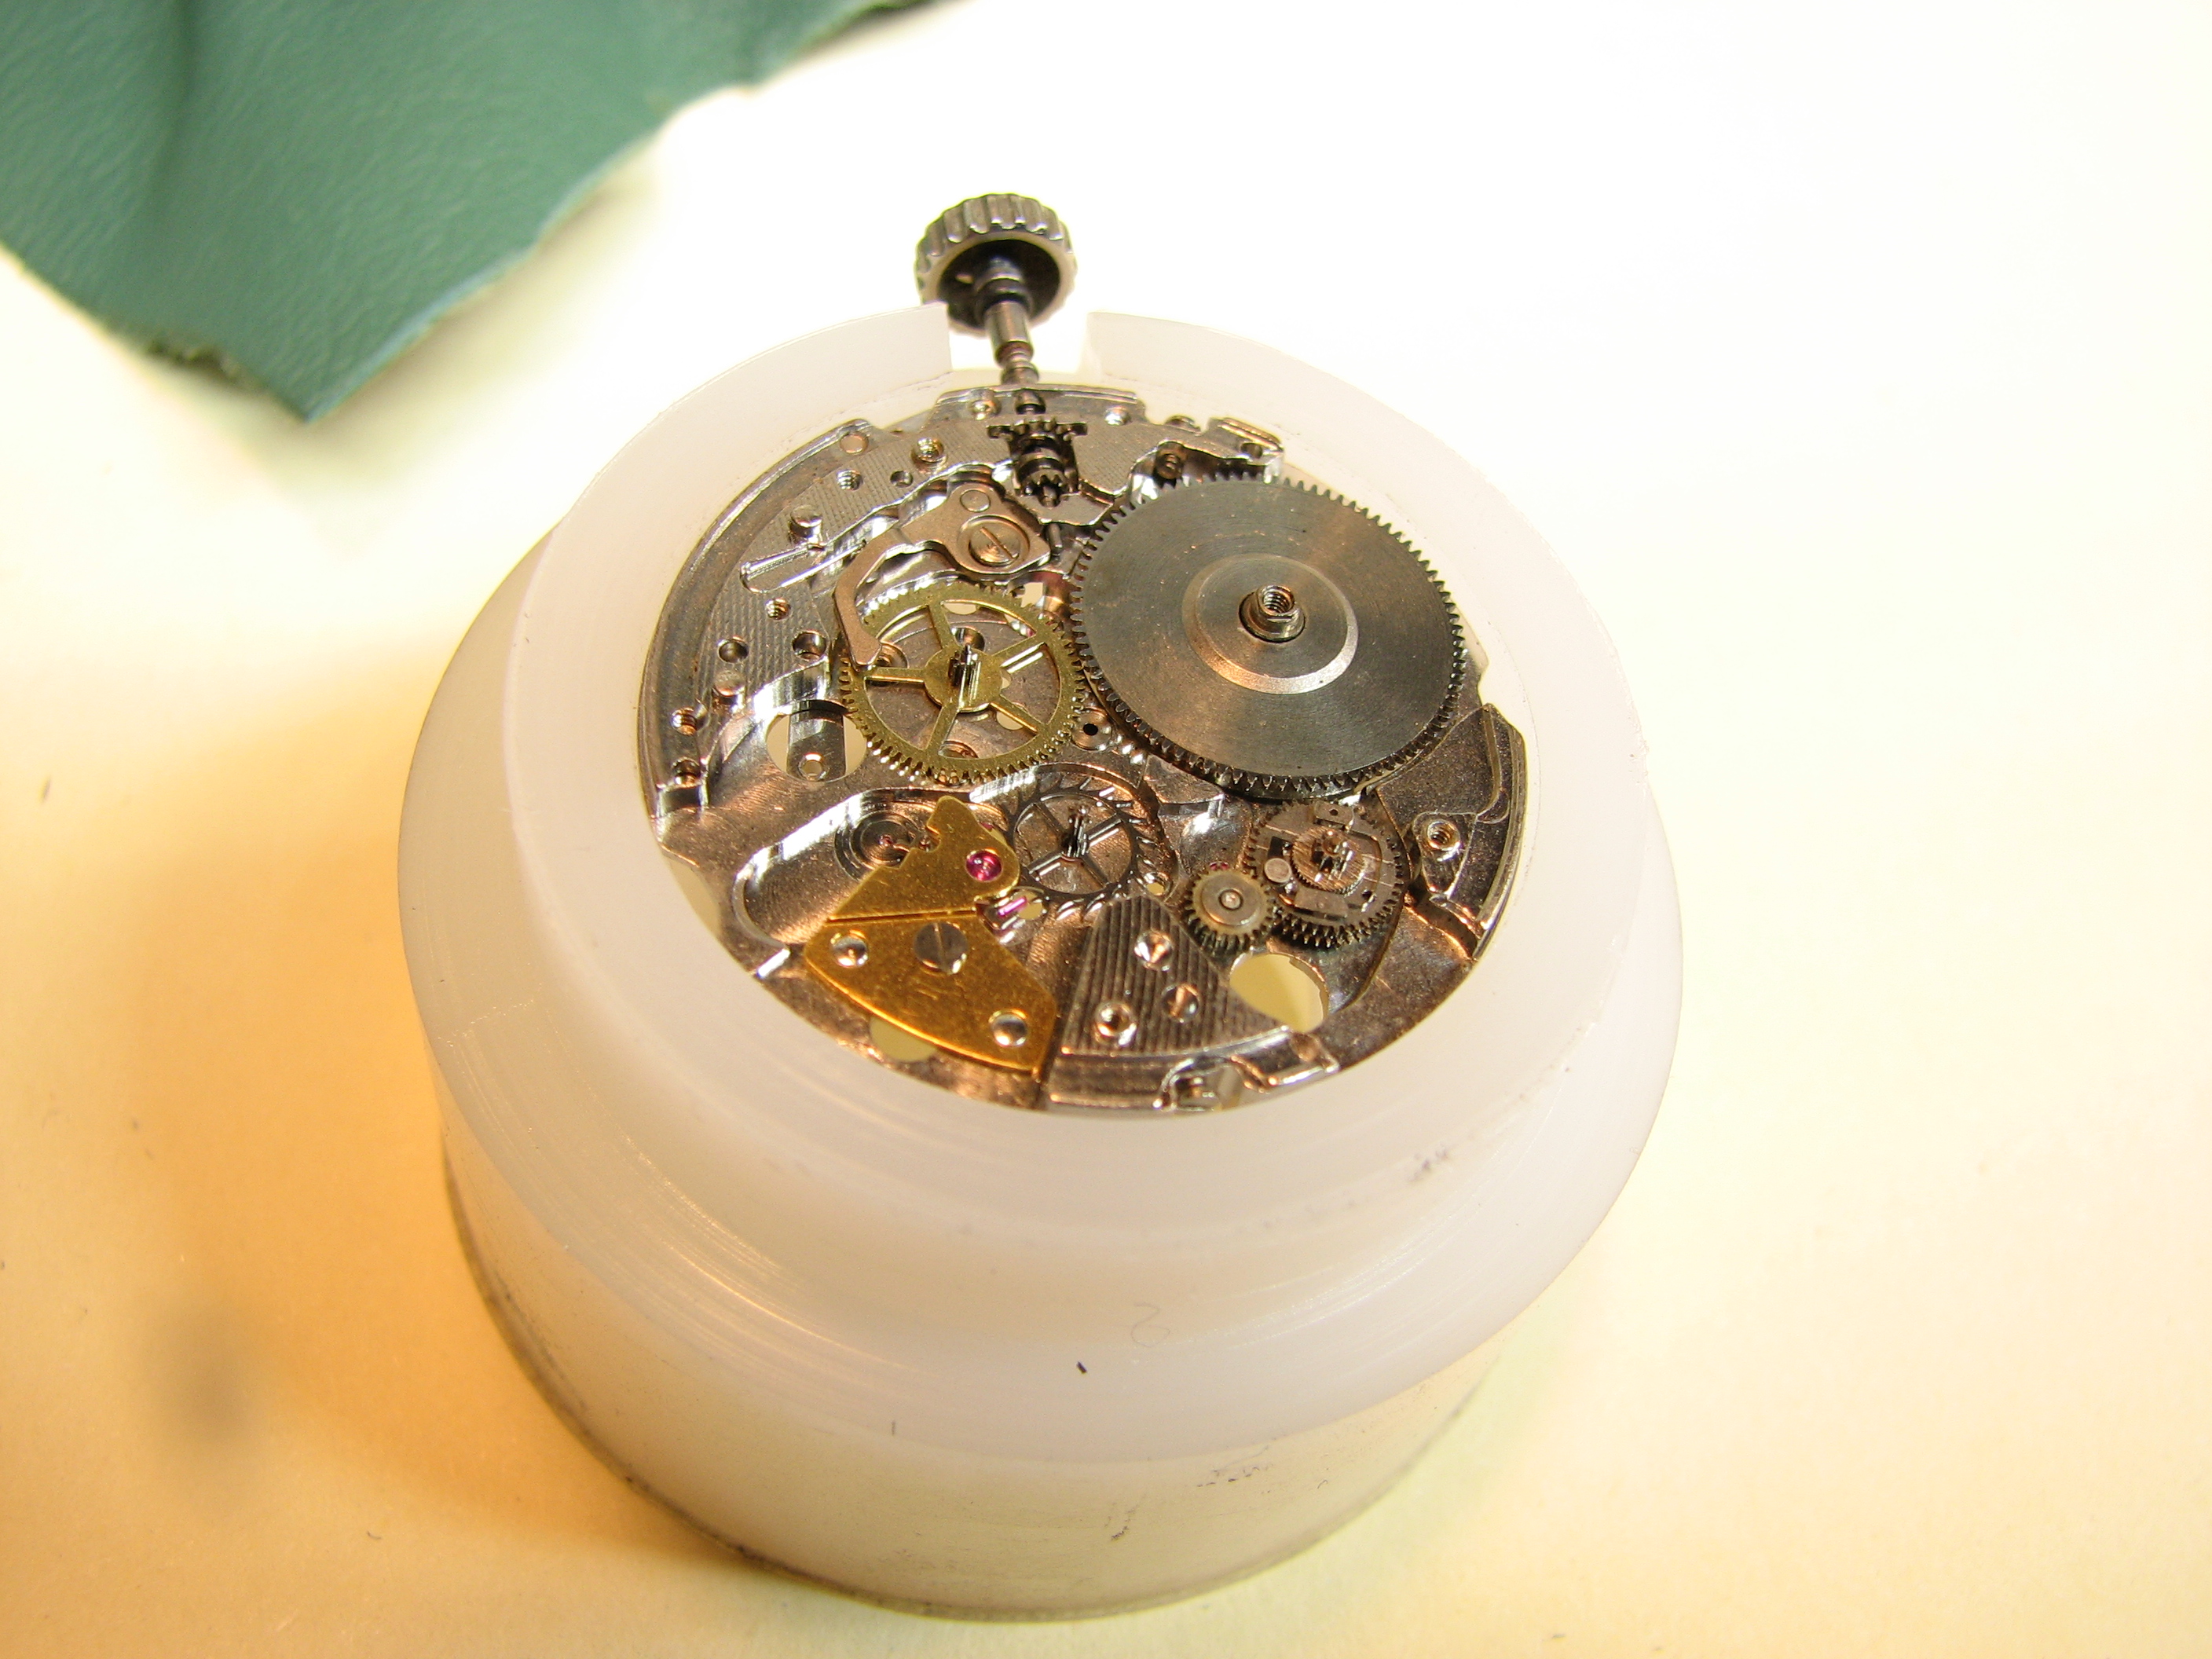
The next step is disassembly of the day/date mechanism and the dial train.


Then the movement gets flipped around for disassembly of the auto-winder rotor (already removed), regulator and main train.


With disassembly of the movement completed and all internal parts soaking, I turned my attention to correcting the external damage. I turned a holder for the bezel so that it could be held in the lathe for machining away the damage and for polishing.

Seiko polishes the cases of their Grand and King models using a method that they refer to as "Zaratzu". This is, effectively, machine lapping of each individual surface of the case, ensuring that all flats remain so, and all edges are sharp. I do not have this polishing equipment but I do have a pretty steady hand, and files, which were needed to get the case ready for polishing because of the depth of the scratches. The actual polishing was also done by hand, using wood blocks and multiple lapping compounds, in order to maintain the flats and edges. No buffing wheels are used.

Everything cleaned and ready for reassembly, once the NOS crystal arrives.

Reassembly begins with lubing and installing the mainspring, using a shop-made mainspring winding tool.


Then the mainspring barrel and main train, along with the under-bridge portions of the auto-winder are installed, followed by the main bridge and pallet assembly. Each of the jewel bearings is lubed as assembly commences. Note the polished bevels of the bridge, the screw holes and the jewel recesses.


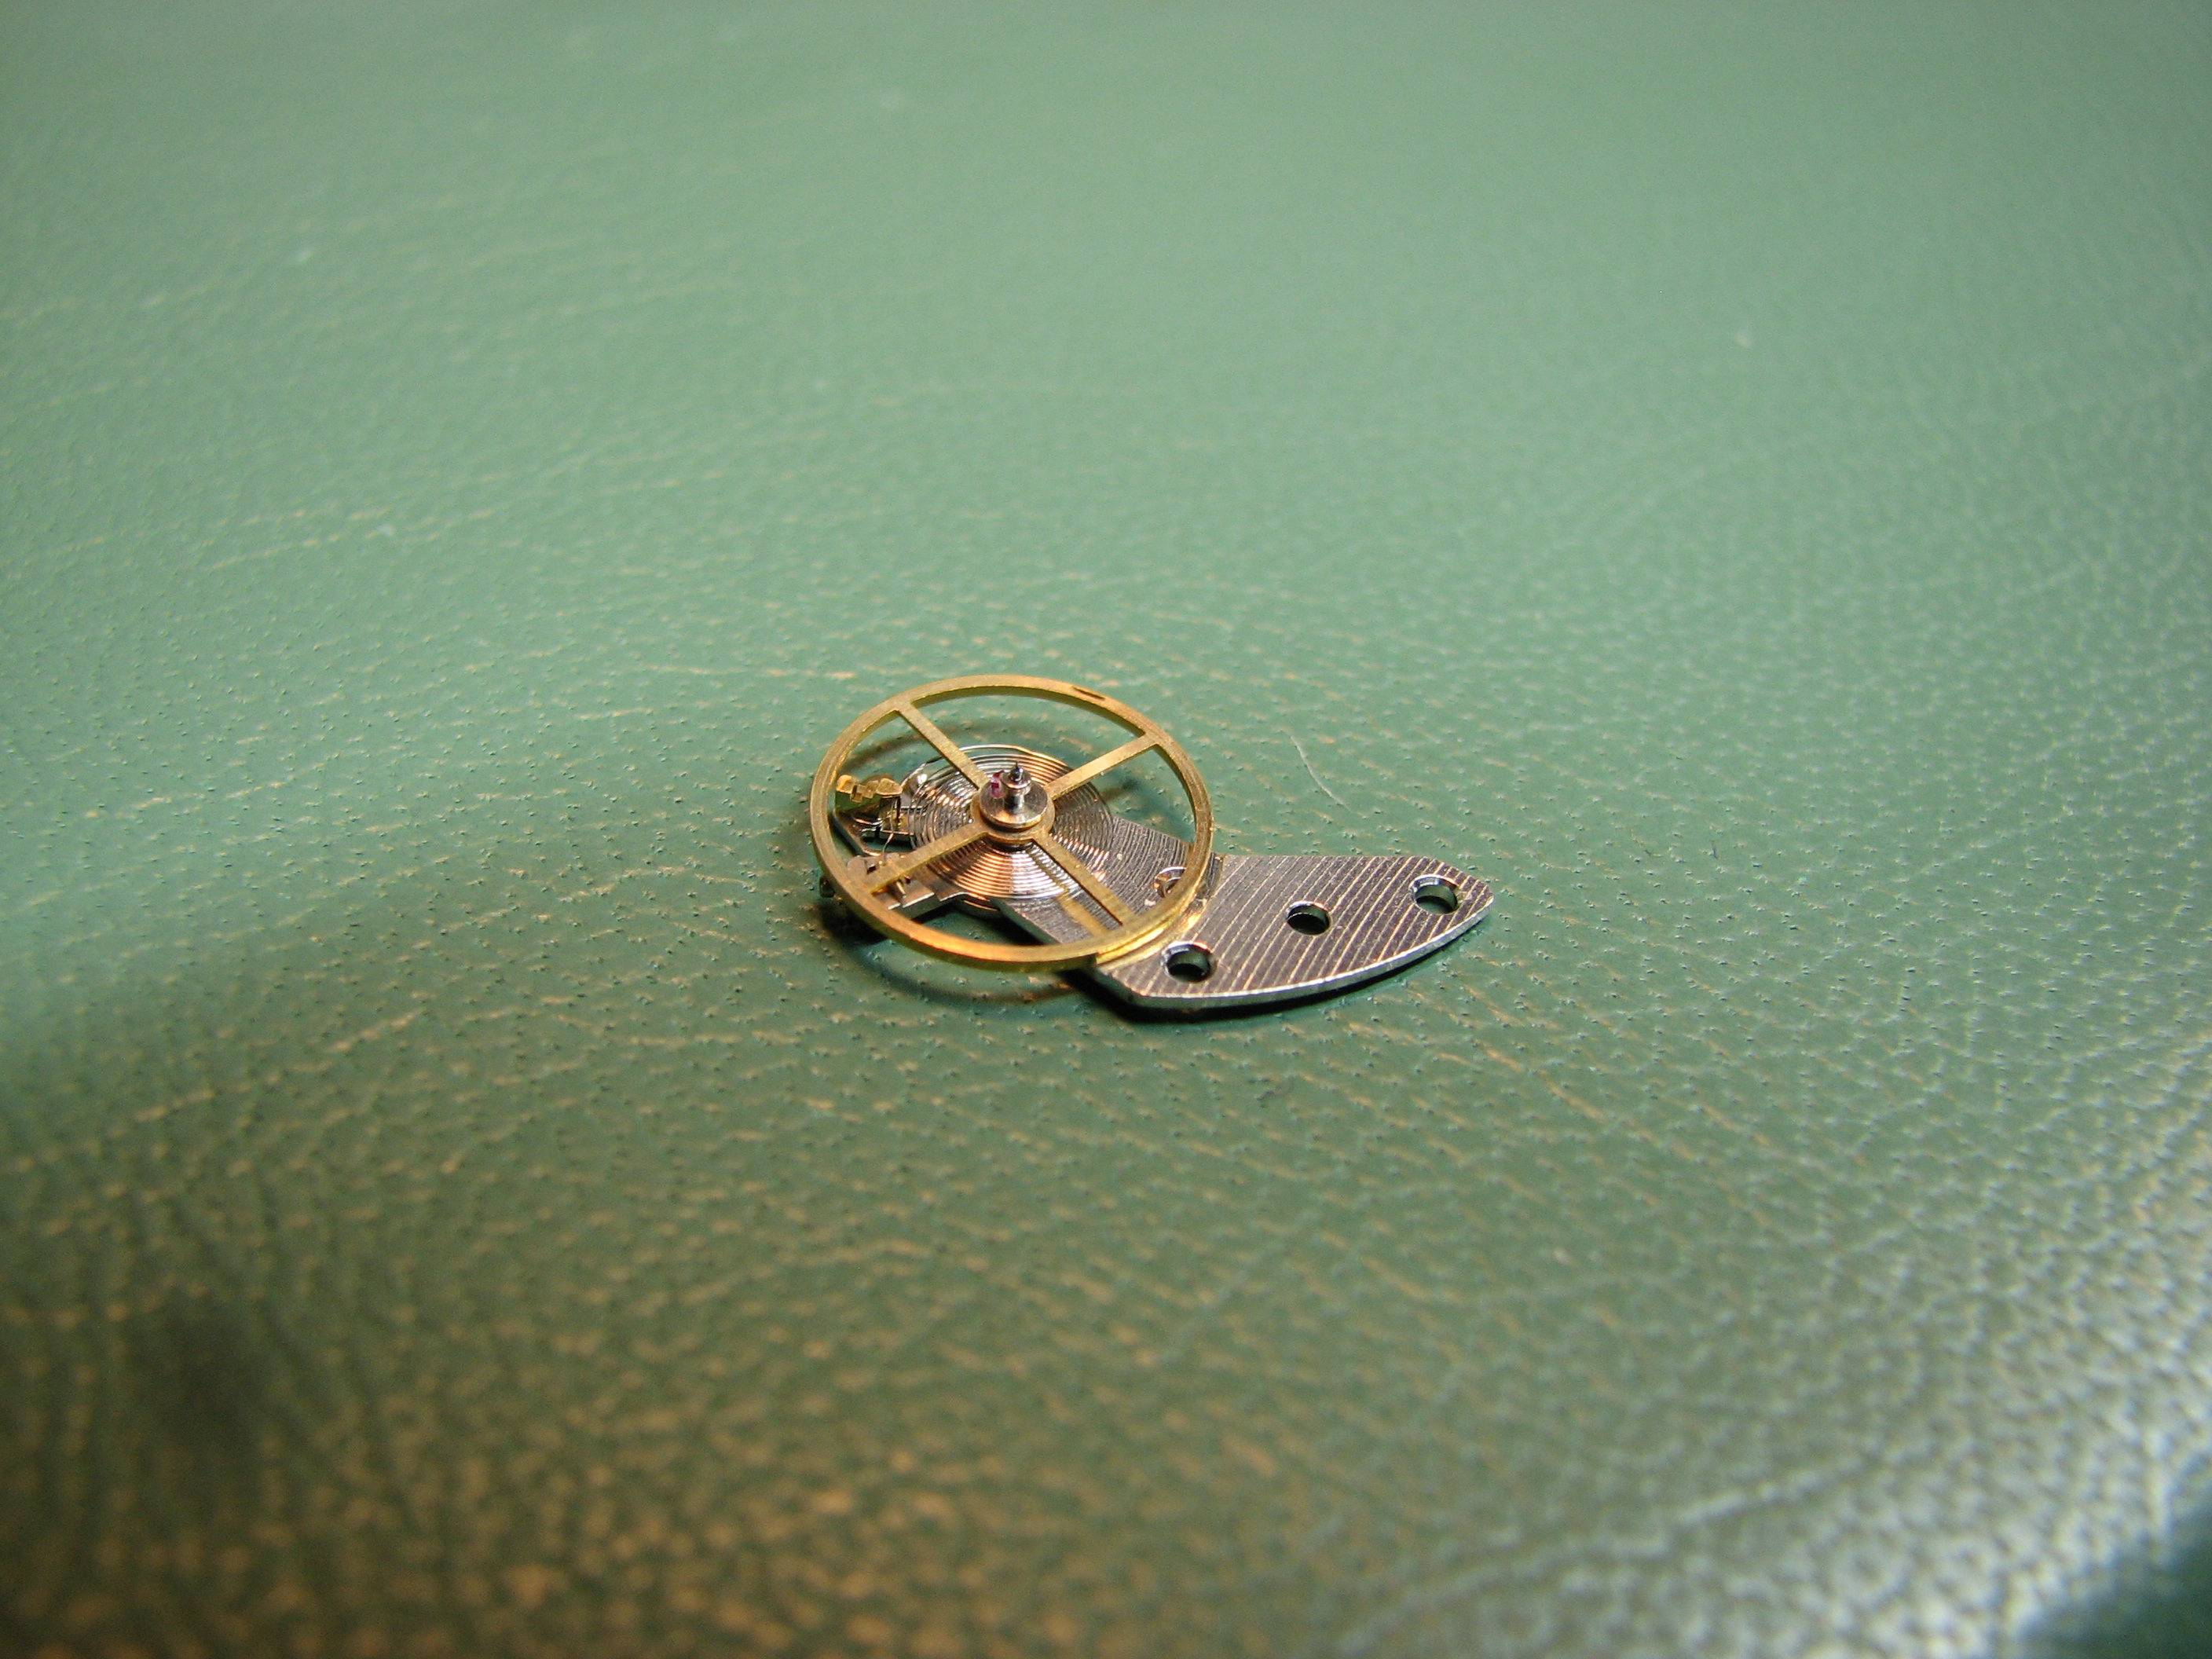
Next is the installation of the regulator assembly (regulator, balance wheel and hairspring) Note the machined notch on the underside of the balance wheel. This is used for "poising" (balancing) the wheel by removing weight from the "heavy" side. That notch is .004 of an inch wide.

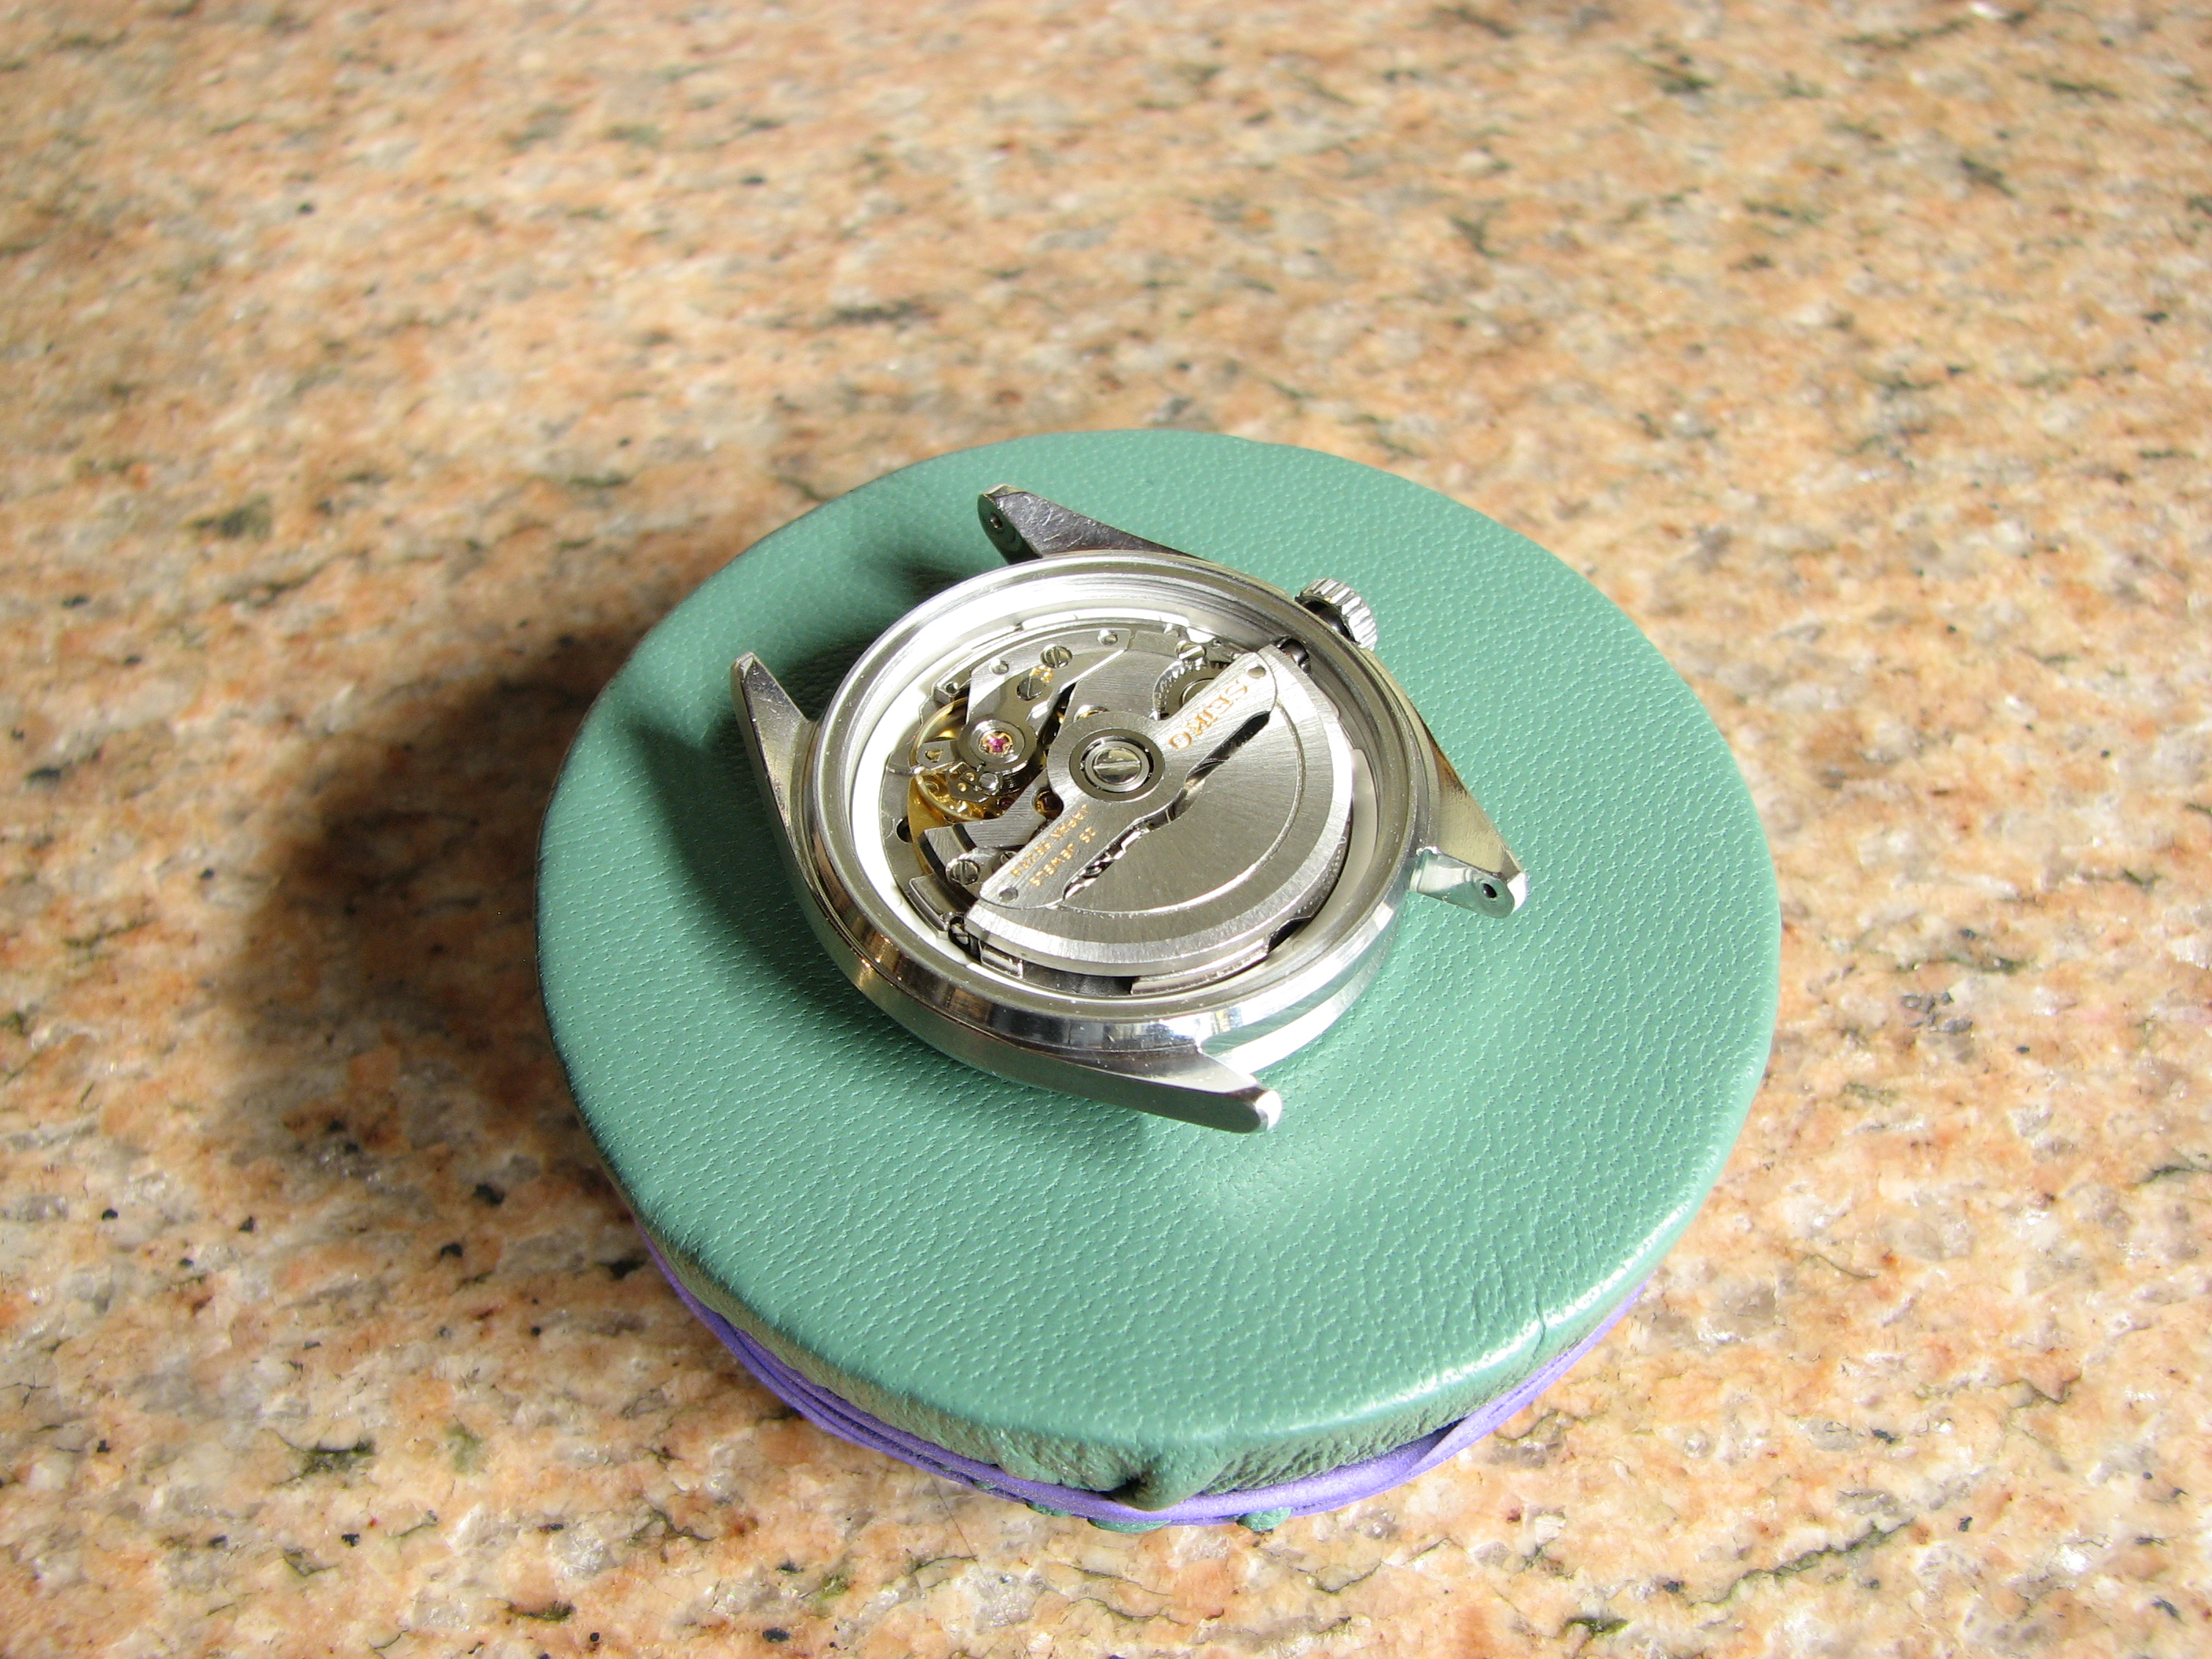
A couple of turns of the crown and, it runs. Now the auto-winder rotor is installed after its bearing and the gear teeth (on the back side) are lubed.


Now on to the dial side of the movement. I did deviate from "factory correct" by bluing the sweep second hand.


The broken crystal is removed from the rehaut and all traces of the original glue are carefully removed in preparation for the installation of the new crystal.


The shop-made case support and pusher used to snap the bezel (which retains the crystal assembly) into place on the case. They are made from Lexan and the pusher's contact area is highly polished to ensure no chance of marring anything.

The movement is reinstalled into the case. All that's left is to install the rear spacer and back cover (with a new gasket).
It's finished. Compare this to the photos at the beginning.


Now that that mental health break is over, it's back to the salt mines.
For more watch related work, see: vicknairwatchrestoration.blogspot.com
Sunday, February 19, 2023
Yet More Parallels
All of this directly applies to gunmaking (or it should). Maybe I should forget about guns and become a full-time watchmaker...
https://watchesbysjx.com/2019/09/editorial-movement-finishing-instagram-age.html
Tuesday, February 14, 2023
Interesting Parallels
I found this a while ago and couldn't help but be struck by the similarities between the worlds of watch collecting and gun collecting, as well as watchmaking and gunmaking (real gunmaking, not the half-assery that's most commonly seen), for that matter. In fact, one could almost simply replace the words "watchmaker" with "gunmaker" and it would be just as valid, except for the final paragraph.
The big difference of course is that, in the watch world, independent makers have little trouble either finding buyers or actually getting paid for their time. This is unsurprising but I won't get into any theories on that situation.
Anyway, here's the link:
https://watchesbysjx.com/2017/01/editorial-the-myth-and-importance-of-hand-made-watches.html
Wednesday, April 20, 2022
Replacing a Claw-Mounted Scope
Here we have a Steyr-Mannlicher sporting rifle in 8x60S. Its original Köhler Pecar 6x59 (6 power, 59mm objective) scope had suffered damage that was beyond repair. The owner did not want to shoot the rifle without a scope and he did not want to mount a modern scope in custom-made rings because that would have compromised the vintage flavor of the rifle. Being the intrepid sort, he actually found another scope of the same type on, believe it or not, Ebay. The replacement scope was intact, with good undamaged glass but it was more than a bit lacking in the looks department, as well as being quite dirty internally (scopes of this type are neither sealed nor charged with inert gas). It also had claw-mounts for a completely different rifle attached. This would necessitate removing the mounts from both scopes and placing the "new" scope in the old mounts. These scopes are built with steel main tubes and the mounts are soft-soldered in place so, since it would be entirely disassembled for the mount swap and cleaning anyway, the decision was made to completely refinish the scope as well.
After complete disassembly of the replacement scope, some damage to the main tube was discovered in the bearing area of the eyepiece, where it rotates to focus the reticle. It seems that someone had at one time removed the lock screw and replaced it without aligning it in its retaining groove, causing a spiral dent in the main tube. This interfered with the fore and aft movement of the erector lens tube and would have to be repaired, using a custom turned mandrel and a small (and very highly polished) ballpeen hammer.

After removing the mounts from the replacement scope body (along with all traces of solder) and draw filing the pitting that was present, it was time to put the new tube into the original mounts.

Attaching the mounts is no different than reattaching the ribs on a set of barrels. The tube is tinned in the area of the mounts, as are the "saddle" portion of the mounts. The reticle is temporarily reinstalled so as to be able to level the scope, the mounts are locked into their bases on the rifle, and then the scope tube is slid into the mounts. Measurements were taken from the original assembly before disassembly, so that the eye relief would be correct. The assembly was then soldered together. Since the entire reticle assembly is metal (brass with steel "sidewires" and "post"), there was no danger to them from the heat of soldering.


With the tube repairs and mounting complete, preparation for refinishing could begin. While the tube/mount assembly are steel, and would be rust-blued, the eye piece and elevation adjuster wheel assembly are aluminum and would require a different finish method. These parts were originally finished with a finely textured paint, the remains of which was removed with lacquer thinner. The closest modern equivalent that I came up with is black wrinkle paint. This wrinkles very tightly with the application of heat and while not exactly as original, it would look good and it is very tough. After stripping the original paint from the aluminum parts, they were lightly glass blasted to give the surfaces a uniform base for the paint.

After bead blasting, the interior surfaces were masked in the threaded areas in preparation for internal painting. All of the interior surfaces are finished in black so as to prevent any internal glare or reflections in the sight picture.


After the internal painting was finished, the external surfaces were wrinkle painted. Here is the eyepiece with the cleaned lenses, spacers and retaining ring. The retaining rings are made of brass and were polished bright. This isn't as original but the owner likes the look of it and I concur.

After the wrinkle paint is fully hardened, I recut the markings, using a graver.

With all of the metal finishing done, it was time for reassembly. At this time I also made a nylon thrust bearing for the eyepiece that eliminated metal-to-metal contact between the eyepiece and and the shoulder on the tube. This wasn't strictly necessary but it does result in much smoother movement of the eyepiece while focusing the reticle.


Subscribe to:
Posts (Atom)