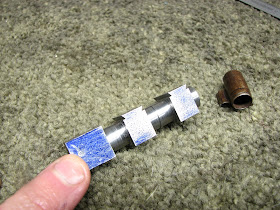
If I had a dime for every time I heard that phrase, I probably wouldn't be writing this blog. It's most often used in response to hearing the cost of making (and fitting, heat-treating, finishing and possibly engraving) a small, seemingly simple, part or screw. I understand that gunmaking is probably a bit too esoteric to be appreciated by many, which is one reason why there are those that balk at the cost of properly done work. To the average person, a screw is a screw, so they don't understand why the local hardware store sells them for twenty nine cents while a screw for a gun could cost a thousand times (literally) as much.
Let's take as an example the breech screw from a Parker, that most iconic of American doubles. This is a 12-27 (#12 diameter and 27 threads per inch) screw with an unthreaded shank and a "flat head". Seems simple enough, right? Let's take a closer look at that screw then, shall we? To start, the threads are not the typical 60 degree "V" form, but 55 degrees with rounded root and crest. Now, the local hardware store is definitely not going to have a threading die for this, which means that the threads must be cut on a lathe, using a cutting tool specifically profiled for that job. That seemingly flat head isn't really flat either, is it? No, it follows the contours of the top strap, which means that the new screw head must be shaped in situ, which further means that, in order to have the necessary access, the entire toplever works must be disassembled and the frame put back into the stock, so that the screw head can be shaped. This must be done absolutely flush and without harming the surrounding finish. Sounds easy, right? This is after cutting the slot so that it aligns correctly when properly torqued. Then the head of the screw is engraved in the correct factory pattern, by hand, and then heat-treated and finished. Depending upon the condition of the gun, the screw must then be artificially "aged" in order to blend with its surroundings and look original, because no repair should be readily discernible, ever. Finally the toplever work is reassembled, along with the rest of the gun. For most other doubles, also figure on the added time for making the tapered shank. A couple of hundred bucks doesn't sound so out of line now, does it?
"Hold on there a minute." you say. "A couple of hundred bucks for a screw?", you ask. The truthful answer is that the screw (or part, or entire gun) is free, what you are paying for is my time, knowledge, attention-to-detail and ability, and, as the old adage goes, you get what you pay for. Keep that in mind when someone says they can do it "fer cheep".
The fact of the matter is that, when it comes to one-off work, economy-of-scale simply does not apply. A part that was originally made on a screw machine by the thousands is going to be much more costly to duplicate by hand. Comparing the cost of one to the other is simply nonsensical.


